| |
|
4/29/2004 - Ribs -1 hour
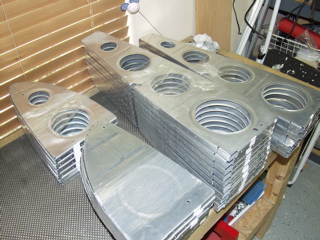
There are lots of ribs. They all have to be prepared, so I began setting up a makeshift assembly line so I can get them all done at once. |
 |
| |
|
5/1/2004 - Deburring - 4 hours
Deburring is a painfully boring task which can be slow and difficult if you don't have the right tools. I have tried several tools, and have heard of others which I don't own which may be good too. Here are the tools I am using: a pneumatic grinder with a Scotchbrite wheel, a yellow handled deburring tool, a hobby sanding stick, a Dremel tool with a small piece of a Scotchbrite wheel in the chuck, and a Scotchbrite pad. |
 |
| |
|
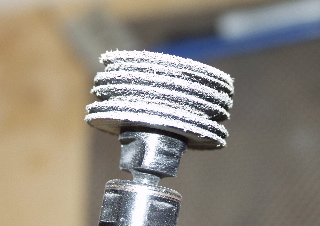
| The only problem with using the Scotchbrite wheel on the edges of the ribs is that the edge is like a knife and cuts grooves into the wheel. |
 |
| |
|
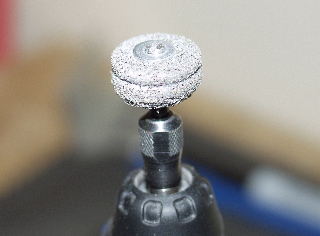
| I found a small piece of a Scotchbrite wheel. I used the mandrel from an old sanding wheel to mount the small Scotchbrite wheel into the Dremel tool. this turned out to be great for deburring small areas. |
 |
| |
|
| Areas like inner edges like these... |
 |
| |
|
| ...and the spaces in the corners like these. |
 |
| |
|
5/2/2004 - Deburring - 2.5 hours
The stack of ribs is growing... |
 |
| |
|
5/3/2004 - Deburring/Fluting - 3 hours
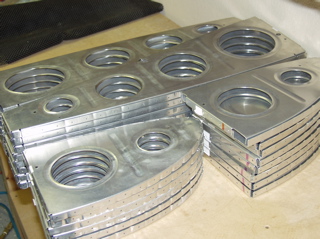
I finished the deburring of all the ribs (finally) and then I worked on fluting the flanges so the holes are in alignment. You can see from this picture that the ribs are all sitting nice and flat compared to the picture above where they are all bent out of shape. That's what fluting does. Using some special pliers, a "dent" or "flute" is put in the flange of the part which shrinks the length slightly. By doing this in several places along the edge of the part I was able to straighten them acceptably. There may be some small adjustments which will need to be made when I install them, but we'll cross that bridge when we come to it, won't we?!! |
 |
| |
|
5/4/2004 - Cleaning - 2 hours
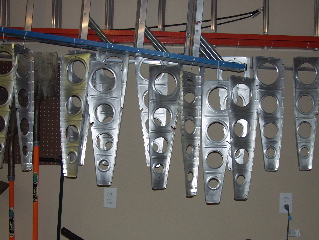
I have decided to prepare the wing parts with Alumaprep/Alodine prior to priming. Although technically the self-etching primer I am using doesn't need this step, I found in the Empennage that I was doing much of the same work with a scotchbrite pad anyways, so it really isn't any more work. My understanding is that this should make the primer adhere more effectively. |
 |
| |
|
5/5/2004 - More Cleaning - 4 hours
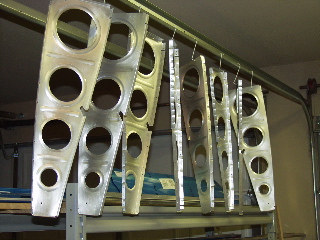
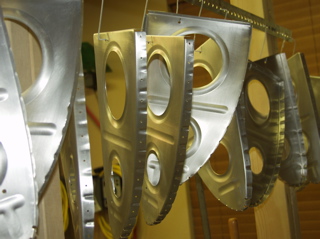
I completed cleaning the main ribs. There are 30 in all. They are all hanging up to dry. I still have 14 nose ribs to do. I separated the tank ribs so I don't accidentally do primer on those. |
 |
| |
|
I got a package from Van's today with some important parts.
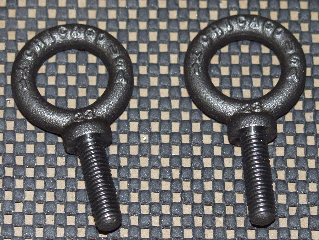
First, I got a pair of tiedown rings. These are installed on the underside of the wings. |
 |
| |
|
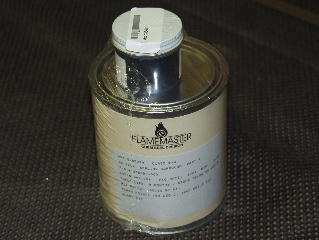
| Next, I got the tank sealant. It says it has a nine month shelf life, so I better hurry! |
 |
| |
|
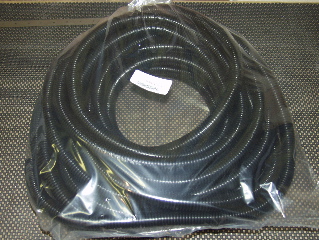
Finally, I got a big bag-o-conduit. This will be run through holes in the main ribs so that I can eventually run wires for the lights in the wingtips. I got 50 feet just in case.
I think this stuff needs a 5/8" hole, but I am going to check first before I go drilling a bunch of holes. |
 |
| |
|
5/6/2004 - Conduit Holes - 1.5 hours
I called Van's this morning to ask about the best place to put the conduit. The instructions say that it is possible to enlarge the tooling holes, but I was uncomfortable with that vague answer. Bruce at Van's told me that there is an FAQ on their website which explains the procedure.
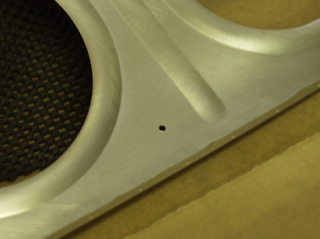
I chose to put the hole in the recommended position on the lower part of the main ribs, so I started by drilling a pilot hole in the first rib. |
 |
| |
|
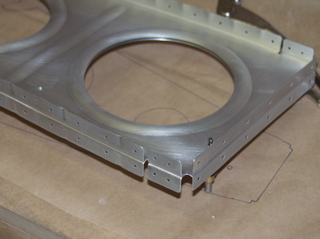
For every right-handed rib, there is also a left-handed rib. So, I simply found a left-handed rib to match the one I just drilled, and I clecoed them together. Then, I simply match-drilled the hole. In this way I knew that the position was identical. Next, I proceeded to match-drill all the other ribs.
There are three different types of ribs. The difference is in their length primarily, so since they couldn't be clecoed to the other ribs, I had to carefully match other holes to make sure everything was lined up. |
 |
| |
|
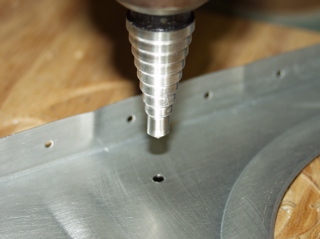
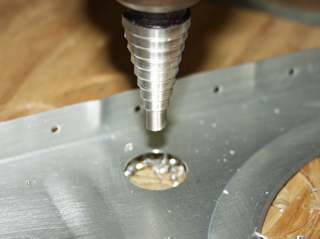
| Next, I used a Unibit in my drill press to enlarge these holes to 3/4". This is the diameter of the indented areas of the conduit, meaning that the conduit, when installed, won't slide back and forth through the holes. |
 |
| |
|
| This is what the holes look like when they are drilled to the 3/4" size. |
 |
| |
|
5/6/04 - Cleaning - 3 hours
After several more hours of quality time with a Scotchbrite pad, I finally completed the task of cleaning all of the ribs, as well as the rear spar parts. |
 |
| |
|
5/7/04 - Priming - 6 hours
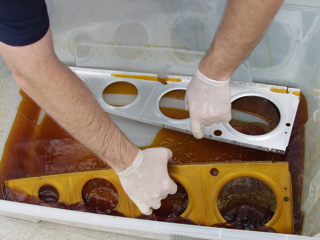
I found a storage container at the Dollar Store that was a pretty good size for working with the main ribs. I poured the Alodine into the container so that I could fully submerge the ribs in the chemicals. It sure beats brushing the chemical onto the parts!
At first they came out really bronze looking, but they got lighter and lighter as the day went, so I am wondering if the process alters the Alodine in some way. |
 |
| |
|
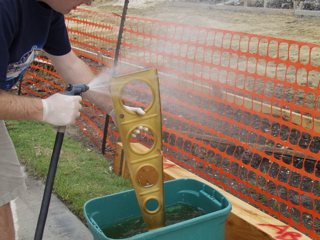
After soaking in the Alodine for about two minutes, I would remove the part and spray it with the water hose, letting the residue drip into yet another storage bucket. Finally I hung the part up to dry.
This process was repeated 50 times or so until all of the main ribs and nose ribs (except for the tank ribs) were complete.
|
 |
| |
|
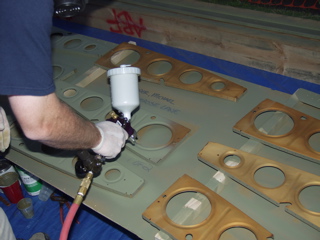
By the time the the Texas wind had died down for the evening it was already getting pretty dark, but I went ahead and started priming.
Priming with a spray gun is much different than with the rattle cans, and it has taken me a little while to get used to it. Fortunately this isn't the outside of the plane. It does reinforce my opinion that I should have a professional do the painting of the plane when the time comes. |
 |
| |
|
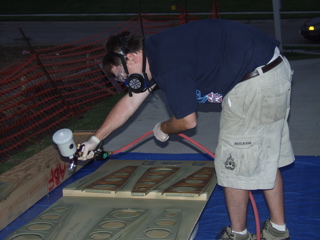
One thing I realized was that I had the gun set way too "rich," meaning that I was spraying too much liquid onto the parts. I went through my supply of primer and I still had a bunch of ribs to do.
When I went to the paint store to buy more primer, the guy smiled and said that I was using way too much, and that it should last me a long time if I would adjust my gun to spray less of the primer on the parts. |
 |
| |
|
5/9/2004 - Priming - 2 hours
I practiced with the spray gun filled with MEK until I figured out how to adjust the "mixture." The rest of the ribs went smoothly, and I didn't use near as much primer. I also had much less overspray, which is where most of my primer probably went anyways.
So, now I have a mess of primed ribs. This is all of the ribs that will need primer. The tank ribs are not primed to avoid any unusual chemical reactions with the fuel.
It is time to move on to some assembly! Yipee. I feel like I've been working with chemicals and primer for a week...wait, it has been a week! I guess that's what I get for doing all the ribs at once. It probably saved me some time in the long run, but it sure got to be awful monotonous.
At least I can be confident in the assumption that the ribs on this plane will not corrode in my lifetime. |
 |
| |
|
| Next: Assembly |
|
| |
|

