| |
|
6/8/04 - Misc. - 3 hours
I riveted the platenuts to the T-408s. I couldn't do these last night because my countersinks were not deep enough. Today I deepened the countersinks and then squeezed the rivets with the pneumatic rivet squeezer.
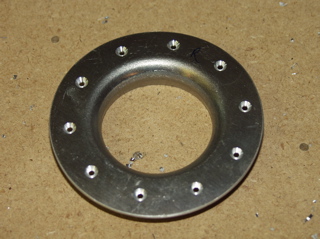
Next, I drilled the filler cap flanges. It is a bit strange trying to line up the bend in the flange with the shape of the skin. Once I got it lined up I marked the flange and the skin with a marker so I could return it to that position later. |
 |
| |
|
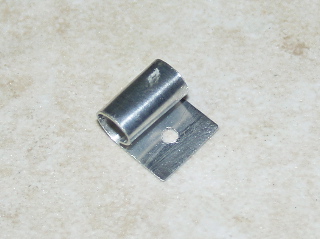
| I had to fabricate two little clips. These are made with .020 scrap. I got to working on these before I had to stop and think about what they are for. These little clips are riveted below the fuel filler cap flange to hold the vent line securely next to the filler cap. |
 |
| |
|
| After removing the flange from the skin, I removed the filler cap and stored it for later. Next, I machine countersunk the holes in the flanges to accept the dimples that I am getting ready to put in the skins. |
 |
| |
|
| The drain fitting gets drilled to the skin as well. |
 |
| |
|
6/9/04 - More Misc. - 6 hours
Once again I spent a long time on lots of little items. I removed strips of blue vinyl from the skins so I can properly dimple the rivet holes. I had neglected to make the outboard T-410 doubler plates, so I took care of that.
I also made a bonehead mistake which probably cost me two hours. I misread the instructions where it says that I have to fill the aft tooling hole on the outboard ribs. I didn't see the words aft and outboard, so I spent over an hour manufacturing a bunch of small plates that could be used to seal all the holes. Then, I drilled these plates to several of the inboard tank ribs before I realized the mistake. Now I have about five ribs that have holes on either side of the forward tooling holes. I'm not sure what I will do about these extra holes. Either I will just leave them alone or I will put rivets in them.
Finally, I disassembled the right tank to get ready for dimpling. |
| |
|
6/10/04 - Debur, Dimple - 1 hour
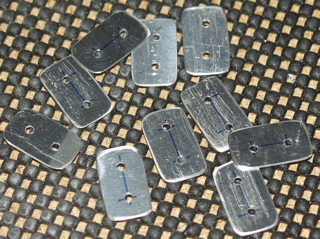
This is for a friend of mine who thinks I don't post enough pictures of my mistakes. So, in the spirit of full disclosure, here is a picture of the ten tiny hole cover plates that I painstakingly fabricated so that I could cover some tooling holes inside the tank that don't need covering. I really don't know what I was thinking. The first mistake was that I didn't have to make them, and the second mistake is that the holes are drilled too close to the center, which made the edge distance wrong (if I actually ever used them, which I won't.) |
 |
| |
|
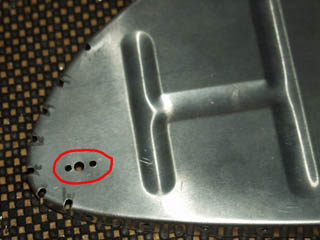
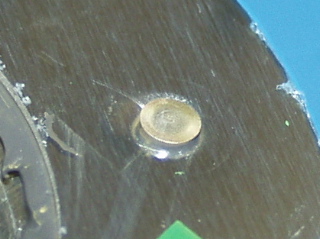
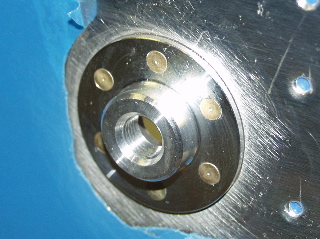
Now, here is the real mistake. These tooling holes don't need to be covered, but in my attempt to mistakenly cover them, I mistakenly drilled the holes on either side to mount my little cover plate which wasn't necessary. You can see in the picture that there are now three holes instead of the one that doesn't need to be covered. Also, notice that the edge distance is too small.
I called Van's and talked to Gus. He said not to worry about these holes, and that I could put rivets in them if I wanted. I think I'll just leave them. there are three ribs in all that have these holes. |
 |
| |
|
Now, back to the project. :-)
I spent some time deburring and dimpling the ribs. |
 |
| |
|
6/12/04 - Debur, Dimple, Scuff - 5 hours
I deburred the holes and edges of the tank skins.
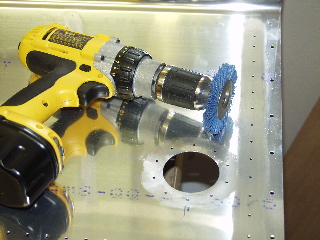
I decided it would be easier to make sure I got all the surface area properly scuffed if I did it before dimpling. That way the dimple is scuffed ahead of time. I did this using a bristle brush chucked in my cordless drill. It worked really well to scuff straight lines across the rivet holes. |
 |
| |
|
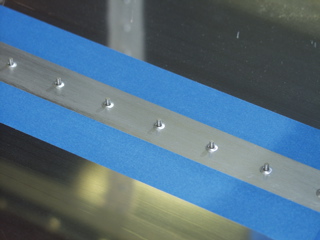
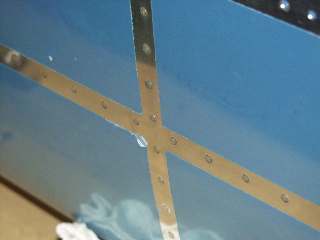
The results looked like this.
I scuffed a bit wider than the width of the rib flanges because I assume the "overflow" of ProSeal needs to stick to something as well.
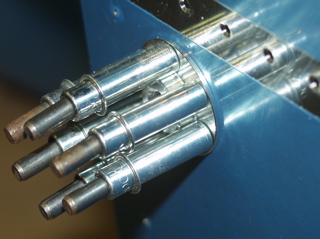
Next came the tiring task of dimpling the rivet holes in the skins. I used my new Tank Dimple Dies and everything went well except that my arm is totally sore from swinging the mallet. |
 |
| |
|
The instructions say to dimple the screw holes on the edges of the tank skins using the c-frame and mallet method, rather than with a squeezer. I guess it forms the dimples more cleanly. So, that's what I did.
It is important to remember not to dimple the row of rivet holes aft of the tank. These attach the baffle, and should already be countersunk. The scary part is that you can't tell that they are countersunk from the inside of the tank, so I had to constantly remind myself not to dimple those holes or it would be a big mess. Fortunately, I didn't dimple any, but if I had it to do again, I would put tape over the holes I didn't want to dimple. |
 |
| |
|
One place that I did accidentally dimple was on one of the holes where the drain attaches. I dimpled one before I could stop myself, and then I had to figure out what to do about it.
The drain, as you may recall, is countersunk on its flange, so the skin needs to be left flat. I fixed the one hole by putting a bit of tape over the hole and with my back-rivet plate underneath, I pounded out the dimple with a few hits from my hammer. It came out acceptably. |
 |
| |
|
6/14/04 - ProSeal - 3 hours
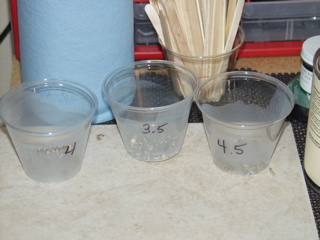
The first thing I did was to clean the rivets as the instructions say. I used MEK. I let them dry and then put them in labeled cups.
I also found a bunch of popsicle sticks that my wife had for craft projects.
I figured out how to measure the ProSeal by volume using a set of metal measuring spoons. |
 |
| |
|
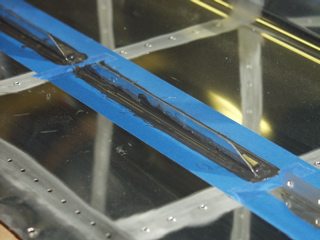
I received a tip from Matthew Brandes (Thanks Matthew) to mask using low adhesion masking tape around the parts to be ProSealed. Then, after letting it set for an hour or so, it is removed, leaving clean lines with no clean-up. It worked like a charm, as you will soon see!
I also took a few moments to do a little more scuffing of the stiffeners. I started wondering if the ProSeal would "stick" to the top of the stiffeners if not adequately scuffed, so I hit them a little more with the scuffing wheel. |
 |
| |
|
 |
 |
| |
|
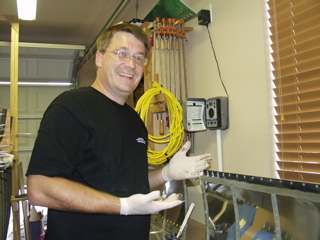
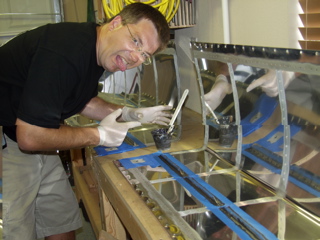
My wife was nice enough to take a few pictures of my first experience with the Black Death.
I was surprised how long it took to do just one set of stiffeners. My batch of ProSeal was just getting stringy as I was finishing the last stiffener. Maybe it was just my inexperience with the stuff that made me go slowly. We'll see.
I used back rivet tape to put the rivets in place before the ProSeal. It also kept ProSeal off of my back riveting plate. |
 |
| |
|
 |
 |
| |
|
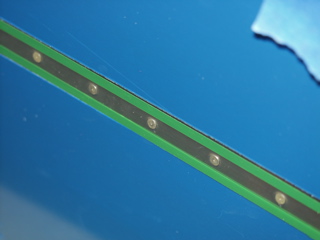
After removing the masking tape you can see that it leaves a nice, clean edge. I was careful to have placed the tape far enough away from the stiffeners so that removing the tape did not affect the fillets of ProSeal. You will, however, notice that there is not much space between the stiffeners I had masked this area because that is where the ribs will go. I am hoping that by overlapping ProSeal onto the ribs and stiffeners I can avoid trouble in these areas as well.
The bad part is that this was only the stiffeners for one tank. Tomorrow I will do the other one. |
 |
| |
|
6/15/04 - ProSeal - 4 hours
Time once again for the sealant. I feel like I'm building a boat. The second set of stiffeners went on a lot faster than the first. I was done in about an hour.
Have you ever watched the X-Files episodes where the space aliens infect their victims through a black oily substance? I wonder...
The fuel cap flanges came next. |
 |
| |
|
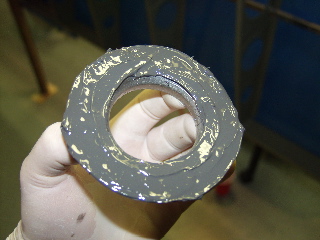
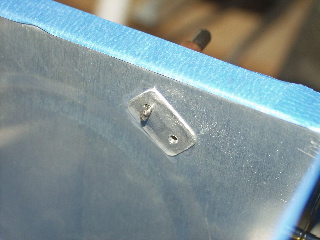
| Here is the fuel cap flange before I back-riveted it. |
 |
| |
|
One of my rivets didn't get properly set. Drilling out one of these rivets is a new experience. It wasn't too bad, and the new one went in straight and flush.
Once everything was sealed, I left everything and went to dinner. |
 |
| |
|
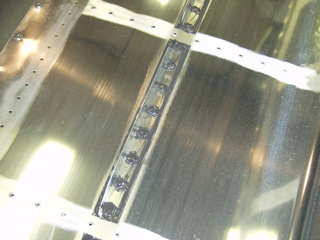
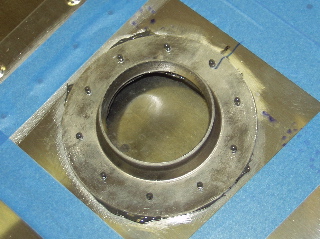
Now, let's play "what's missing?" from this picture.
If you answered "vent clip" then you win. When I returned from my dinner I went out to inspect my work and the first thing I noticed was the absence of the clips. After contemplating what to do, I decided to drill out the rivet that is supposed to hold the clip in place. Since the ProSeal was still sort of gooey, it wasn't difficult, just a bit of a pain. After drilling the rivet, I carefully cleaned the area around the rivet hole.
|
 |
| |
|
 |
 |
| |
|
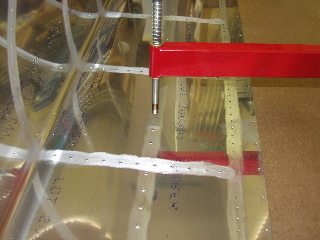
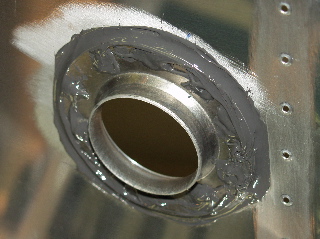
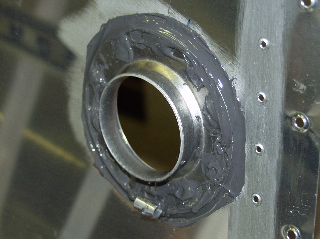
| Since I had to mix up more ProSeal anyways, I went ahead and installed the drains. These were a bit tricky. I used my rivet squeezer with a 4" yoke. I made a mess of one rivet, which I promptly drilled out and replaced. |
 |
| |
|
6/16/04 - ProSeal - 2 hours
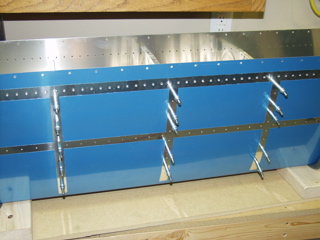
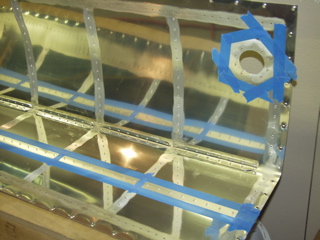
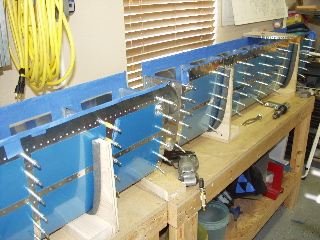
I spent two hours today and didn't do any ProSeal. I put the skins back into the cradles, and then I clecoed all the tank ribs into position.
It is important that some of the critical parts of the skin don't accidentally get residue ProSeal on them, like the areas that need to sit flush with the spar. To make sure this didn't happen, I spent time lining all of these areas with masking tape. |
 |
| |
|
| Next I fabricated the small cover plates that are used to seal the tooling holes on the outboard rib. These will be ProSealed into position soon. |
 |
| |
|
6/17/04 - ProSeal - 3 hours
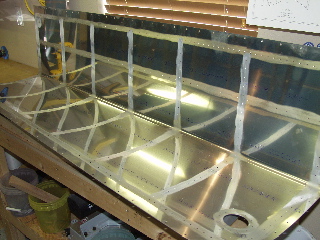
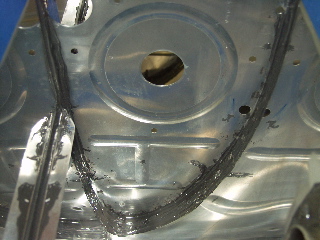
I didn't expect the ribs to take this long, but I worked three hours and got three ribs riveted into position. I may have gone a bit overboard on the amount of ProSeal I used, but I don't want any leaks.
|
 |
| |
|
 |
 |
| |
|
6/19/04 - ProSeal - 6 hours
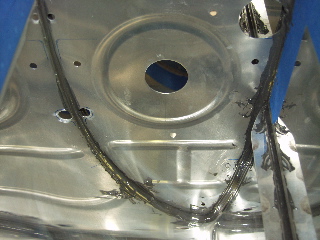
I worked on the inner ribs, getting them all riveted in place and hopefully sealed properly. I am running out of ProSeal. Probably because I am spreading it like icing because I just don't want to have any leaks. I may have to go find a local source for some more before I can seal the baffle.
So now all of the interior ribs are done. I looked at the instructions and all it says about the vent line and the fuel pick up is to make sure they are installed. I need to go study the plans to figure those out before I proceed any further. |
| |
|
| Next: More Tank Sealing |
|
| |
|
