| |
|
| Previous: Center Section |
|
| |
|
10/9/04 - Forward Side Skins- 6 hours
I had to bend the back corner of the F-970 side skins to match the fuselage. It wasn't easy. I ended up doing the right side twice because the first time I didn't put enough arc in the bend. |
 |
| |
|
 |
 |
| |
|
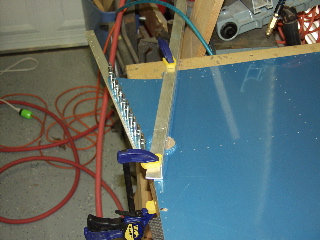
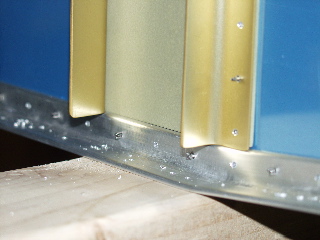
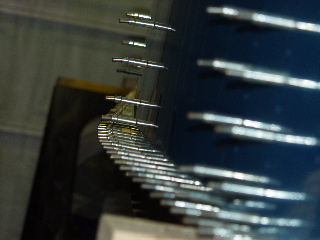
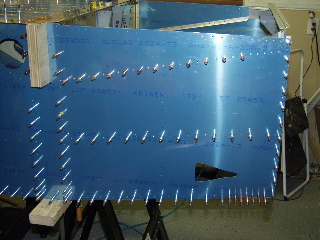
It was time to drill the longeron, so I started from the end of the tailcone and worked my way forward to the front. I started by drilling every fourth hole, and then I went back and drilled every other hole. Finally I drilled the in-between holes to finish it up.
The bends in the longerons turned out better than I expected. You can see why in the pictures below. |
 |
| |
|
 |
 |
| |
|
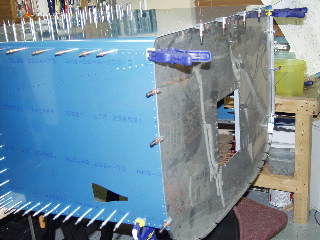
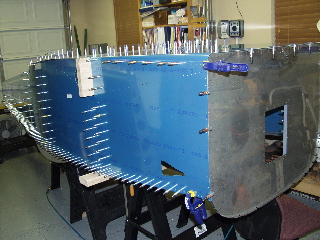
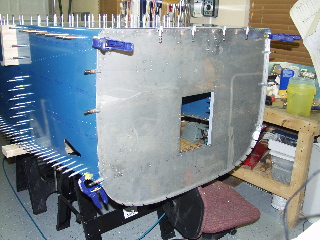
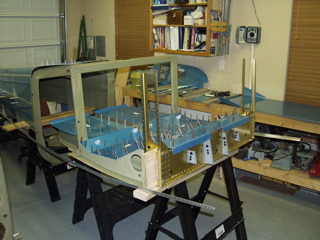
Time to install the firewall. It went on without any problems. I then installed the bottom skin. Cool. Everything lined up just right.
How about a few more pictures?
Tomorrow maybe I'll drill the flanges of the firewall. |
 |
| |
|
 |
 |
| |
|
10/10/04 - Drilled Firewall - 2 hours
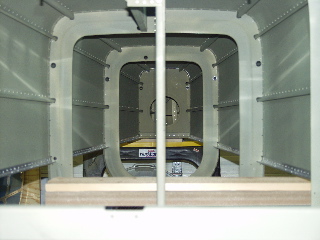
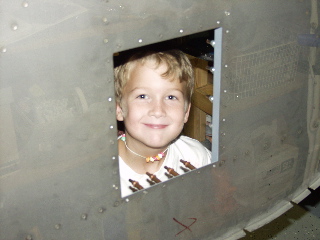
Jonny came out to inspect my work. He especially likes the "window" in the firewall.
I got the firewall drilled to the skins. The only issue I had was that the firewall flanges were not the same length, so I had to measure from the face of the firewall to make sure I had the proper distance from the front of the side skins. |
 |
| |
|
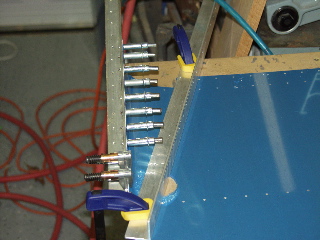
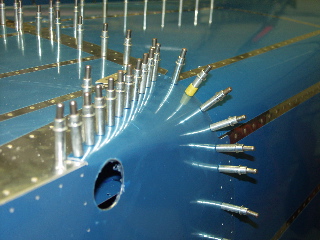
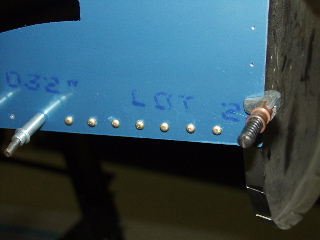
Here you can see the AN470 rivets that hold the skin in alignment while the firewall is drilled. I have since drilled the holes in the longerons.
My friend, Max, came by to act as my tech counselor for the evening and he gave the go-ahead for drilling the holes.
I finally drilled the holes, and everything is secured with clecoes. |
 |
| |
|
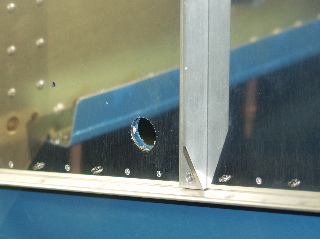
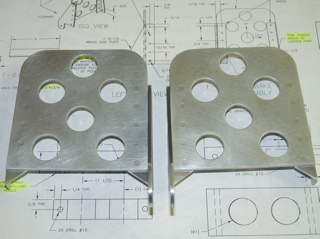
10/11/04 - Reinforcements - 3 hours
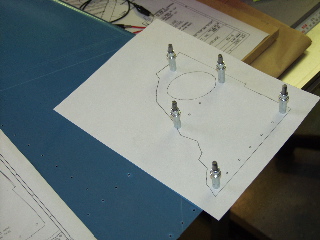
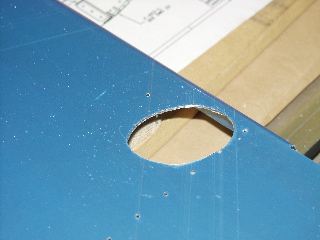
Today I started by tracing the gear hole cutout template on to a piece of paper. I put clecoes through the printed holes. Next, I used an x-acto knife to cut through the paper and the plastic to define the location of the hole.
|
 |
| |
|
I used a hole cutter to cut the center of the hole, then I used my jigsaw to cut around the perimeter.
Finally, I cleaned up the hole with a drum sander in my Dremel tool. I will adjust these holes if I need to.
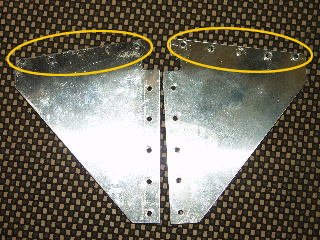
In the next two pictures below, you can see the F713 installed. The F713s are pre-cut, but they must be twisted slightly to fit the contour of the skin. Also, the aft edge needs to be beveled so that it can butt up against the 904 bulkhead flange. |
 |
| |
|
 |
 |
| |
|
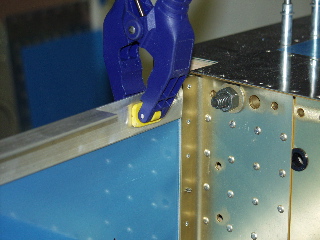
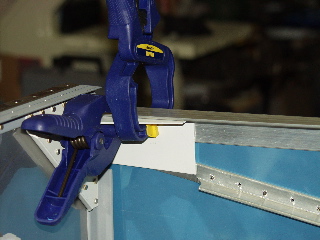
Previously I had fabricated the 904 attach strips. There are four of these that connect the F904 bulkhead to the longerons. I simply clamped these with the edge of the strip at the edge of the flange, and with the top of the strip just below the bend in the longeron. Then I match-drilled from the outside.
Next is a fairly strange connection that took me a while to figure out, and I wish I had done it a bit differently.
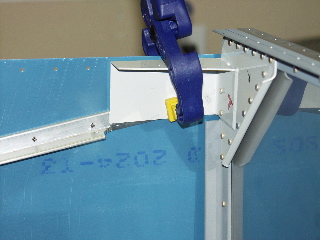
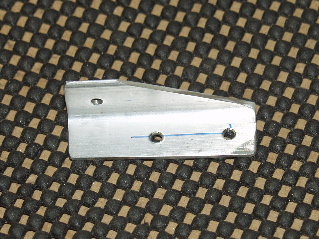
The F919 is attached to the firewall flange using a little bracket that I had to fabricate. |
 |
| |
|
 |
 |
| |
|
| The plans show the dimensions, as well as positions for the holes. I fabricated and drilled the bracket, but later I realized that it would have been better to drill at least one of the holes "in assembly." As it was, I had to peel back the side skins so that I could gain access to the location where the hole needed to be drilled. It turned out fine, but if I had waited, I could have drilled through both the firewall flange and the bracket at one time, saving a little bit of work. |
 |
| |
|
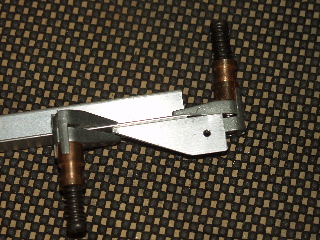
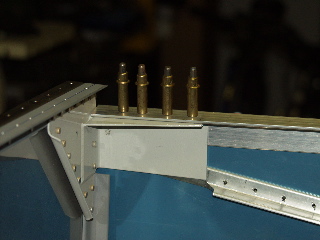
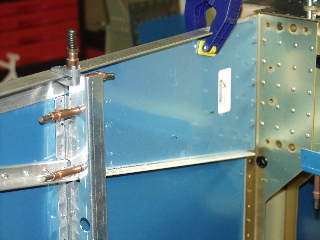
| Here is the way it looks when it is finished. Again, it is a strange setup. It is made even more strange by the fact that I am building it upside-down, and the plans are shown right side up. On more than one occasion I found myself trying to look at the plans with my head tilted. Maybe I should have just hung the plans inverted. Oh well. |
 |
| |
|
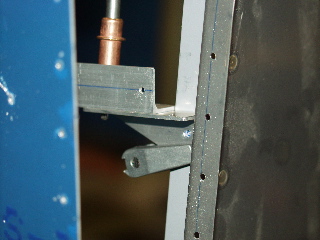
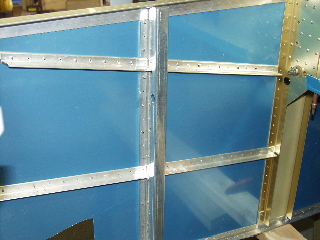
| From the side you can see how much I accomplished today and what I have left to do. Tomorrow I will work on the gussets and braces that attach to the bottom of the firewall (which is on top.) Welcome to topsy-turvy building! |
 |
| |
|
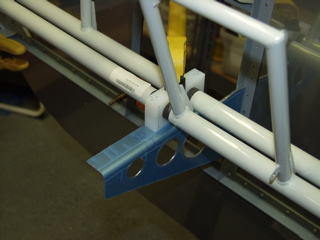
10/12/04 - Misc. Fiddling - 2 hours
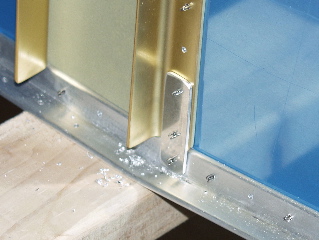
I mostly fiddled with the fit of the F917 lower longerons. These parts are cut from a piece of angle, and one end must have a notch removed (as you can see in the picture.
I cut these and formed the notched end, and then I cut it to length and put the slight bevel on the end to make it butt against the F904 bulkhead. |
 |
| |
|
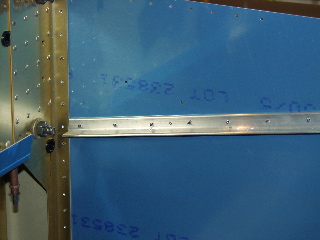
The lower longeron must be twisted slightly to match the angle of the firewall bracket. It took a few tries. but I finally got it at the correct angle, so I clamped it in place.
The plans show a somewhat strange set of distances for the four bolt holes that must be drilled. I measured these out and marked the longeron before drilling. |
 |
| |
|
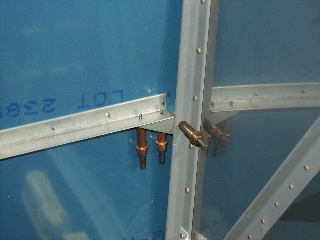
Here are the results. There will be AN3 bolts here eventually.
Next I worked on fitting the F684 gussets. These are thick pieces of aluminum sheet that attach to the firewall flange and the bracket. There is a compound bend I had to make so that the gusset nests correctly. I'll take a picture tomorrow. |
 |
| |
|
10/13/04 - Gussets & Braces - 4 hours
I spent way too long fiddling with these gussets. After installing and drilling them, I realized that I didn't have adequate edge distance from the bottom rivet holes. Ugh. So, I found a sheet of .063 alclad (I hope I don't need it for something else) and I made another set of F684 gussets. |
 |
| |
|
The new ones are much better. I made them about 1/8" taller since I needed to be able to use my predrilled holes.
So what should have been an hour of work was more like two hours.
Next, I fluted and installed and drilled the F902 bulkheads and drilled the holes for the rudder cables. I also fit the F9101s and drilled them to the bulkheads. |
 |
| |
|
 |
 |
| |
|
| The remainder of my time was spent making and remaking the F996c brackets. These are used to support the fuel tank where it attaches to the fuselage. I mis-drilled the first one I made, but these are made out of aluminum angle that I have a bunch of, so I made another one. I made the one for the other side and decided to call it quits. Tomorrow I will attach these to the 9101s. |
 |
| |
|
10/14/04 - f996c brackets - 1 hour
This entry is mercifully devoid of a picture because a) I messed up another 996c bracket and had to fabricate yet another one, and b) tonight was the local EAA chapter meeting, so I only spent a total of about 1 hour working on the project.
Thank you to Matthew Brandes for posting a link to my site today, unfortunately I didn't get much more completed on my project than he did. Maybe tomorrow will be more productive.
|
| |
|
10/15/04 - f996c redux, brake pedals - 4 hours
Here is a picture of the right side of the fuse with the 9101 and the f996c in place.
After messing up the F996c yesterday, I was eager to get these behind me. So I got busy fabricating a new piece for the left side. Unfortunately I duplicated the one for the right side. So I made another one. Finally I had one that worked, so I finished drilling it to the side
Note: there is some confusion about which holes go through the side of the fuselage. Here's the deal: the top and bottom-most holes go clean through the f996c, the 9101, the stiffener, and the outer skin. The large inner holes go clean through the 996c, 9101, 996b, and outer skin. The #40 holes are called "keeper rivets," and only are drilled through the 996c, the 9101, and the 996b. Whew. Glad I got that off my chest. |
 |
| |
|
| Next the plans show holes for fuel and vent lines through this part of the fuselage. There are even pilot holes predrilled in the skins. Unfortunately there is no mention of these in the instructions. I drilled the vent line hole to 3/4", but I had to go to Home Depot Aircraft Supply to get a 1" hole saw to cut the fuel line holes. I'll do these tomorrow. |
 |
| |
|
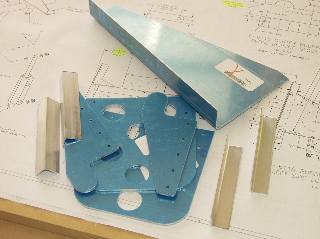
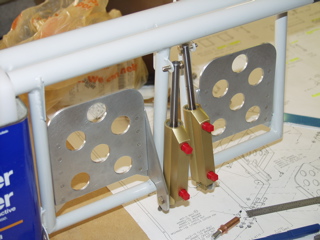
Time for some fun stuff. The brake pedals are built up from a stack of precut parts, as well as a couple of parts that are fabricated from aluminum angle. This is easy and rewarding work and was a fun distraction from the world of twisting longerons and bending gussets.
I am planning to have brakes only on the pilot side of the plane for simplicity, so I only needed to make one set of brake pedals. |
 |
| |
|
First I cut the aluminum angle to length and made the initial angle cuts in them. The precut parts are pretty rough, so I spent a while sanding and deburring the holes and the edges.
Next I match-drilled the angle pieces to the pedal, which already has the holes pre-drilled. The pedal parts are mirror images of each-other, but remember to make a left and a right pedal.
There are some places marked on the plans for lightening the angle. I went ahead and cut the angle pieces as specified. |
 |
| |
|
 |
 |
| |
|
10/16/04 - Pedals, misc. - 6 hours
I bought a 1" hole saw, so I went ahead and drilled the holes for the fuel lines on each side of the fuselage. I'm not sure what I need to do with the 9101 doubler plate on the inside of the fuselage. I went ahead and made this the same size hole, but I've seen where other builders have enlarged these internal holes. |
 |
| |
|
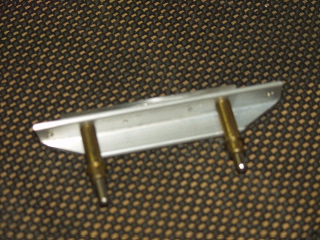
I went ahead and riveted the brake pedals. I am planning to have these either anodized or chromed, so I didn't prime them at all. They look great just with the raw aluminum.
With the pedals done, I went ahead and attached them to the rudder bars. I was momentarily confused by the Right is in Front note on the plans because things just weren't working properly. I finally realized that "front" means "fore" as in reference to the aircraft. After I made that adjustment everything matched up correctly and I was able to drill the holes for the brake master cylinders. |
 |
| |
|
 |
 |
| |
|
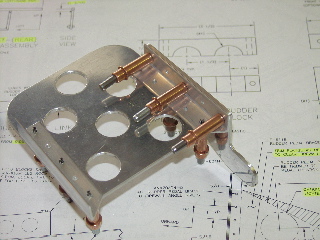
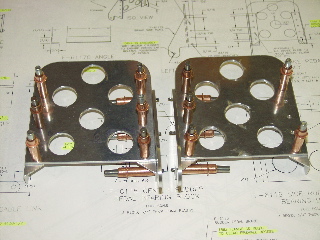
I drilled the bearing blocks to the side stiffeners on the bench instead of in the plane, but I drilled the center support in the plane. I made three positions for the rudder pedals, with the first position being 3" from the firewall and working forward in 1" increments.
|
 |
| |
|
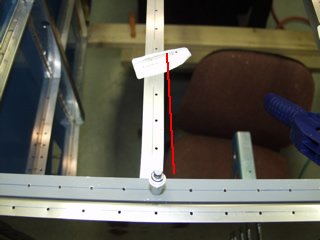
| With the rudder pedals done I attached the lower forward skin and got my son to help me drill the floor stiffeners. I first drew lines on the centers of each stiffener, and then I had Tim sit "inside" the fuselage and hold the parts in place while I drilled from the top. |
 |
| |
|
I thought I had gotten everything drilled great until I pulled the skin off and looked at it. I somehow missed on the leftmost stiffener. I drew a red line to show the angle of the holes. It must have slipped when I started to drill. Yuck!
So, I ordered a replacement from Van's. It should be here before I need it. I will drill the new one on final assembly, which shouldn't cause a problem. |
 |
| |
|
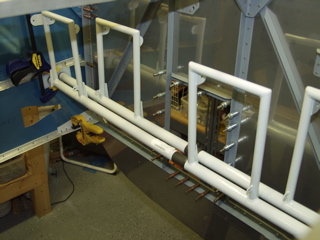
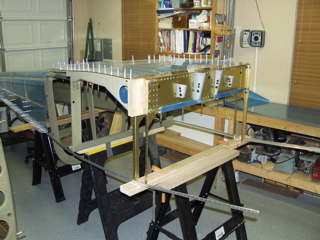
10/17/04 - Baggage Area, Drilling, Disassembly - 5 hours
The baggage bulkhead and stiffeners are the last things to get installed and drilled. There's also a permanent side panel that I installed that I didn't get a picture of.
With everything together I went carefully around the plane and match-drilled all the holes. I had to use the 12" drill bits to get to some of the holes near the wing root. |
 |
| |
|
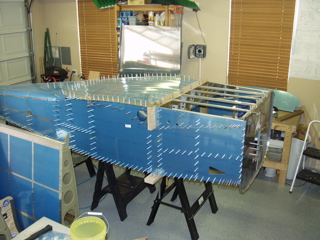
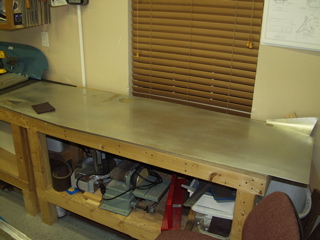
With everything drilled, it's time to take everything apart. Before I started, I spent some time clearing my workbenches so I would have a place to put the parts.
Disassembly was a lot faster than I thought it would be, and before long all I had left was a pile of parts and a lot of clecoes! |
 |
| |
|
The next steps are:
- Remove Blue Plastic
- Debur all holes
- Debur edges
- Machine countersink the longerons
- Prep and prime
- Dimple
- Install nutplates
- Preassemble a few key parts
These steps should take several days. Hopefully by the weekend I can start reassembling and riveting! |
 |
| |
|
10/18/04 - Deburring - 4 hours
I spent the evening removing blue plastic and deburring holes. |
| |
|
10/19/04 - More Deburring - 2 hours
I finished deburring holes and edges of the parts. Next up: machine countersinking the longerons. |
| |
|
10/21/04 - Countersinking - 2 hours
I have been somewhat under the gun with work the past few days, so I haven't had time to work on the plane too much. I've also had an ear infection which is giving me dizziness, which is not a good thing when working with power tools!
I was able to go out and countersink the spars tonight, and hopefully tomorrow I can get all the remaining things wrapped up so I can prime these parts. |
| |
|
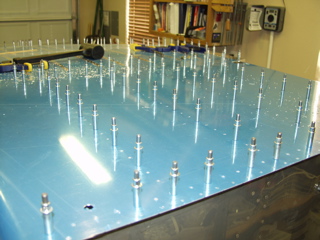
10/22/04 - Prepping for primer - 7 hours
Hey, look. More pictures. I guess I felt like I had to prove that I was really doing something these past few days. Anyways, today I finished countersinking the holes that needed countersinking, and then I started with the Scotchbrite pads on all of the Alclad parts.
|
 |
| |
|
I finished by scuffing the side skins and bottom forward skin. I have sort of learned that it is better to scuff and prime before doing the dimpling because the dimples make it harder to do a good, thorough job on the skins.
I also went to the doctor today and got some antiboitics for my sinus infection. They must have helped because I spent 7 hours in the garage working. |
 |
| |
|
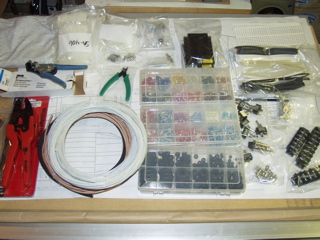
Show and tell time. I got a package today from SteinAir containing my electrical system. Some assembly required. I wanted to have this stuff on hand in advance of when I need it.
I really wanted colored wire, but I can probably suppliment the wire in the kit with some red and black wire to have sufficient color coding.
Besides that, I am pretty happy with this kit. I'll obviously know better when I get into it.
Oh, I almost forgot. I got notification from Van's today that the Finishing kit will be shipped the week of November 29! That will make a nice early Christmas present! |
 |
| |
|
| Next: Fuselage Reassembly |
|
| |
|
