| |
|
| Previous: Cabin Stuff |
|
| |
12/4/04 - Primer - 6 hours
Finally Saturday! I had all morning and most of the afternoon to work on the plane, so I got busy prepping the parts that needed to be primed. I deburred the holes, deburred the edges, scuffed, cleaned, and then primed. The parts included the canopy decks, the flap components, the forward cover plates, and the forward subpanels and ribs. No pictures, sorry. |
| |
|
12/5/04 - Canopy Decks - 3 hours
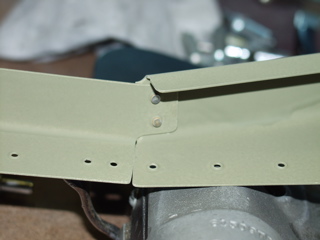
To install the canopy decks I had to first rivet the two parts together before I installed them onto the longeron.
Next I riveted them to the longeron. I had seen "alternative" bucking bars used by other builders, and one example is using a yoke from my rivet squeezer. The yoke is narrow enough to fit, but it is lightweight, so it takes more hits with the rivet gun. I have a small mirror that I used to look at the rivets. |
 |
| |
|
 |
 |
| |
|
Here is the left side all riveted. The right side was next, and it went well without any problems.
|
 |
| |
|
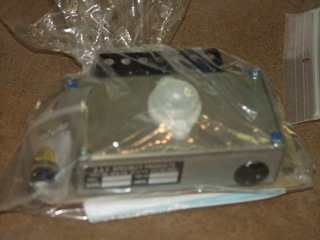
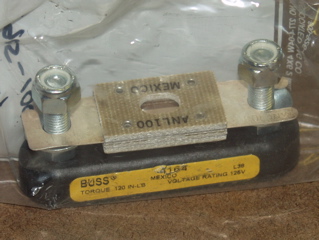
Hey, I got some cool stuff in the mail today. This is all for my electrical system. I went ahead and bought the LR3C from B&C. It serves as a linear voltage regulator, crowbar overvoltage protection, and a low voltage indication. This device is pricey ($240) but it provides "clean" power from the alternator without generating radio noise. It also provides a yellow lightbulb for the instrument panel to indicate if there is a problem with the alternator.
I also the ground block, fusible link kit, and current limiter. |
 |
| |
|
 |
 |
| |
|
 |
 |
| |
|
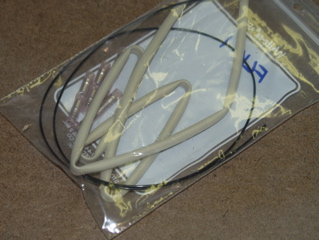
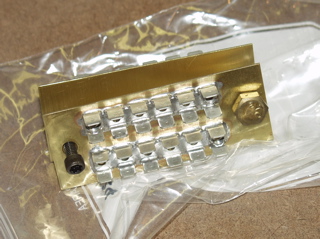
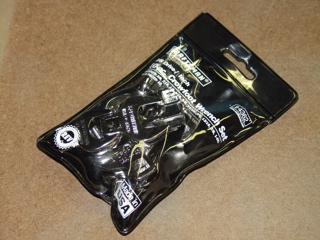
| Finally, I received two of these. They are relays for use with my stick-mounted trim buttons. The little switches in my grips are not meant for the current required to switch the servo motors, so the relay decks are used. |
 |
| |
|
12/6/04 - Misc. - 2 hours
I dimpled the upper aft bulkheads and one of the aft top skins in anticipation of closing it up this week. I've been waiting because my static ports are still not plumbed, but I think I'll be able to plumb those soon. |
 |
| |
|
Also related is the little half bulkhead at the back of the fuselage. I had not yet riveted it, so I went ahead and squeezed the rivets that attach it to the aft deck.
I received word today that my finishing kit will be delivered tomorrow! Stay tuned. |
 |
| |
|
| 12/7/04 - Finishing Kit Arrived - See Finishing Kit Page For Details |
| |
|
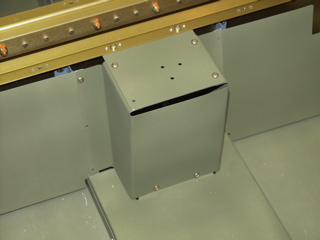
12/8/04 - Tunnel Cover - 5 hours
Check out this cool tool I found at Sears. It is a fingertip driver which accepts a variety of bits so you can get into tight places. I've been looking for a way to use my deburring tool in tight spots, and this thing might just do the trick for me. |
 |
| |
|
| I also picked up a crow's foot set that I can use with my torque wrench. I need these to properly torque the hose fittings and such. |
 |
| |
|
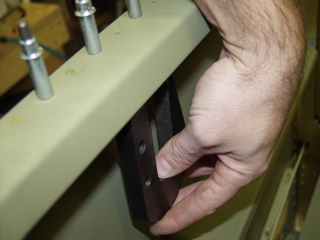
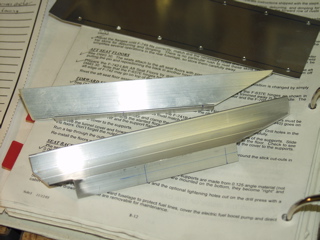
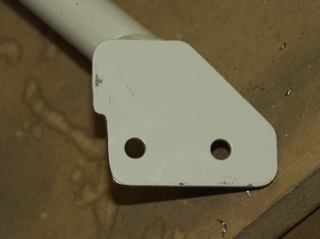
Back to work. Remember that a couple of weeks ago I had inadvertently fabricated these an inch too short. Yesterday my replacement parts arrived so this time I made them the right length. Just make sure they are mirrored, or you will end up with two of the same side.
The tricky part is to drill the holes that match the holes in the seat floors. You can't match-drill them, so you have to carefully measure and drill.
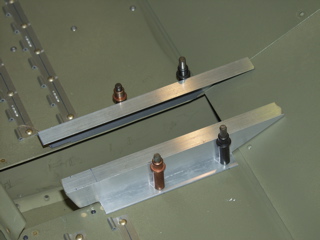
Next I clecoed them into the fuselage and match-drilled the cover to the brackets. |
 |
| |
|
 |
 |
| |
|
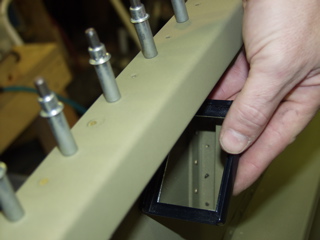
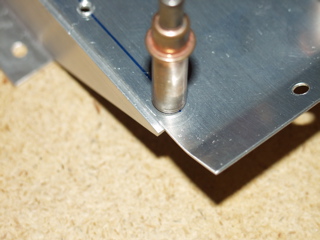
| My tunnel cover doesn't totally come to the edge of the sides. It's about 1/8" too narrow, so it is short about 1/16" on each side. It isn't that big of a deal, but I think if I had drilled my side supports a bit closer together, I wouldn't have this problem. |
 |
| |
|
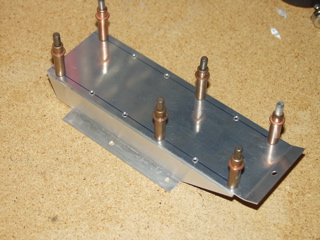
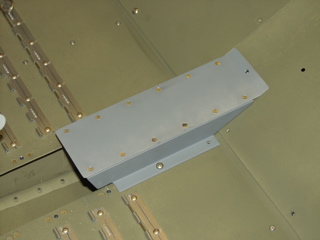
| Here it is all primed and assembled. Now I can put the flap system in for good. |
 |
| |
|
12/9/04 - Flap Actuator Assembly - 7 hours
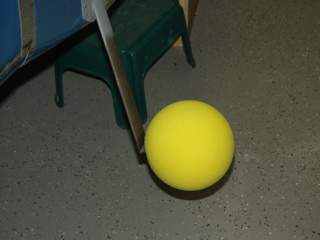
Hey, I figured out a great solution to the pesky steps that are always catching my shins. I went to Wal-Mart and bought two brightly colored foam balls from the toy section. I cut slots in them and slipped them over the step. Now, whenever I accidentally bump into the step, it's a nice, cushy foam ball rather than that angular steel that has been giving me so much grief. I'm really happy I did this, but I think they'll have to come off before first flight. :-) |
 |
| |
|
Some random items. I had been concerned about my static ports because the ProSeal I used to attach them was just not curing very fast. It has been probably two weeks and it was still a bit tacky. So today I removed the ports, cleaned off the ProSeal residue, and mixed some more ProSeal, this time with more hardener. It has been only one day and it is already better than the old stuff.
I drilled the cover plate for the throttle, mixture, and carb heat cables. |
 |
| |
|
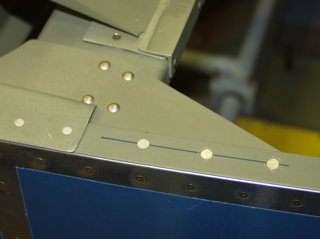
Back to the flaps. I noticed that the flap actuator was uncomfortably close to the 905 bulkhead. Although it might not be a problem, I felt safer putting a little indention into the bulkhead. Here you can see my pen marks prior to forming the indention. It turned out great.
I installed my first castle nut, cotter pin, and safety wire as part of the flap motor assembly. I hope this doesn't have to come apart any time soon. |
 |
| |
|
 |
 |
| |
|
After spending way too much time fiddling with this stuff, the flap housing is finally together. Before all the safety wiring and cotter pinning had been done I had to remove everything because I figured out that there are supposed to be platenuts under the baggage floor to accept the AN3 bolts that hold the center bushing in place. Those platenuts turned out to be very challenging for some reason, but eventually I got everything back together. The movement is stiff, but the motor doesn't seem to mind. |
 |
| |
|
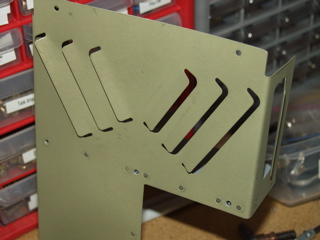
| Finally I bent the loeuvres (sp?) on the heat baffle and I installed the "rib" at the midpoint of the cover. |
 |
| |
|
12/10/04 - Forward Covers, Static Line - 4 hours
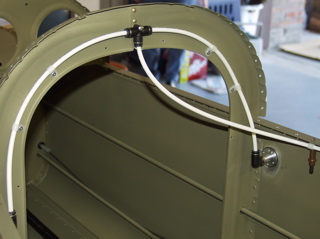
I finally installed my static system. I ran the tubing through each of the bulkheads using snap bushings. I bought some cable clips at Home Depot. These are little clips made of durable plastic that look like little Adel clamps. By pop-riveting these things to the longeron and around the bulkhead to secure the tubing. |
 |
| |
|
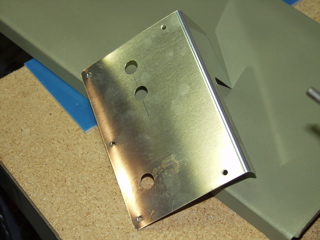
I am installing electric elevator trim, so I had to modify the fuel selector cover plate by chopping off the front portion that is normally used to attach the manual trim cable.
Wowser, there are a bunch of platenuts to install. Incidentally, I mistakenly installed platenuts on the bulkhead where the fuel selector plate is attached. I drilled them out and everything fits fine, but now I have a few extra countersunk holes. |
 |
| |
|
12/11/04 - Aft Covers Riveted - 6 hours
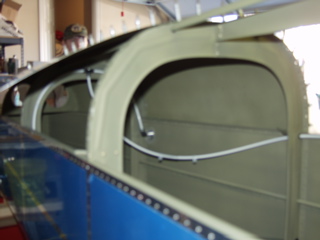
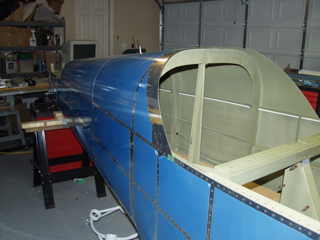
I'm not sure if this was a good idea, but I went ahead and closed up the aft part of the fuselage today. I have run conduit for eventual wiring, I have installed the rudder cables, and I have installed the static lines. So there's really no reason why I should need access back here.
What I really needed to do was to finish something. I have worked on parts here and there for the past few weeks, but I haven't had any visible progress, so this is something visible. |
 |
| |
|
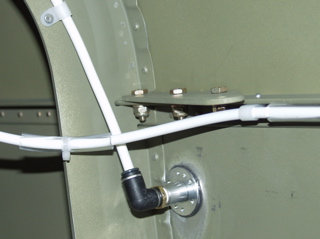
I made some more adjustments to my static lines before closing everything up. I went ahead and secured the center feed tube using a couple of ties and some 1/4" id tubing. This should be secure enough, I would think.
These quick-disconnect fittings are really cool. I had to disconnect them several times to reach rivets and to tighten the bolts on the seatbelt anchors, and they worked great.
4/21/05 Update: Don't route the static line this way. Check out the modification I made. |
 |
| |
|
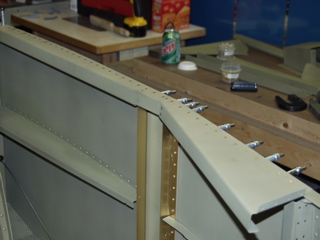
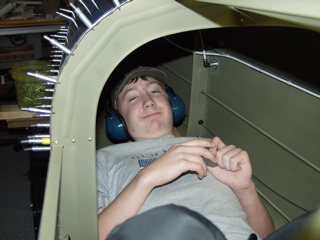
Tim is a great helper. He fits back in the tailcone better than I do, so he did all of the bucking of the rivets for me.
After a bunch of work we finally had the aft skins all nice and riveted. Yahoo. |
 |
| |
|
 |
 |
| |
|
12/12/04 - Rudder Cable Exits - 2 hours
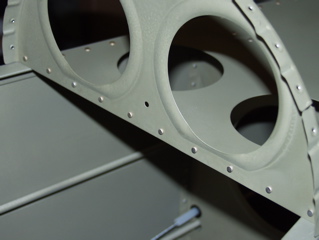
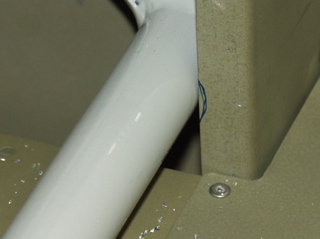
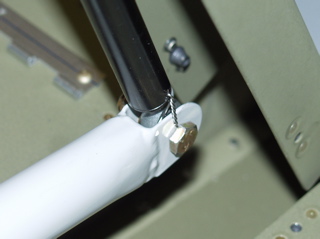
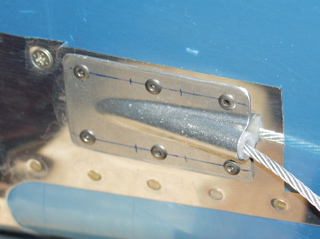
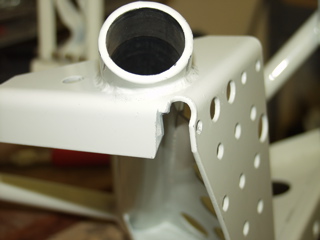
I installed these cool cable exit covers. I bought these from Avery Tools a while back, and they were a little too large, so I trimmed them down and rounded the corners. There are some tricky structural items in the way, so I used pop rivets to attach these. I have come to learn my limitations with a bucking bar, and this is a simple solution.
Notice that I let the teflon tube extend past the cover by about 1/16". Although this is probably not necessary after the rudder is attached, it will hopefully keep the rudder cable from rubbing on the aluminum during construction. |
 |
| |
|
12/13/04 - Gear Weldments - 4 hours
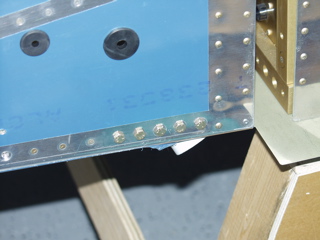
First I match drilled the hole at the top of the gear leg to the weldment using a 5/16" bit. I couldn't even find a supplier of a .311 bit, so 5/16" will have to do.
Next I fit and re-fit the weldments, primarily the right side. I had to grind the weldment in one place to avoid the floor stiffener. I suppose it might have been better to cut the stiffener, but given the proximity to the spar, I was not sure I could grind the stiffener without damaging the spar.
|
 |
| |
|
 |
 |
| |
|
Just when I thought I had it all set, I noticed a rivet in the lower corner that was interfering with the weldment. The weldment needs to be ground to provide clearance. So, out come all of the bolts again. I'll do these tomorrow.
Another interesting thing is that the length of the bolts that attach the weldment are questionable. I called Vans and they said the AN4-12A bolts are fine, as long as the tips engage the nylon, but I think on at least a few of the bolts I am going to install AN4-13A bolts because I couldn't even see the tip of the bolt. |
 |
| |
|
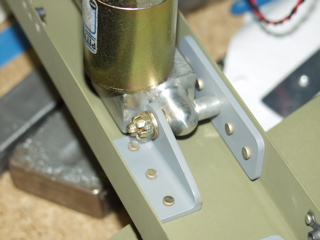
12/14/04 - Gear Weldments - 4 hours
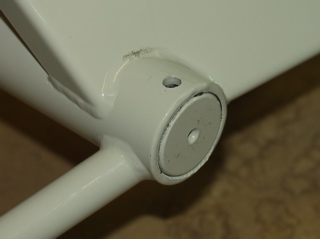
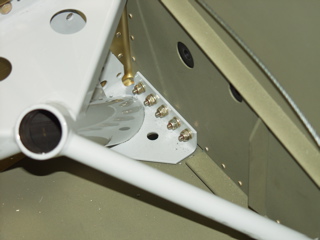
I started by grinding a small notch in the corner of the weldment. It's actually rounded more than it looks on the picture, and I went ahead and shot some primer on the exposed metal. The result is only noticable if you have a mirror inside the cabin, but it does clear the offending rivet adequately.
I reinstalled the weldments and bolted them to the spar. Next I worked on the bolts that attach the weldments to the lower longeron These are first match-drilled, and then carefully tightened. There isn't much space available for twisting a wrench, so it takes a while to get these tightened. |
 |
| |
|
 |
 |
| |
|
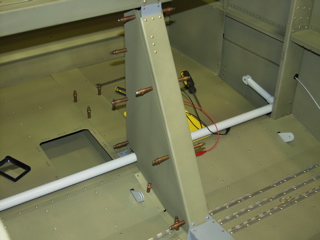
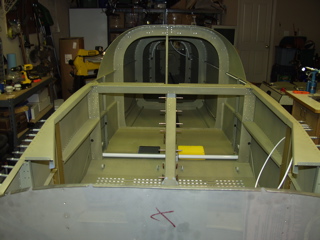
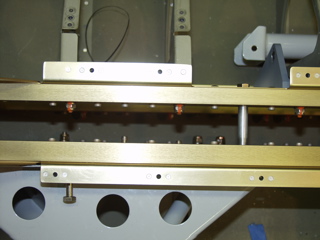
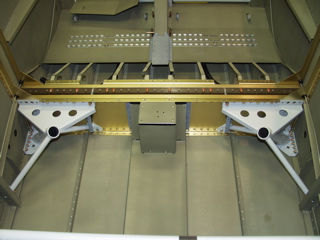
Here's the bird's eye view of the cabin now that I've permanently installed the gear weldments. The next thing that will go in here is the fuel and brake lines, and the fuel selector.
I am going to be taking a vacation from the project until after Christmas, so this is the state it will rest in until I return. Hopefully I will have a bit of spare time while I'm away so I can start to design my electrical system. This will also mark the end of the fuselage kit, at least for my purposes. The next entries will be in the finishing kit section.
So, for now, Merry Christmas to everyone. |
 |
| |
|
| Next: Finishing Kit |
|
| |
|
