Wing Stand
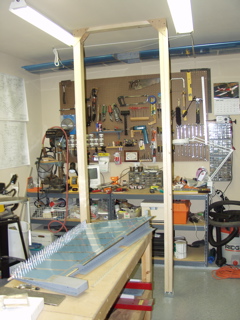 I built a wing stand in my garage to hold both wings. According to Van's, a wing jig is not really necessary, but it provides a convenient way to hold the wing while you are working on it. The stand I built is level and square, but it doesn't need to be exact, since the prepunched holes in the wing skins should force the wing into alignment regardless of the state of the wing stand. I built a wing stand in my garage to hold both wings. According to Van's, a wing jig is not really necessary, but it provides a convenient way to hold the wing while you are working on it. The stand I built is level and square, but it doesn't need to be exact, since the prepunched holes in the wing skins should force the wing into alignment regardless of the state of the wing stand.
I plan to build both wings at the same time, so I needed to be able to access both sides of each wing without becoming a contortionist. (is that a word?) I did enough of that trying to fit into a Cessna 150 during my flight training!
I used two 2x4s screwed together to make the posts. I placed the posts approximately 36" apart on each end of the garage. This should allow both sides of both wings to be accessible without removing the wings from the stand.
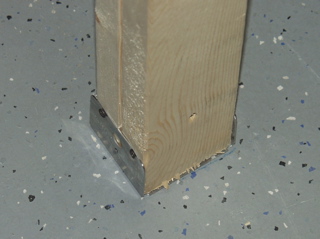 I attached the posts to the floor using some steel post clips I found at Home Depot. I used anchor screws which I pre-drilled into the concrete. These should come up easily and only leave a couple small holes in my nice shop floor. I attached the posts to the floor using some steel post clips I found at Home Depot. I used anchor screws which I pre-drilled into the concrete. These should come up easily and only leave a couple small holes in my nice shop floor.
Although these won't handle lots of abuse, I am only interested in keeping the posts from moving around during construction of the wings.
|

 For the ceiling, I cut crossmembers from leftover 2x4 material and screwed them into the ceiling joists. They're not going anywhere! To reinforce these, I added some angle braces made from 1/4" plywood at each corner, making a sandwitch which should be very sturdy.