| |
|
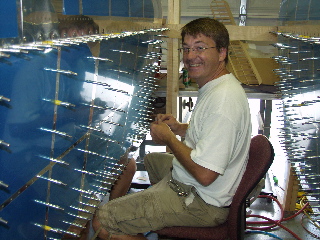
Alrighty! I have dealt with fuel tanks for what seems like a month. Wait. It WAS a month! Ugh. Anyways, I feel my sense of humor returning now that the tanks are complete.
I spent some time thinking about the upcoming tasks. They are as follows: 1. Debur every hole in the wing skins. 2. Shoot primer on the inside of the skins. 3. Dimple and machine countersink all of the holes. 4. Rivet the skins to the wing skeleton. There are some minor steps in there that I will need to do, but that's the basic flow. I decided it would be easier to prime the skins before I dimple, so that's what I'm going to do. |
| |
|
7/2/04 and 7/3/04 - Plastic - 4 hours
I spent a long time removing the blue plastic from the rivet lines. Although tedious, it sure was a welcome task after dealing with ProSeal for so long.
7/5/04 - Deburring - 2 hours
I spent a few hours deburring the holes on the outside of the wing skins. Next, I will remove the skins and debur the inside holes.
7/6/04 - More Deburring - 2 hours
I want to be able to shoot primer all at once, so I am working to debur all of the wing skins. This work isn't interesting enough to justify a picture, so just use your imagination. |
 |
| |
|
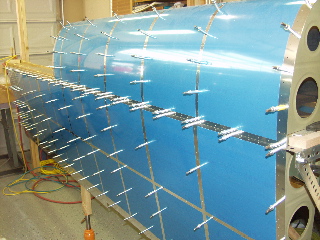
7/9/04 - Deburring, beveling - 4 hours
Last night was the EAA meeting, so I didn't get to do any work. So I had to make up for it tonight. In anticipation of hopefully being able to shoot primer tomorrow, I finished deburring all of the wing skins. I also applied the remaining bevels on the overlapping wing skin corners. These will hopefully make the top skins sit flush with the skin of the wing tank. |
 |
| |
|
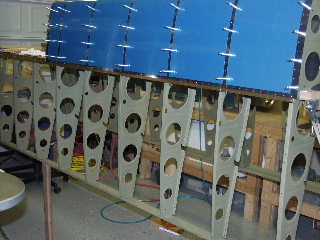
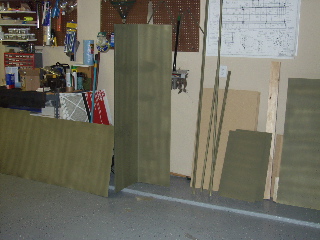
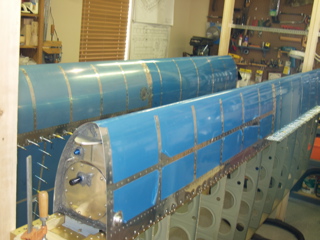
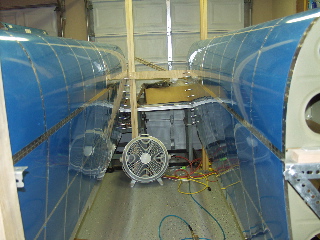
The wings are once again looking naked. The picture at the right shows the leading edges still attached. I will be taking those off in the morning.
|
 |
| |
|
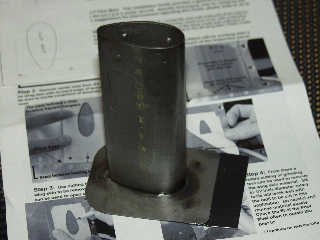
I received an item that I ordered from SafeAir1.com here in the Dallas area. They resell the Dynon D-10 and they just came out with a pitot mast that fits the Dynon heated pitot.
I exchanged emails with Tony and he agreed to send me a mast and an invoice, which I appreciated. I am going to install this in the wing. I'll document the installation when I get to it. |
 |
| |
|
7/10/04 - Primer - 8 hours
Today was a marathon day of prepping and priming. I started by removing the leading edge assembly from the spar and removing the ribs. Then I deburred the inside holes of the leading edge skins, which were the last of the skin holes needing to be deburred. I had also forgotten to debur the j-stiffeners, so I did that.
Next, I began the long and tiresome job of scuffing and cleaning the skins. I went back and forth between dry scuffing and cleaning with Acetone and wet scuffing with Alumaprep and cleaning with water. I can say that this was a lot of hard labor that I am not interested in repeating soon.
Finally, after the sun had gone down far enough to not be a factor, I set up my priming booth (sawhorses on the driveway) and got busy with the primer. It took a while but I can now say that I am ready to dimple.
I know what you're probably thinking: "8 hours of work and only one lousy picture?!" |
 |
| |
|
7/11/04 - Debur - 3 hours
I deburred all of the ribs. So no pictures. Sorry. |
|
| |
|
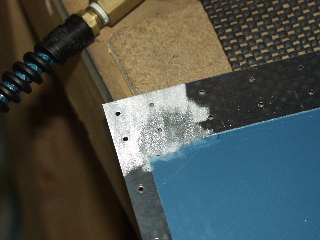
7/16/04 - Dimple - 3 hours
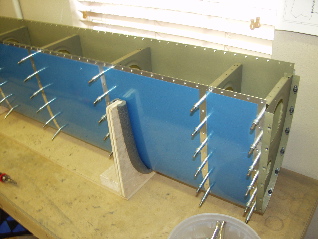
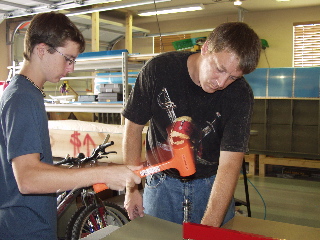
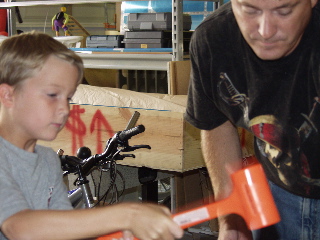
My friend, Todd, came over to help me with the plane. I had already done all of the prep work already, so I was able to hand him the squeezer and let him work. He dimpled all of the main ribs while I installed platenuts on the splice plates. Here you can see the completed splice plate temporarily clecoed to the fuel tank. |
 |
| |
|
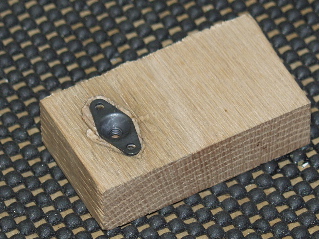
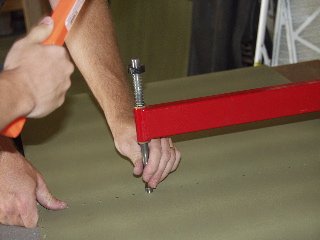
| I had to countersink the platenuts so that they could be installed with flush head rivets. I used a method I figured out on the empennage to hold the platenut in a block of wood while I use the microstop countersink to countersink the rivet holes. |
 |
| |
|
7/17/04 - Leading Edge - 8 hours
I started by finishing the splice plate. It's funny that it took me three hours to do the first one when Todd was here to help, but it only took 45 minuts alone.
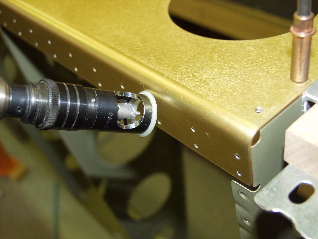
Next, I went around the spars and countersunk each hole that will eventually contain a rivet. |
 |
| |
|
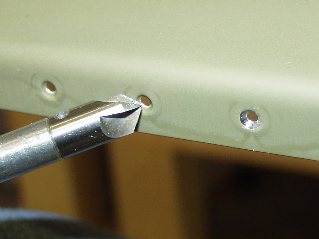
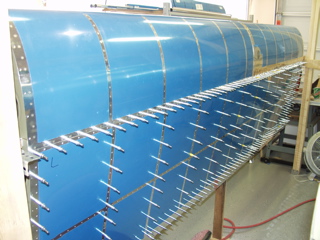
Once again it is a real joy to be able to use the pneumatic rivet squeezer to squeeze the dimples. If you can only buy one luxury during construction, I recommend a pneumatic squeezer wholeheartedly.
The rear spar is dimpled, but the instructions say that the holes should be reamed with the deburring tool just a bit so that the skin fits more snugly. |
 |
| |
|
The forward spar was ready to be constructed. This is where it gets really fun. Every piece has been primed, deburred, dimpled, and countersunk, so all that was left was to permanently rivet the ribs in place. I put the splice plate in its proper position and riveted every other hole in each rib.
I used the pneumatic squeezer to squeeze the aft rivets on all of the ribs. This is called out in the instructions. I then used the rivet gun and bucking bar to buck the remaining rivets. I only messed up on one, and I was able to minimize the damage to the skin so that I can barely tell. |
 |
| |
|
7/18/04 - Leading Edge - 4 hours
I used rivet tape to cover each rivet while I bucked it. This kept the damage of the skin to a minimum and made the finished product look better.
I was able to do all of these rivets by myself, and it was a lot of fun to be constructing something, especially when it doesn't have ProSeal all over it. |
 |
| |
|
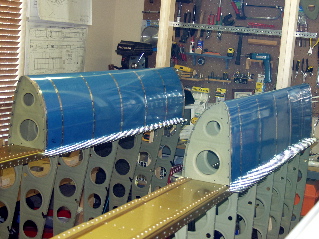
Both leading edge assemblies are now complete and clecoed to the spar. Riveting the ribs to the spar is a difficult task requiring an assistant, so I decided to wait until one of my sons is available to help.
|
 |
| |
|
7/19/04 - Misc. - 2 hours
I started the process of riveting the rib flanges to the main spar. This is tricky because of the limited access. The flanges also tend to bend up away from the spar, so I was paying special attention to that. Bottom line is that I only got about 1/3 the way finished with that part of the job before I got tired of it.
Taking a break from the riveting, I decided to dimple the right inboard wing skin and doubler plate. It is now ready to be riveted. |
 |
| |
|
7/20/04 - Riveting, etc. - 7 hours
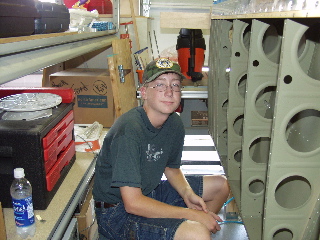
I am fortunate to have a son who is tall and skinny. He was able to reach into the lightening holes and buck the rivets that connect the leading edge ribs to the spar. This is difficult work. Much of it has to be done by feel. We had started this yesterday, but didn't get to the tricky ribs until today. Hooray, they are all done, and I am very proud of my son, Tim, for doing such a great job of bucking in those tight spaces.
|
 |
| |
|
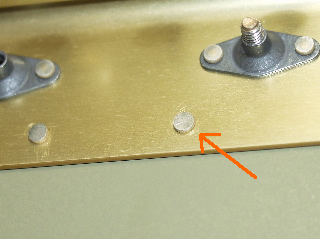
Next came the tanks. They need to be fitted onto the spar and "temporarily" attached. This sounds easy and fun, so I popped the tanks up there and started trying to insert the bolts through the spar into the platenuts on the Z-brackets. The only problem was that the bolts wouldn't engage the threads in the platenuts. What is the deal? I am getting pretty frustrated, so I pull the tanks and look at the platenuts. Ugh. I installed the wrong ones.
I have two bins of hardware. One has nutplates with screws, the other has nutplates with bolts. The ones for screws are used in places where there are countersunk screws, so the nutplate is recessed to accept the dimple in the skin for the flush-head screw. The other thing is that these are -6 screws, and the bolts are -8.
So, to make a long story mercifully short, I had to drill out all the nutplates that I had installed in the Z-brackets prior to their installation, and install the new ones with a bit less-than-optimal clearance for my rivet squeezer. Fortunately, one of the yokes that I have just about fit, so I was able to sort of work it in underneath the lip of the bracket and hand-squeeze the rivets.
All of this took about two hours and the result was that I was able to attach my tanks!
I finished up by riveting the long row of rivets along the top and bottom of the main spar that attach the leading edge to the wing. This was easy and gratifying work, so I probably worked a little too long into the night squeezing rivets. |
 |
| |
|
7/21/04 - Dimpling - 3 hours
The top skins need dimples so they can be riveted to the wing. So, I set up a table and some sawhorses so I could manage the long skins while I used the c-frame to make the dimples. My son, Daniel, helped by hitting the dimpler with the hammer, and that made some of the work go more quickly. I got the left skins done. I still have to do the outboard skin for the right wing.
|
 |
| |
|
| I took extra time to make sure the skins were properly positioned in reference to the countersunk holes on the main and rear spars. I didn't want my rivets to go in at an angle or something. My theory is that if the rivets go in straight and un-stressed, then the skin is aligned with the skeleton and the wing should be straight. This is the left wing. I'll set up the right wing tomorrow. Then I just need a volunteer to help rivet... |
 |
| |
|
7/23/04 - Riveting Main Skins - 4 hours
I am really lucky to have a bunch of boys around to help with the project. Today I was ready to rivet the top skins on permanently, so I got Tim to help. He is really good at bucking rivets, so I handled the rivet gun.
While I was working on the empennage, I was unhappy with the way the rivet gun makes scuff marks around the rivet head. I used a piece of riveter's tape to cover the rivet head each time I shot a rivet. This resulted in some really nice looking rivets.
Our process was simple. I put a rivet in a hole and put a piece of riveter's tape over the rivet head. Then I would place the mushroom rivet set squarely over the rivet head and said "ready." Tim would then place the bucking bar on the rivet and when he was set, he would say "go." I would then give it a nice strong burst from the rivet gun. Then Tim would use the rivet gauge and say "good" if it was a good rivet, which they almost always were. Then we would move on to the next rivet, and so on. |
| |
|
 |
 |
| |
|
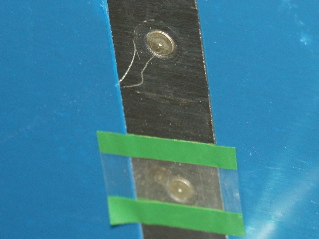
One issue we had was that the rivets called out for attaching the skin to the main spar were AN426AD3-4. This was barely enough length, and it was difficult to set the rivet so that it wasn't too thin. You can see what they looked like in the picture at the right.
After doing several of these, I decided to change to AN426AD3-4.5. This was much better. I went back and drilled out the others that were questionable and replaced them with the slightly longer ones. |
 |
| |
|
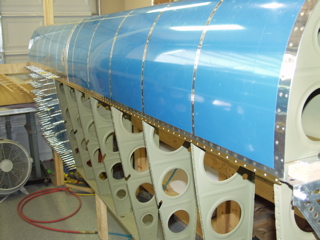
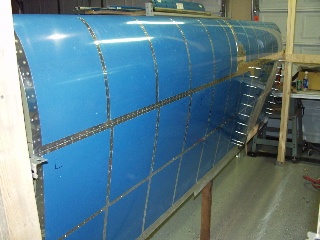
Here is the left wing, all nice and pretty. The only things left to do to the top skin is to rivet the overlap of the inboard and outboard skins and then I need to squeeze the ribs on the inboard rib.
Tomorrow I hope to get the right wing done. |
 |
| |
|
7/24/04 - Riveting Skins - 6 hours
Once again I was able to get my son Tim to help me rivet. But before I got him to come out to the "hangar" I did the rest of the dimpling of the top skins and any other prep work that I could do.
Again I used the technique of "centering" the holes on the skins. I tried to get a picture of this, but they came out too blurry. Regardless, just consider that if the holes in the skins are not properly aligned with the skeleton, then it will be more difficult, if not impossible, to get the wings riveted straight.
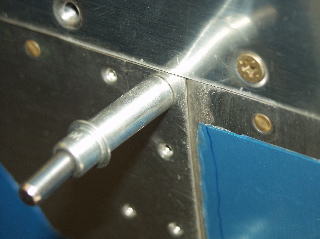
Here is a picture of how my scarf joint came out on the left wing. The outboard skin can remain flush with the fuel tank skin while the inboard skin is beveled. |
 |
| |
|
| It was a hot day here in North Texas. It was somewhere around 95 degrees. We worked with only a few breaks. After many hundreds of rivets we finally finished riveting the top skins on the right wing. We only ended up having to drill out about four rivets. Man, it feels good to have this part finished. |
 |
| |
|
7/25/04 - Misc. - 8 hours
I had left the bottom skins alone while getting the top skins riveted on, but with the top skins finished, I turned my attention to the rest of the skins. I cut strips of plastic, deburred the holes, and then dimpled. I was able to get some of my kids to help hit the dimple dies with a hammer, which saved me some work.
I also installed the J-stiffeners in the wings, but I didn't get them riveted yet. I need to do these before I take the wings off the wing stands. |
| |
|
 |
 |
| |
|
 |
 |
| |
|
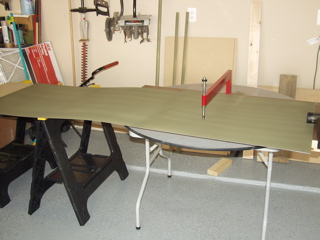
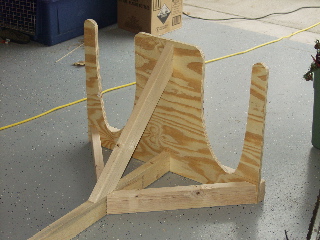
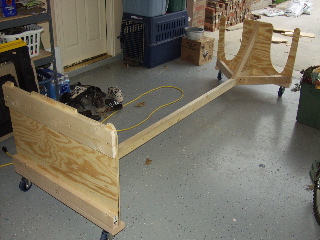
My next task was building a rollable wing cart for the wings to be stored. The wings can be worked on in the cart, and it is actually easier to access the back side of the wings when they are in the cart, so my next step will be to remove the wings from the stand and place them in the cart. Then I will disassemble the stand permanently, which hopefully will give me some space that I will need for starting the fuselage.
The plans for the wing cart are supplied by Vans. All I had to do was construct it. |
 |
| |
|
Here is the finished wing cart. The spars rest on one end while the outbound end of the wings are cradled in the cutouts I made in the plywood. I will pad the cutouts with water pipe insulation like I did with the leading edge cradles.
I put nice, big, rubbery castering wheels on the stand, which should help with those rough off-field landings! :-) |
 |
| |
|
| Next: Finishing Up the Wings |
|
| |
|
