| |
|
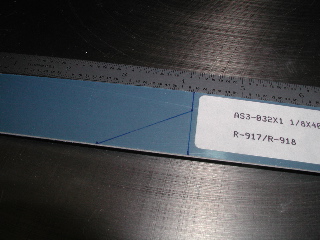
1/12/04 - 2.5 hours - Stiffeners
I went back to the parts box to retrieve the pieces for the rudder. I was somewhat surprised at how thin the skins are. They are so flimsy that if care is not taken, they might easily be bent. I guess that's the reason for the stiffeners.
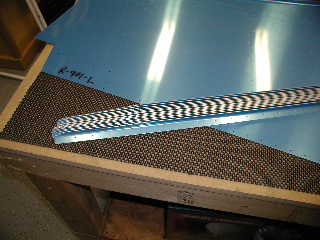
The first step in building the rudder is cutting the stiffeners from long strips of angled aluminum. The locations for the initial cuts are indicated by several pre-drilled holes. By "connecting the dots", I was able to produce all of the stiffeners to roughly the same size and shape using a pair of snips. |
 |
| |
|
The final size of each of the stiffeners is cut only after the stiffener is laid onto the skin. By looking to see where the last hole is located on the pre-drilled skin, I was able to cut the stiffeners about 1/4" past the final hole on the stiffener.
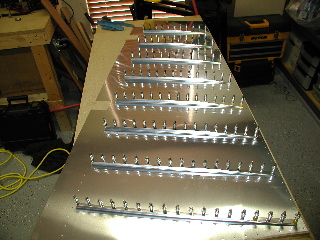
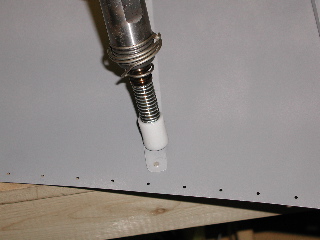
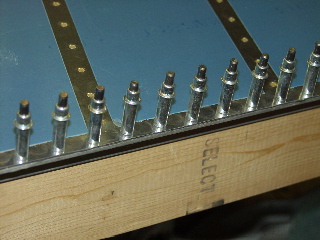
The next step was to match-drill the stiffeners to the skins. I put a spare piece of particle board on the workbench so I could drill into it. The clecoes are then installed into the hole and attach the skin to the wood. This makes things nice and straight.
The instructions call for a cleco in every hole. It is also recommended that the holes be drilled from front to back in sequence. This was somewhat time consuming working alone. It would have gone faster if I had someone install the clecoes for me. |
 |
| |
|
1/17/04 - 4.5 hours - Drilling & Deburring
After each hole was match-drilled with a #40 bit, I marked the stiffeners to remember their location. Then I removed the stiffeners (and the skin) from the workbench and repeated the process on the other skin. |
 |
| |
|
| The only real important thing to mark is if the stiffener is for the left or the right skin, because there is only one place each of the stiffeners could possibly go on the skin. |
 |
| |
|
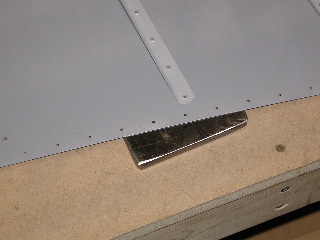
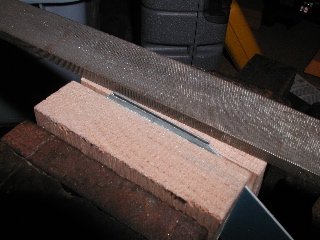
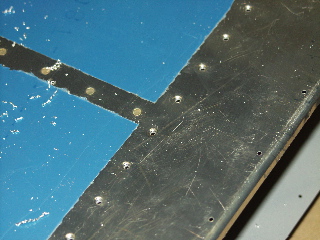
When the stiffeners are cut out, there are lots of jagged corners and edges, due to the marking holes from the factory. The instructions say to cut between the centers of the holes. Doing this leaves some ugly corners, so I decided to smooth each corner on my belt sander.I was also able to straighten up my uneven snipping. |
Before
|
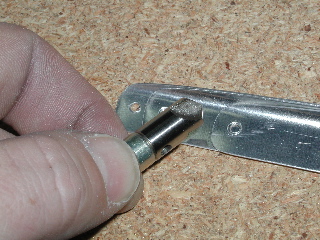
| To debur and smooth the edges of the stiffeners, I used a Scotchbrite wheel attached to my air powered die-grinder. Although it took quite a while, the result was that I had very smooth edges on all of my stiffeners. |
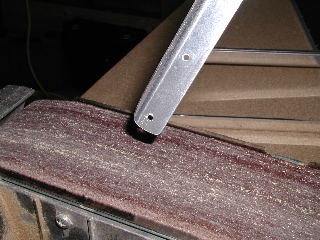
After |
| |
|
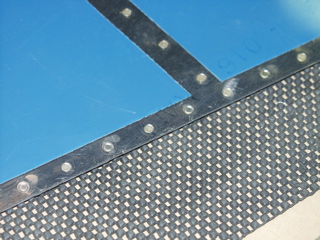
Before I could properly debur the holes on the skins I had to remove the blue plastic from the inside, and remove a strip of the blue plastic from the proximity of the stiffener holes on the outside. This plastic is a pain to take off because it is easy to bend the skin in the process. It almost seems as if the plastic is nearly as thick as the skin itself.
I use an old wood burning iron to melt the strips on the outside of the skin. |
 |
| |
|
1/18/04 - 0.5 hour - Deburring
The material is so thin that I used my deburring bit between my fingers on all of the ribs and the skins. |
 |
| |
|
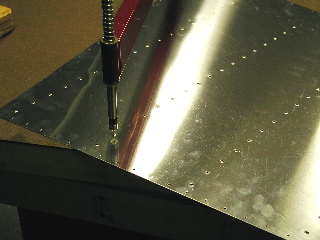
1/19/04 - 1 hour - Dimpling
The c-frame dimpling tool came in very handy when dimpling the skins. I had previously built a sub-table to enclose the base of the c-frame, and it made this part of the job quite easy. Since the skins are so thin, I barely had to hit the tool with the mallet to achieve a nice dimple.
I then hand-squeezed the dimples into the stiffeners. |
 |
| |
|
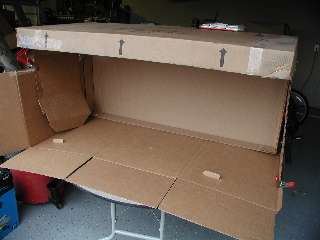
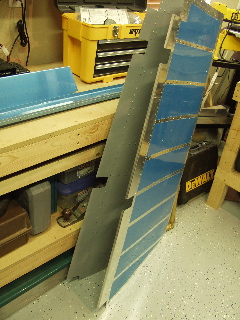
1/24/04 - 3 hours - Priming
It was raining this morning, so I had to figure out another plan for priming the rudder parts. I ended up assembling a small box out of cardboard which is just big enough to hold the rudder skins one at a time. Not seen in this photo is the plastic dropcloth that I covered the whole apparatus with.
With the limited size of the painting booth, priming the parts took a bit longer than I had planned. |
 |
| |
|
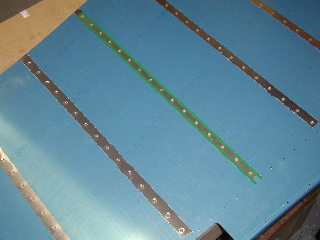
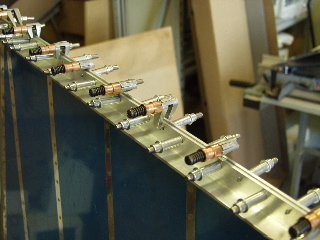
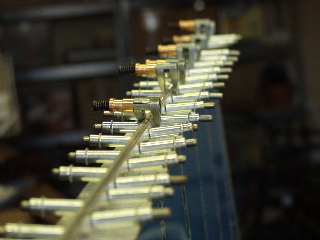
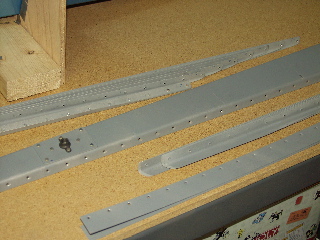
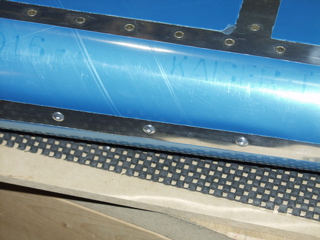
1/24/04 (pm) - 1 hour - Riveting
Back riveting is really fun. There's not that much that can go wrong, and the results look great. It also goes really fast once you get started.
Several months ago I assembled Van's test project. It is a simulated control surface with stiffeners and ribs that have to be riveted together. When I got to the back riveting of the stiffeners, I thought "this will be easy. So, I taped the rivets in place and went to town riveting . The only problem was that I had forgotten to put the stiffener on the rivets. This was a valuable lesson that I made sure I didn't repeat on the "real" control surface I am now working on.
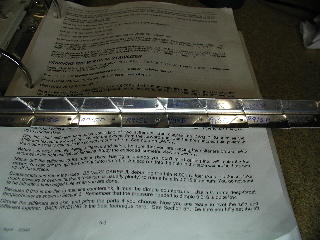
I am using some riveting tape that I got from Avery Tools. It is sticky on the sides, but not in the middle. You can see it on the picture. It has green sides. It is somewhat reusable, so I cut a piece to the length of the longest stiffener and then I was able to use it on all the stiffeners on the skin. By the end of the first skin the tape had lost it's stickiness, so I used another piece for the other skin. What can I say, I'm cheap! |
|
| |
|
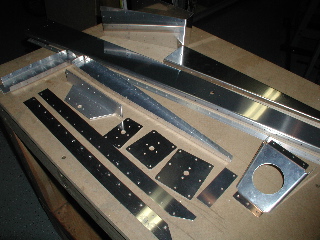
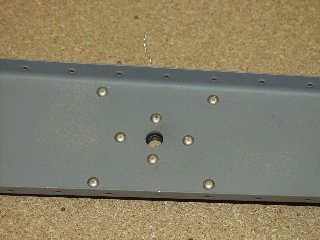
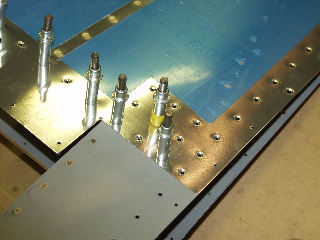
1/25/04 - 3 hours - Rudder Skeleton
I don't have a bandsaw, and since most of the parts are pre-cut, I decided not to buy one. I do have a scrollsaw, so when the plans called for the fabrication of the R-917 shim, I installed a metal cutting blade in the scrollsaw, and it made short work of the thin (.032) aluminum.Of course, I had to be very careful to keep a straight line, because there is no fence on the scrollsaw. Instead, I did my best at making a straight cut, and then I moved the piece over to the bench vise and finished each edge off with a file.
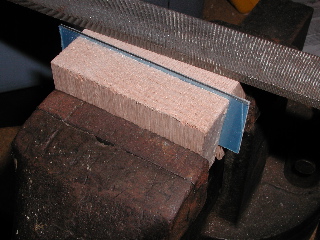
I placed the piece between two pieces of scrap wood to keep it from getting crushed by the vise.
This is my grandfather's old vise, and it's a lot older than I am. |
|
| |
|
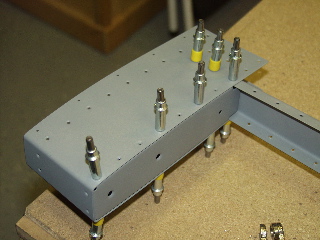
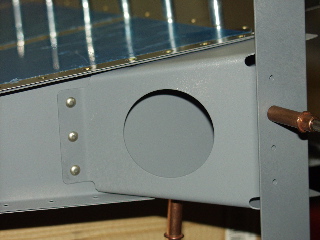
The ribs needed fluting, and the R-405PD rudder horn needed to be "radiused" so it would fit snugly into the base of the R-904.
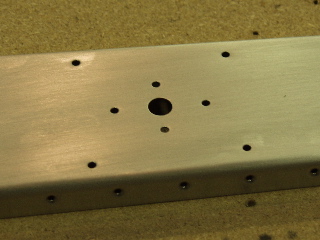
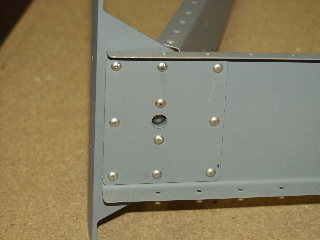
The instructions say to cleco the reinforcement plates to the spar, but there is no mention of doing anything else to them. After careful study of the plans and the instructions, I decided that there was no other reason to cleco these to the spar other than to match-drill the holes, so that's what I did.
The rest of my time was spent with cleco pliers and the air drill as I attached the various pieces to the skeleton and match drilled the holes. I got as far as attaching the outer skins, but didn't drill them. That's next. |
|
| |
|
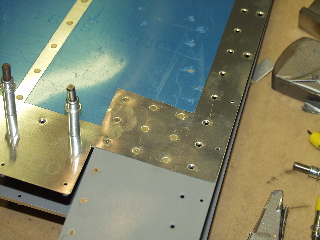
1/31/04 - 3.75 hrs - Rudder Stuff
I match-drilled the holes on the skins. |
 |
| |
|
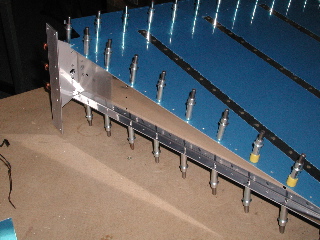
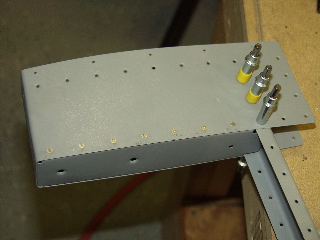
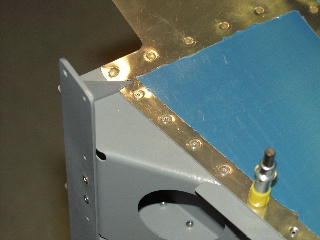
The R-710 rudder brace was next. Van's has marked the location of the cut with some pre-drilled holes, so I cut from center to center of each hole to remove the extra material.I decided not to "smooth out" the cut to remove the half-circles left by the pre-drilled holes because I was concerned about not having enough material. This turned out to be the right decision as there is not a bit of extra material once it was put in place.
Here is another point in which the Van's instructions are unclear. I put the R-710 in place and clecoed it to the R-904 rib and the R-405PD. It says to match-drill those holes, which I did, but there was no mention of drilling the holes on the sides. That is, the holes which are already drilled in the skin and the R-904 rib which match up to the area occupied by the R-710. After careful study it was evident that the only possible solution was to drill those holes, so I did.
The picture below shows the R-710 in place before I drilled the holes in the sides. |


|
| |
|
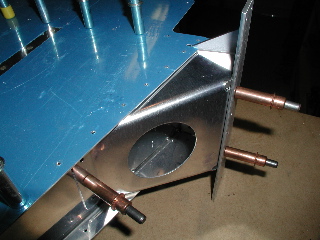
Next, I fabricated the R-917 L and R pieces. I cleaned up my cuts with a file. Then I used the side-gripping clecoes to hold them in place while I drilled the #40 holes using the holes in the skins as the guide. This part is intended to eventually attach the fiberglass tip.
You can see in this picture that the holes are now drilled in the R-710.
Finally, I took everything apart. Then I spent a while removing blue plastic from rivet lines. |
|
| |
|
2/1/04 - 2 hours - Deburring
Deburred the holes in all of the skeleton parts. Deburred the edges of the skeleton parts. |
 |
| |
|
2/4/04 - 1.75 hours - Deburring & Dimpling
I deburred the skins and then dimpled everything that needed a dimple. I also beveled the edges of the counterweight skin as described on the plan.
I also ordered my wing kit today! It has an 8 week delivery schedule, so I have plenty of time to finish the rest of the Empennage. |
|
| |
|
2/6/04 - 1.5 hours - Countersinking
The R-916 trailing edge is a wedge which becomes very narrow at the back. It was not fun to countersink because both sides had the same countersink, so that leaves basically no material in between. I had to double-check my countersink size because it didn't seem that it would be possible to do. Finally I just did it, and it turned out okay, I guess.
I also countersunk the Counterweight, and I had to mess around a bit to get the #10 countersink into the R-912, since I don't have a #10 countersink. |
 |
| |
|
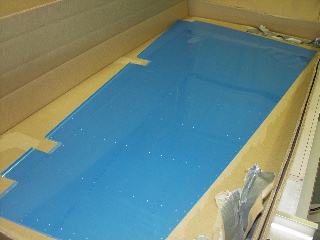
2/7/04 - 3 hours - Priming
I scuffed up everything with some scotchbrite pads, and then I cleaned everything with acetone. Today (Saturday) was a very pretty day, so I was able to take the stuff outside for priming. Everything went really well except that I accidentally primed the outside of the counterbalance skin. Oh well, I guess there goes my big plans for a polished aluminum airplane. :-)
|
|
| |
|
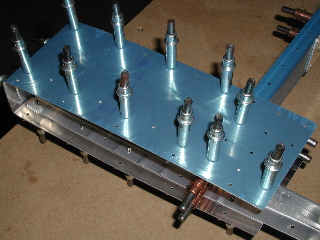
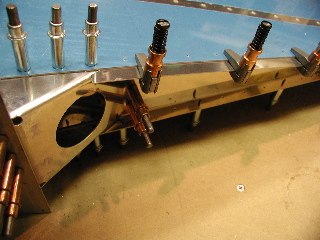
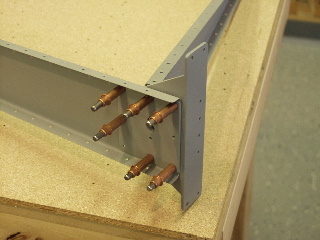
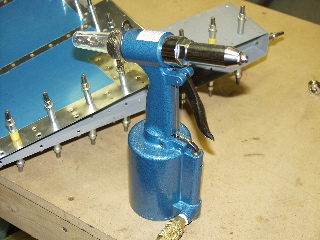
2/10/04 - 5 hours - Assembly
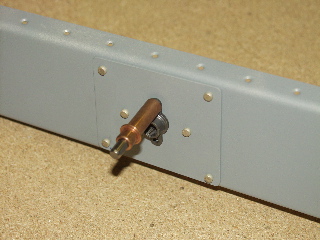
I decided to put the machine head on the outside. One question I had was the size of the rivets that attach the platenuts, since it is not indicated in the instructions or on the plans. I finally settled on the next larger size from the ones which attach the doubler plates to the spar. This worked perfectly.
I don't have a 4" yoke for my hand squeezer, so I had to buck the rivets in the counterbalance skin. I had my son, Tim, help me with the rivet gun, which made it go really quickly. I only had to drill out a couple.
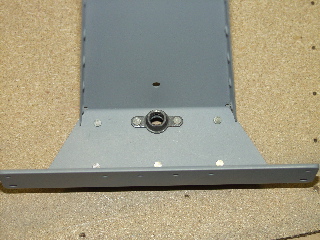
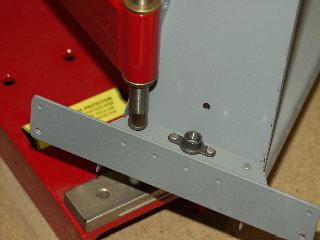
When riveting the control horn onto the spar, I had to use my c-frame to rivet the two rivets which connect to the R-904 rib. I could have bucked it, but I decided to try the c-frame, and it worked pretty well. I was amazed.
I bought a pneumatic pop riveter from Harbor Freight, and it works really well to set those pesky pop rivets. It works much better than my old hand riveter.
I almost forgot to attach the R-710 brace before I finished riveting the skin. Fortunately I caught myself before I riveted the second skin, so all I had to do was peel back the skin and squeeze the rivets to the R-904.
I decided to use pop rivets to attach the brace to the horn, because I don't have a longeron yoke for my squeezer, and none of my bucking bars can reach into the brace adequately to be able to use the rivet gun. Unfortunately, I only had two of the LP4-3 pop rivets, so I need to order two more.
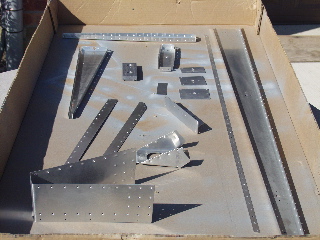
I have lots more pictures than text, so just enjoy the pics and I'll quit typing. |
|
| |
|
2/14/04 - 2 hours - Trailing Edge
Today was our first (and probably only) snowstorm of the year, so I didn't get as much work done as I had hoped. It was too cold in the garage to do epoxy.
I worked on the reinforcement strip for the trailing edge for a while, enlarging the countersinks slightly using my drill press. I was pretty happy with the fit, but then I made a mistake that I hope won't be a problem.
Warning: don't try to edge-roll the trailing edge. When I did so, it turned into a big mess. Now part of one of the skins has a wavy section that I haven't been able to straighten. Aargh. I should have just left it. I went ahead and clecoed it to the 4 foot angle and it straightened it up, but I'm sure when I take the angle off, it will be all wavy again.
Hopefully when I epoxy it to the reinforcement strip it will stay straight. |
|
| |
|
2/15/04 - 1.5 hours - Trailing Edge
Upon further examination, it appears that I may have caused the skins to be stretched by not holding the edge-bending tool in the correct attitude in relation to the skin.
I went to Home Depot and bought a second piece of 4' aluminum angle so that I could effectlively create a "clamp" around the trailing edge. I match-drilled the second angle to the first, so the holes line up.
I used T-88 Structural Epoxy to join the parts of the trailing edge. This stuff mixes up easily (it is mixed in a 1 to 1 ratio) and isn't too messy to use. I mixed about twice as much as I needed, but it was fine.
I used popsicle sticks to apply the glue to the skins on either side of each of the holes on the trailing edge. I was careful not to leave too much glue on the surface.
Once the glue was in place on both sides of the skin, I clecoed the two pieces of angle on either side of the trailing edge. I put a cleco in every hole, and I used cleco edge clamps as well. The result won't be known for a few days, but hopefully this will cure the problem mentioned above. |

|
| |
|
2/20/2004 - 4 hours - Trailing Edge
Today was the moment of truth to see if the extensive clamping was going to help the pathetic state of my trailing edge. The short answer: No.
As soon as I started riveting, I could see the separations starting to form.By the time I had finished, it looked like a 3rd grader had built it. Needless to say, I was totally distressed about it. I didn't want to redo all the work, but I didn't want a terrible looking trailing edge on my rudder either.
Finally, I decided that I couldn't settle for this. If I settle for this, I am setting myself up to settle for other blunders along the way, and I don't want a junky looking airplane. More importantly, I want a safe airplane, and although the trailing edge isn't necessarily a safety issue, it could lead to some squirrly flying characteristics, which could be dangerous.
So, I took a deep breath and started drilling out rivets. I think I can save the skeleton, so I should only have to buy new skins. |
|
| |
|
2/21/2004 - 2 hours - Disassembly
Drilling out rivets is not much fun, but fortunately I didn't have to worry about damaging the skin in the process, so I took care not to damage the skeleton, and it only took me a few hours to remove the skins.
Monday I will order two new skins and a new tapered trailing edge. Then I will try it again.
Like my grandfather used to say:
Good, better, best.
Never let it rest.
'Til the good get's better,
and the better is best.
One thing that I learned from this is that you can waste a lot of time trying to fix something that is most likely unfixable. It would have been easier if I had just bought the new skin when I messed it up, rather than destroying the other skin and the trailing edge trying to "fix" it. Next time I'll just order a new part.
Update: Van's has shipped my rudder parts, and they should be here on Thursday, March 4. |
|
| |
|
3/13/04 - update
New skins ready to roll. |
 |
| |
|
3/14/04 - 3.5 hours - Skins
I didn't take a picture because it's the same process as I did above. I removed plastic with the wood burning iron. Then I drilled and dimpled for the stiffeners. |
|
| |
|
3/15/04 - 1 hour - Deburring
Wow, this is like deja-vu. Haven't I done this once already? |
|
| |
|
3/16/04 - 2 hours - Primer
I scuffed up the skins and used acetone to clean them. Then I put a very light coat of primer on the skins to save weight.The stiffeners went back on pretty easily. |
|
| |
|
3/17/04 - 1 hour - Riveted Stiffeners
I match-drilled the new skins to the spar, and deburred the holes. I also clecoed the trailing edge in place and match-drilled the holes. Finally, I dimpled the skins. The pneumatic squeezer made squeezing many of the dimples a fast process. |
|
| |
|
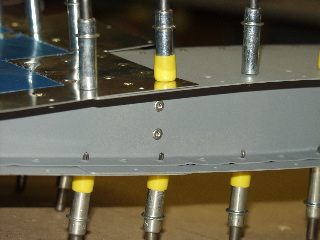
3/18/04 - 2 hours - Assembly
I clecoed the skins in place and riveted the skin and the counterbalance skin together. Next, I riveted in the tip rib. Then, I riveted the skin to the spar. |
|
| |
|
4/6/04 - 1 hour - Trailing Edge
Time once again for the much-feared trailing edge. I have had some practice since my first attempt, and I have also decided to try using ProSeal on the rudder since I needed to use it on the trim tab as well.
The ProSeal went on much thicker than the epoxy. There wasn't very much sliding around of the parts once they came together.
I also put little dabs of ProSeal at the tips of the stiffeners to reinforce them and hopefully avoid cracking over time. |
 |
| |
|
4/13/04 - 2 hours - Finishing Up
After letting the ProSeal set up for a week, I went ahead and riveted the trailing edge. I alternated the direction of the rivets to make sure I didn't get an arc in the rudder. I worked from the center, first back-riveting, and then flipping it over and setting the rivet using my mushroom set and the back riveting plate. I made sure I didn't over-drive the rivets this time.
The results are acceptable. There are a few little cosmetic things that I don't like, but it is straight and secure. |
 |
| |
|
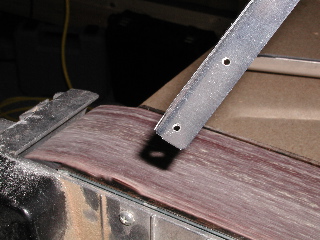
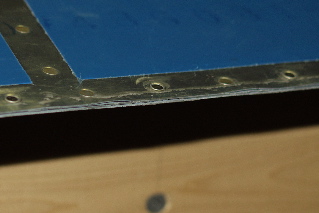
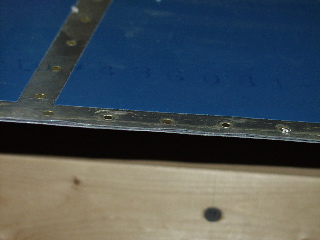
| Bending the leading edge of the rudder was a challenge. I started by using the dreaded edge-bending tool on the right skin to make sure it would set down against the left side when riveted. Then I used a piece of 1" dowel to make the bend. |
 |
| |
|
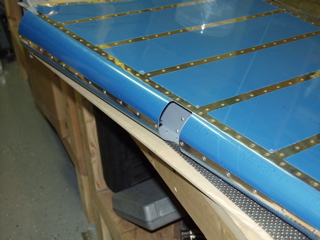
| Here is the result. It looks pretty good. |
 |
| |
|
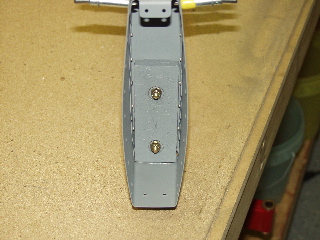
| I'm finally done with the rudder! |
 |
| |
|
| Next: The Right Elevator |
|
