| |
|
6/13/03 - Delivery by FedEx
Like Christmas morning, we carefully unwrapped the multitude of brown paper packages to find a few of my favorite things. Things like rivets, ribs, spars, and skins. My son and I took our time to inventory and organize the parts.
The only things missing are the "Phantom" parts, which are parts that I am responsible for fabricating from the included raw aluminum. |
 |
| |
|
|
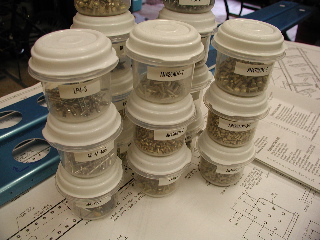
I had seen an idea to use old baby food jars to organize the small parts, but I worried about the possibility of dropping one. So instead I went to Wal-Mart and bought a bunch of 1/2 cup rubbermaid storage containers. These are a bit larger than baby food jars, and they are made of clear plastic, so I can see inside.
I also bought a cheap ($15) ptouch labelmaker at the office supply store. It is perfect for labeling the many little parts jars. |
 |
| |
|
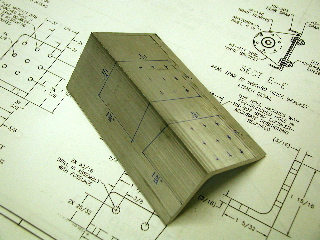
6/13/03 - 1:00 - Marked up HS908
The aluminum angle material supplied with the kit has a radius machined on the inner face. So, I marked all my cut-lines and hole positions on the outside using a metal rule and a sharpie. The NBA finals were on the tube, so I may have worked more slowly than normal. |
 |
| |
|
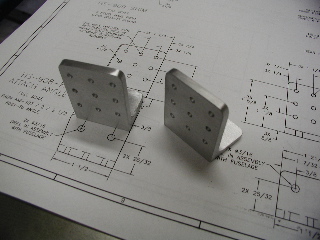
6/14/03 - 3:00 - Attach Angles
Because I marked the angles on the outside, I was able to clamp them into the vise and cut using hand tools. If I had planned to use stationary tools, I would have needed to transfer the lines to the inside. I cut the angles to rough size using my Bosch jigsaw.
Shaping the angles to final size was done on a ScotchBrite wheel in my stationary grinder. My radiuses look a bit different than the plan, but everything else looks good. I drilled the 9 holes with my drill press. Finally, I deburred and polished each angle with a scotchbrite wheel mounted in a cheap die grinder. |
 |
| |
|
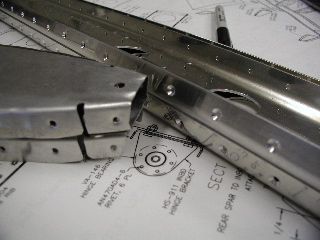
6/14/03 - 3:00 - HS skeleton
I connected the front and rear spar halves using the spar doublers. Right away I noted that the halves are identical. There are three holes on each side of the doubler plate which, when drilled through, makes the spar halves unique. It is therefore important to mark the halves as left or right.
I didn't have any angle that I could use to set the positions of the attach angles, so I moved on. I clecoed and pre-drilled the hinge brackets.
The ribs need to be prepared before they can be used, so I laid them out and spent a while deburring. The scotchbrite wheel mounted in my die grinder worked great, except that my compressor ran a lot. Next, the ribs must be fluted so they are flat. I used a flat table saw table to test the ribs.
The instructions say to fabricate the HS909 shims from AS3-040 stock. It took me a while to figure out how to determine the thickness of a piece of sheet. Then I noticed the .040 printed on one of the sheets. Cool. |
|
| |
|
6/16/03 - 1:30 - HS Skeleton
I fabricated the HS909 shims according to the plans and match-drilled them to the spar.
The remainder of the skeleton, including the nose ribs, was assembled and drilled. I made my first mistake: I put the inboard ribs facing out. They are supposed to be facing in. Fortunately I caught the mistake and no harm is done. |
 |
| |
|
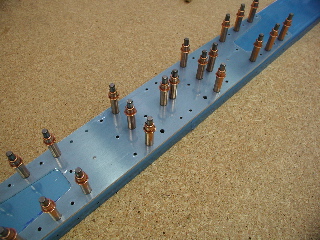
6/17/03 - 2:00 - HS Skeleton
I borrowed some angle from a friend and set the position of the HS908s. I match-drilled the nine holes through the spar for each angle, and everything looks good.
Next, to the surprise of all onlookers, I proceeded to disassemble the skeleton. The parts are once again nicely stacked on my workbench. I deburred every #30 hole that I had drilled out. |
 |
| |
|
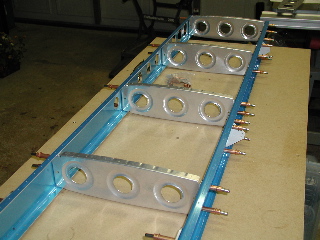
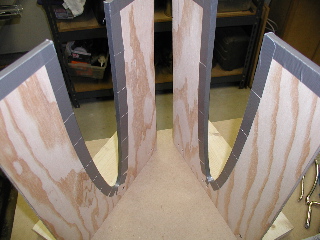
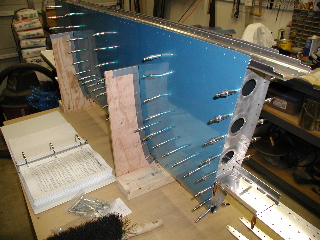
6/18/03 - 2:00 - HS Skins
I built the jigs using the wood supplied in the kit. I clamped both pieces together and cut them out at the same time to assure consistency. Then I mounted them to pieces of 2x4. I used duct tape on the edges to protect the skins.
I placed the right side into the jigs and proceeded to cleco the ribs, spars, and doublers into position. Everything lined up perfectly.
I have to say how impressed I am with the accuracy of the parts. Each hole perfectly lines up with its mate, even when there are three parts coming together at the same hole. I have never built even a model kit with this degree of quality. |
|
| |
|
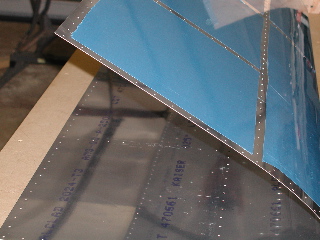
6/19/2003 - 2:00 - Right HS Skin
I drilled out all the holes on the skin to #40. This went pretty smoothly. Once again I disassembled everything. I left the blue plastic on the outside of the skin for protection. I had read somewhere that you can use a soldering iron to melt the plastic enough so you can peel a strip off along the rivet lines. I had used my son's woodburning tool to try this on my practice project, and noticed that the sharp bit in the wood burning set actually scratched the aluminum. So, before I used it on these skins, I rounded off the tip on my grinder. Now all it does is melt the plastic. |
 |
| |
|
6/20/2003 - 5:00 - Right HS Skin
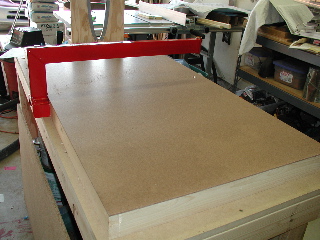
After deburring all of the #40 holes on all of the ribs, spar flanges, and the skin, I dimpled the holes on the rib flanges and countersunk the holes on the spar flanges.
Before I could dimple the skin, I had to make a table for my Avery dimpler. I went to Home Depot and bought a 2' x 4' sheet of hardboard. I ripped some 1" pine to 2 1/4" to form the frame. I used a nail gun to nail the hardboard to the frame. The frame was installed in such a way as to let the dimpler slide under it while letting the lower dimple die protrude up through a hole in the hardboard. The result is a nice dimpling table which is smooth and clean, and stores nicely under my bench.
Once I completed the table, dimpling the first HS902 skin was pretty straightforward.
I spent the remainder of the evening assembling the second half of the HS in the jig, and showing my boys how to cleco. |
|
| |
|
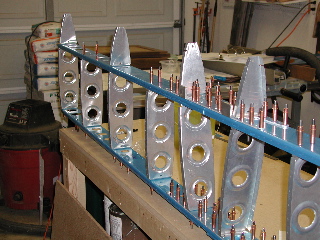
6/21/2003 - 3:00 - Left HS Skin
Everything repeated for the left skin. Install the ribs, cleco every other hole. Install the spars. Drill out all the exposed holes to #40. Switch the clecos to the empty holes. Drill the remaining holes. Remove everything. Debur all the holes. Countersink the spars. Dimple the ribs and the skin.
You can see in this picture that I use a small electric screwdriver to turn the deburring bit. It turns slowly as to not do much cutting, and it saves a lot of repetitive stress. |
 |
| |
|
6/23/2003 - 1:00 - Surface preparation
In preparation for priming I am "scuffing" the surface of each aluminum piece so the primer will stick to it. This takes a while. I am using a Scotchbrite pad, which is similar to one of those plastic sponge thingies you can use to clean pots and pans after you burn the eggs. Except these are more expensive. |
Sorry, no picture today. |
| |
|
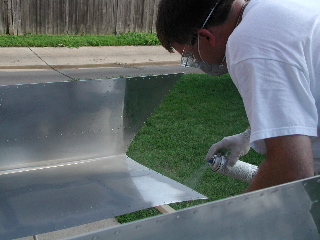
6/24/2003 - 2:00 - Surface Prep/Priming
After scuffing all of the surfaces, I set up a temporary painting area on my driveway.I first cleaned the surfaces with Acetone, which removed all pen marks, and even the blue text printed by the aluminum company.
I think about half the can of primer was lost to the wind, but at least I won't die from ingesting this stuff. The coverage wasn't as uniform as I would have liked. I went around the rivet lines to make sure there was good coverage where metal meets metal.
The downside is that I totally used my only can of primer just on the skins. So, tomorrow I will make another trip to the paint store. |
 |
| |
|
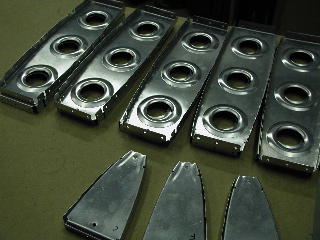
6/25/2003 - 2:30 - Primed Ribs (yummy)
It wasn't quite as windy tonight, and I had plenty of primer, so the priming process went much more smoothly than last night.
I had to figure out a way to remember the markings on each of the parts, since the Acetone cleans everything, including my pen marks, off of the surface. So, I copied the markings from the part onto the wood right next to it. When the parts were dry, I marked them again.
I started riveting the forward spar, and quickly realized that a pneumatic rivet squeezer would be a big help. |
 |
| |
|
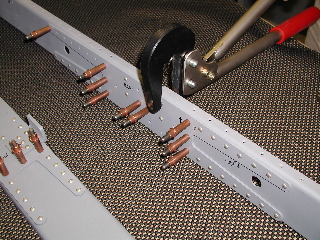
6/26/2003 - 2:30 - Rivet, Rivet, Rivet
I finished squeezing the large rivets on the forward and rear spars. As hard as the squeezer is to use, it sure does make nice looking rivet heads.
I started on the right skin. The nose ribs on each end can be installed with the rivet squeezer, but the middle one has to be done with the rivet gun. I got about nine rivets done, and I had to drill out two of those. |
 |
| |
|
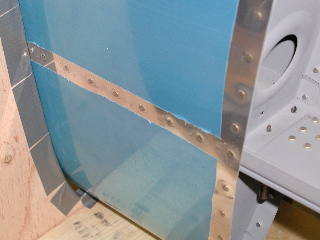
6/27/2003 - 2:00 - Riveting the Skins
I had lots of apprehension about using the rivet gun to rivet the skins, but I am happy to report that the riveting is going quite well. I started to get the hang of it while riveting the skin to the forward spar, and the main ribs have been going smoothly as well.
I wrapped the bucking bar in masking tape to avoid damaging the inside of the skin, the spar, or the ribs. This works pretty well, although I can see a few places where the riveting process has worn the primer off. I'm not sure if I need to deal with that or not. |
 |
| |
|
6/28/2003 - 4:00 - Riveting the Skins
My son ran the rivet gun while I did the bucking. It went pretty fast. We finished more quickly this way.
One task which was critical to have two people was riveting the inboard rib to the forward spar. On the first one, I forgot to rivet these before I riveted the rib to the skin, so there was no way to get the gun in place on the back side, so we had to flip the apparatus over and do it from the front. |
 |
| |
|
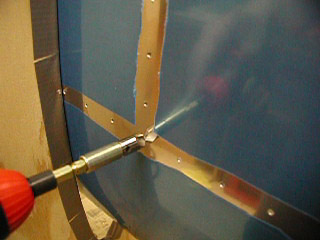
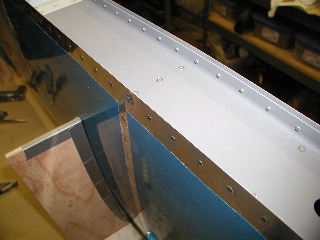
6/29/2003 - 1:00 - Rear Spar
The rivets which connect the rear spar to the skin can be squeezed, but I found it easier to use the rivet gun and bucking bar on the rivets near the hinge brackets, since the squeezer cannot get in there straight.
The rear spar connects to the ribs using blind rivets. I borrowed a pneumatic pop riveter from a friend, and this was real nice. I was able to install the blind rivets pretty quickly. |
 |
| |
|
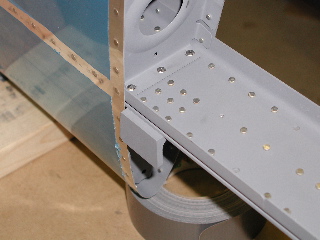
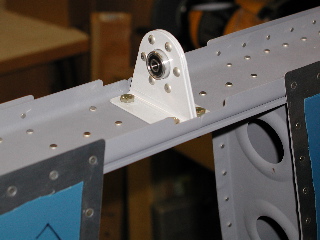
7/4/2003 - 2:00 - Hinge Bracket
I waited for the 4th to finish the HS because family was coming over and I wanted to demonstrate how this thing was going together. The last of the rivets went in, and I torqued the hinge bracket in place.
I have hung the HS in the garage. Next step: the vertical stabilizer. |
 |
| |
|
| Next: Vertical Stabilizer |
|
| |
|
