| |
|
| Previous: Forward Section |
|
| |
|
10/23/04 - Priming - 6 hours
In the morning I went out to the airport and checked out an RV-7A w/slider built by Tom Moore, whom I've met him a couple of times at EAA meetings, and he was kind enough to let me look at his plane. He has been flying for eight months or so, and I wanted to get a look at how some of the components interconnected inside the cockpit. His was a Quickbuild, and I noticed among other things that the edges of the overlapped skins on the fuselage are beveled using a die grinder, so I came back home and modified my skins prior to priming.
|
 |
| |
|
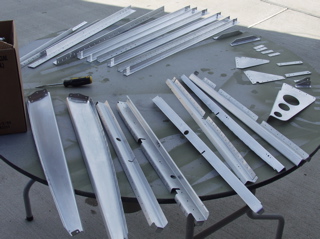
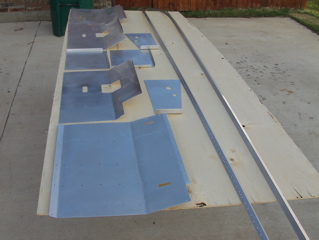
In the afternoon I got to spend some quality time with Acetone and raw aluminum parts. I cleaned up all of the parts that I had previously scuffed up with Scotchbrite pads, and laid them out for priming.
I primed everything, including the seat skins. I figured I will be painting the interior eventually, and I don't want to have to try to scuff and prime the parts after they are in the plane.
If you are planning a special paint for the interior that requires a different primer, then now would be a good time to mask the areas you don't want primed. |
 |
| |
|
10/24/04 - Outside Seat Ribs - 2 hours
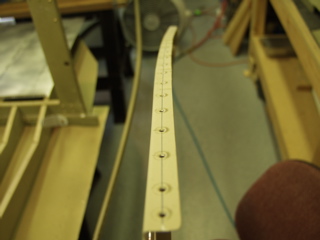
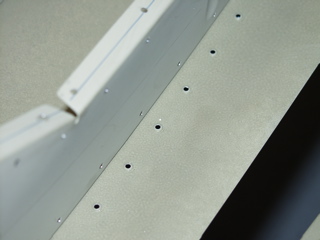
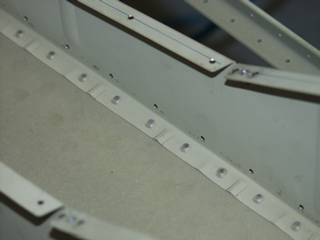
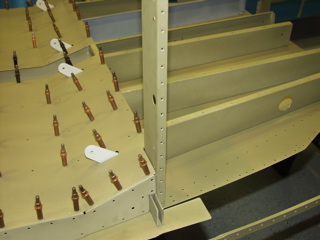
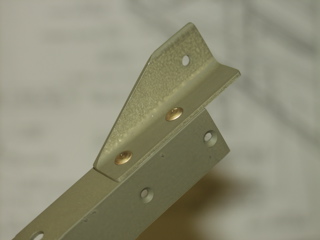
I only had a short time to work today, so I started getting the 916 outboard seat ribs installed. I attached the platenuts to the top, forward holes. I dimpled the bottom holes. The ribs really need to curve slightly to match the holes in the bottom skin, so I made sure they were fluted properly to create the gentle curve.
To the right you can see the curve in the rib. Below you can see how well the curve matches the hole pattern. |
 |
| |
|
 |
 |
| |
|
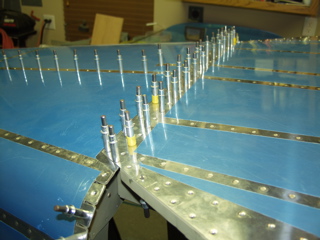
10/25/04 - Dimpling - 3 hours
First I finished working on the seat ribs from yesterday. Next I went ahead and put the seat ribs back in place with clecoes. I'm not sure when I'm supposed to put the platenuts on the seat skins. It seems like now would be a good time to do it while I have easy access, but what do I know?!
|
 |
| |
|
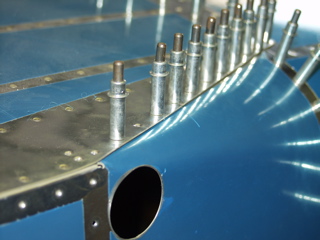
I worked for a while deburring and then dimpling the tailcone skins where the longeron is attached and where the 906 bulkhead attaches. At the aft end of the tailcone it gets pretty tight trying to use the squeezer to make dimples, so I switched to the vice-grip dimpler. This thing works great in tight quarters.
I also dimpled the rear edge of the bottom skin on the center section. |
 |
| |
|
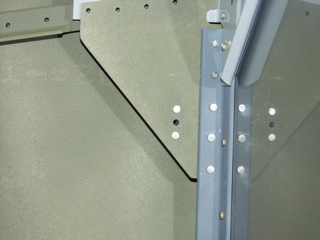
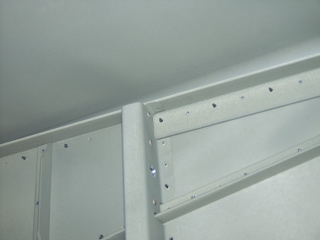
Here you can see the 906 back in place. I deburred and dimpled the 906 flanges to match the skins.
The only place you don't want to dimple is the little tab that sits behind the longeron when it is installed, since the longeron is countersunk, and dimpling the tab at that point would actually do more harm than good. |
 |
| |
|
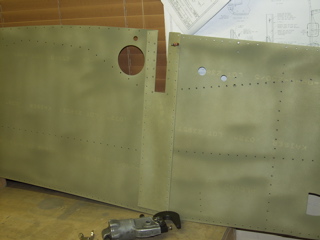
I countersunk the appropriate holes on the outside of the 904H doubler plates.
One thing of interest here is that the rivets at the bottom of this doubler plate are not flush rivets. They are regular round-head rivets. It appears that this area is enclosed by the wing fairings and therefore the flush head rivets are not used.
This part will be "preassembled" with the skins, using a couple of rivets to hold it in place. |
 |
| |
|
10/26/04 - Reassembly - 6 hours
I got lots of small stuff done today. I wanted to get to the point where I could put the side skins back on because they're in my way in the shop.
I started by doing a lot of dimpling. The 905 bulkhead sides need dimpling, so I used a yoke with a short nose along with the small dimple die that came with the Avery kit. This was no problem at all. Even at the top, where there is a doubler plate. The doubler still made the flange only about as thick as the 904 bulkhead flange, so I squeezed the dimples. |
 |
| |
|
Next, I installed the platenuts on the baggage ribs. The plans say to do this prior to assembly, but there are some other platenuts in this area which are not installed until later, so check the plans carefully.
Next I clecoed the corner ribs in place, and I also clecoed the clips. These are sort of tricky to get in place after the skins go on, so I put clecoes in from the inside, and I will remove these once I have clecoed from the outside. |
 |
| |
|
 |
 |
| |
|
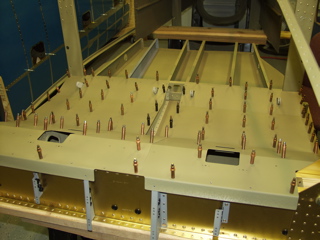
Here we go again. I flipped the center section back over and set it carefully on two sawhorses. It's a good idea not to bump into it while it's set up like this. I can see how you could cause some major damage if it were to fall.
I dimpled the side skins with the C-frame, but for the edges I used the pneumatic squeezer. This is great and works really fast, but be careful, or you'll put a hole where you didn't mean to.
Ouch! I think I'll just put an extra rivet, since there is adequate edge distance. |
 |
| |
|
 |
 |
| |
|
| Next I re-installed the longerons and clecoed them to the skin and bulkheads. The dimples help the parts to sort of click together at this point, making it a bit easier than the first time. |
 |
| |
|
| I got some help from my son to help me re-attach the tailcone to the center section. Somehow I did this myself the first time around, but he's cheap labor, so I got him to go underneath the assembly and help pull the baggage ribs over the 906 flange. It is easier if you can get a cleco in on one end, and then close it like a pair of scissors, moving from one rib to the next until everything has drawn together. Then it can be clecoed fully. |
 |
| |
|
| The 904H doubler plate gets pre-riveted to the side skins at this point, and they get regular round-head rivets around the spar opening. Check your plans to be sure you don't put rivets where they don't belong, because there are numerous callouts. There's even a pop-rivet or two, so beware. |
 |
| |
|
| Before reattaching the side skins, I went ahead and squeezed the rivets to attach the corner ribs. I may find out later that this was a mistake, but from what I can tell, there's no turning back from here, and squeezing rivets is always easier than bucking, especially when you can't reach around the assembly by yourself. So I squeezed these rivets, leaving the rear-outside line of rivets open to accept the bent part of the side skin. |
 |
| |
|
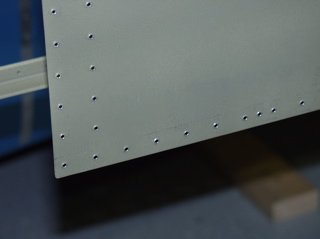
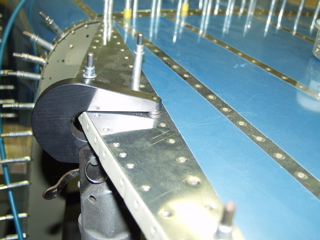
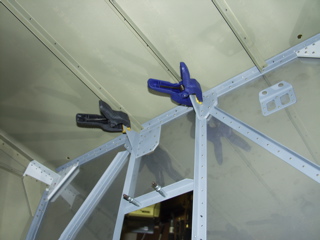
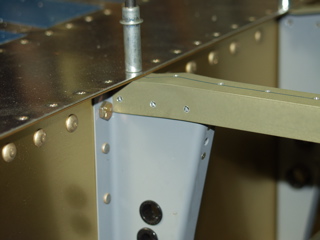
Here's the bend in the side skin I was speaking of. Hint: use your edge-bending tool here to "cup" the edge of the skin downward so you don't end up with a big old gap. The first time I attached this I could tell it was going to be ugly, so I bent the edge and it should be fine. I may have to tap it down on the ends using a hammer, because the bend radius is causing it to stick up a bit on the endas you can see in the picture.
Update: See correction below |
 |
| |
|
| Yes, I did get the side skins back on the plane. Yahoo. Now I have some room on my workbench. |
 |
| |
|
10/27/04 - Nothing, except...
Today I had real work to do, and one of my servers crashed, which is better than my plane I guess, but still it ruined my day. So I didn't get anything accomplished on the fuselage.
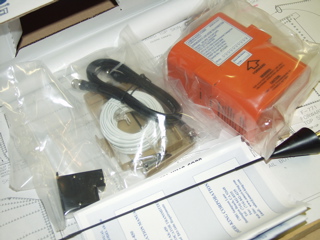
I did receive something in the mail. I had ordered an ELT from SafeAir1 last week, and it showed up today. It is a cheap AmeriKing unit. I opened it up just for a peek, and it looks like everything but the disposable batteries are included. |
 |
| |
|
I went ahead and ordered this unit so that I can install the mounting bracket early rather than later. It also has an indicator that goes on the control panel.
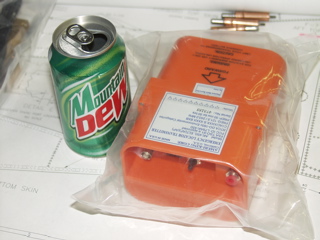
This unit is smaller than I expected. Here it is with a Mountain Dew can just for size comparison. I think I will be able to fit it underneath the baggage floor, but I'm going to have to come up with some sort of trap door or something, you know, Batman style. Stay tuned. |
 |
| |
|
10/28/04 - 3 hours - Stiffeners, etc.
I started by installing the gussets to the firewall. This is best done before the firewall is installed back on the plane. There is a little bit of conflict between the rivets in some places, but I tried to be careful and I only dinged up most of them. :-)
|
 |
| |
|
| Looking at the plans I noticed a hole that I had not yet drilled out. The plans say to enlarge the second hole connecting the 9101 to the 902 bulkhead. I believe this is where the fuel vent line will eventually be routed from the attachment on the side of the fuel tank to the point on the bottom of the fuselage where it vents out. So, remember when I was working on the fuel tanks and I had to route a vent from the top of the tank near the fuel cap? Well, this is part of the same system. I'm glad I didn't miss this. It would be a pain to try to drill later. |
 |
| |
|
Next I attached these little brackets to the longerons and then attached them to the firewall. This is done before the firewall is permanently attached to the fuselage, because otherwise it is virtually impossible to access these holes.
A few days ago (or was it a few weeks ago) I mis-drilled the floor stiffeners and had to order new parts from Van's. I went ahead and primed the parts, so now I had to go back and re-drill the stiffeners, hopefully correctly this time. I have not yet dimpled the forward floor skin. |
 |
| |
|
 |
 |
| |
|
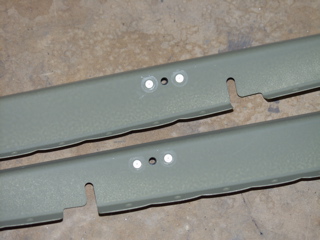
This time they came out great. I made the little cut in the forward part of the two center stiffeners as described on other sites, and this made them sit better against the attachment points on the firewall.
I'm getting closer to having to start thinking about riveting all this stuff together permanently. |
 |
| |
|
10/29/04 - Problem Solving - 5 hours
I found several things I either didn't do, or that I was in the position of doing wrong if I didn't take care of them, so although I didn't accomplish a lot, I probably saved myself lots of headaches later.
Before I get to those things, I'll show you the work I did on the floor stiffeners. These were drilled to the skins yesterday, and today I had to drill them to the brackets inside the plane. I decided this would be easier accomplished with the bottom skin off the plane. |
 |
| |
|
This would been dang near impossible with the skins on. Instead, all I had to do was position the squeezer and pull the trigger. Couldn't have been much easier than that.
Below you can see a cool set of pictures showing what both ends of one of the center stiffeners looks like after I riveted it. |
 |
| |
|
 |
 |
| |
|
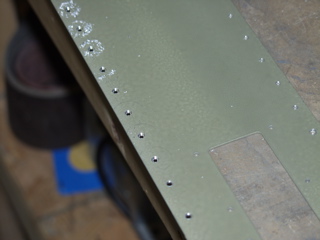
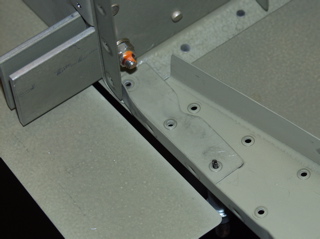
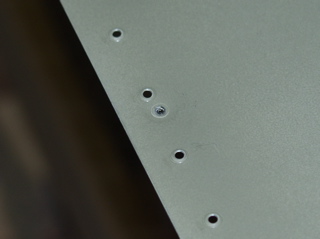
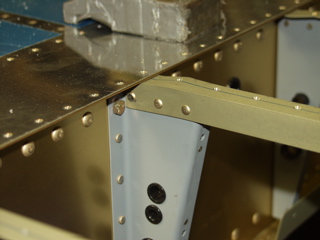
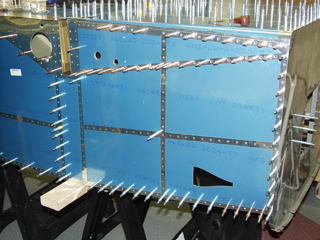
Well, here's the first place that I had to correct. Remember the other day when I mentioned how these side skins stuck out where they overhang the fuselage? Well, after more careful examination of the plans...okay, maybe I noticed it by accident...I discovered that I am supposed to tuck the side skin underneath the bottom skin.
It makes sense. The bottom of the fuselage is an airfoil of sorts, and you don't want anything sticking up from the surface that can cause drag. Fortunately I had left enough of the rivets open that this wasn't difficult to tuck the skin between the corner rib and the bottom skin. Doesn't it look better?! |
 |
| |
|
Here's the second thing I noticed. I installed the gussets to the firewall without installing a platenut that the plans call for. These platenuts are used to secure an adel clamp that routes the vent line.
So, to fix this I had to peel back the side skins and drill, debur, countersink, and rivet the two platenuts. I sure am glad I caught this before I riveted the skins. |
 |
| |
|
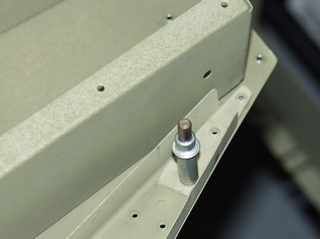
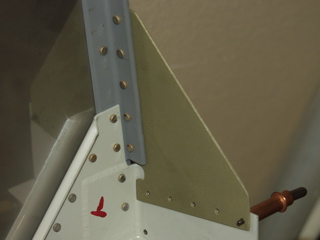
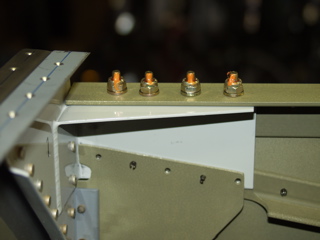
After putting the skins back in place, I installed the bolts which attach the bottom longeron to the firewall bracket. These are torqued and then I put some orange torque seal on them. Perfecto.
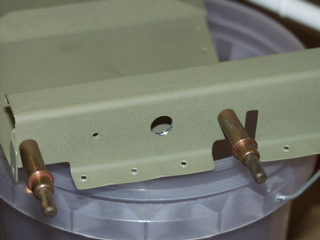
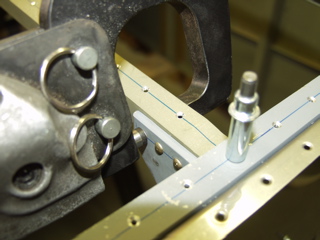
One more issue arose that I spent a while addressing, and that is that the instructions say to install five of the rivets on each side of the 904 bulkead "double-flush". Well, it is totally impossible to countersink the inside of the flange, and reverse-dimpling won't work either. I went so far as to test-fit the landing gear mounts to see what type of clearance I was going to need. |
 |
| |
|
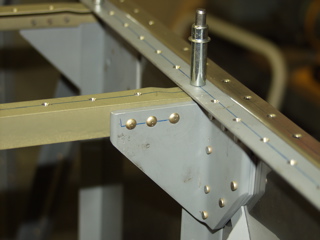
I went hunting on other builders' websites to see what other guys have done to reconcile this. It seems that some people don't even mention it, but the ones that do said that there appears to be adequate clearance behind the gear mounts that you don't really have to double-flush the rivets.
That's the same conclusion I came to. There's probably 3/8" of space behind the gear mounts, which is plenty of space. |
 |
| |
|
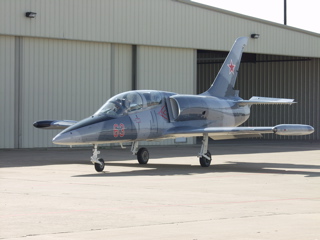
10/30/04 - Riveting - 6 hours
I went out to the hangar today. While I was there I watched this L39 depart. That's not something you will see every day at a GA airport! |
 |
| |
|
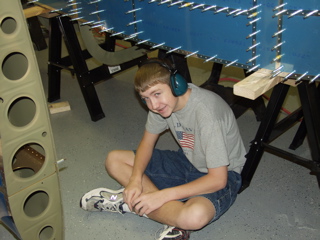
I went through my usual set of riveting helpers. I got Tim to help for a while. He did the armrests. I worked by myself for a while, but there's not a lot you can do without a helper. Jonny volunteered, so he helped with the left side 902 bulkhead and one of the stiffeners. I finally taught Melissa to rivet. She did a great job too.
There's a lot of riveting to do. |
 |
| |
|
| Here's another gocha. I hadn't yet riveted the bottom of the 902 bulkhead to the lower longeron before I installed the bottom forward skin. At first this doesn't seem like it would be a big deal to just rivet, since there's about 1" of clearance betweeen the bottom of the longeron and the skin. The problem is that you can't easily get the squeezer or rivet gun into place, and the bucking bar would almost certainly dent the lower skin. So, I once again removed the bottom forward skin and floor stiffeners, which takes about 10 minutes of cleco removal. Do yourself a favor and rivet these two rivets before you put the skin on for the last time. |
 |
| |
|
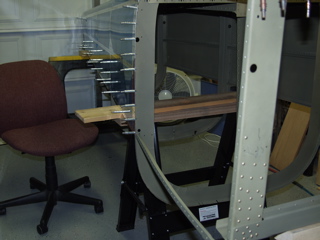
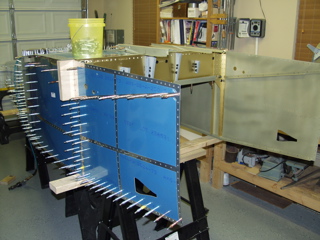
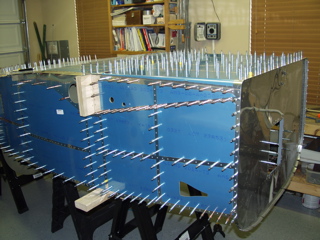
| So here's the status after today. I riveted a bunch, but it is slow work, so it doesn't really seem like I have a lot to show for all the time I spent. |
 |
| |
|
10/31/04 - More Riveting - 3 hours
One of my riveting helpers (Tim) is sick, so my options are sort of limited for getting the fuselage riveted together. Jonny (who is 9) helped me for a while, and I did a bunch solo. Hopefully tomorrow I can get some more help. |
| |
|
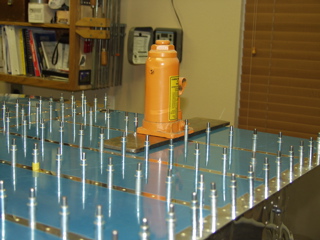
11/1/04 - Riveting - 2 hours
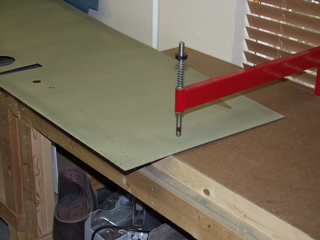
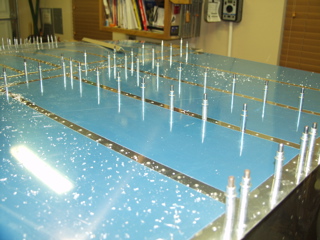
Trying to get as much of the riveting done by myself, I came up with a cool way to rivet the floor stiffeners. I figured out that I can place the back riveting place on top of the skin and, using a heavy weight to keep it in position, back rivet from the inside. I used a bottle jack for weight, since it is heavy and compact. This setup worked really well except for a couple of places where the skin was slightly uneven. |
 |
| |
|
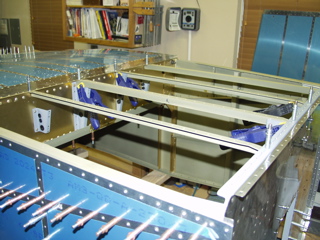
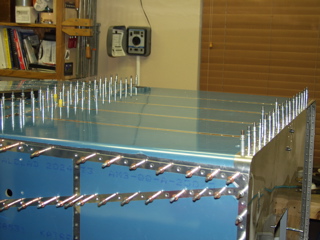
| Here it is mostly completed. I only set three rivets at a time, since that is all that would fit in the width of my back riveting plate. I didn't want to remove too many clecoes , so I would set three rivets in their holes, place the plate and the bottle jack over the rivets, go inside and back rivet, then come back and remove some more clecoes and do it all over again. The results are nice but my back is hurting! |
 |
| |
|
11/2/04 - Riveting - 3 hours
At this point in construction I spend a lot of time referring to Dwg 28, the page of the plans that shows all of the rivet callouts for the skins. This is important because there can be different rivet callouts even in the same row of rivets. Of course, it's all based on the thickness of the material being joined and the number of layers, but it is sometimes difficult to tell the difference between an area requiring -3.5 rivets and one requiring -4 rivets. |
 |
| |
|
I managed to get an hour of help from Tim, so we were able to make some progress on riveting the skins. I also did the remaining rivets on the rear bulkheads that were left open to allow the longerons to be installed. I did most of this while watching election returns.
So, the number of rivets remaining has diminished somewhat, but I still have a bunch to do. Hopefully with another long session I can get everything buttoned up. |
 |
| |
|
11/3/04 - Riveting - 2 hours
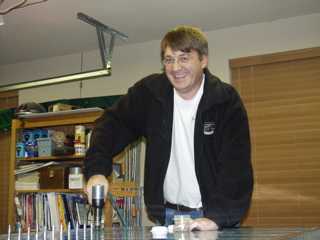
To satisfy the FAA that I really did do the work on this plane, here is a picture of me driving rivets on the bottom of the fuselage. The goofy smile is to show that this really is fun.
I got more rivets done, but there are still more to do. |
 |
| |
|
11/4/04 - Riveting - 1 hour
I got Tim to help me for an hour to get some of the difficult rivets along the lower spar. |
| |
|
11/5/04 - Riveting - 6 hours
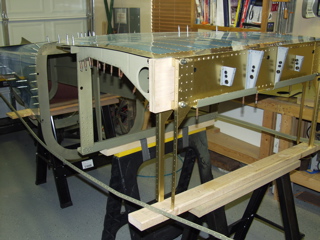
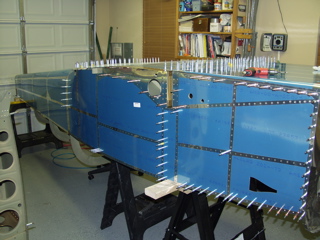
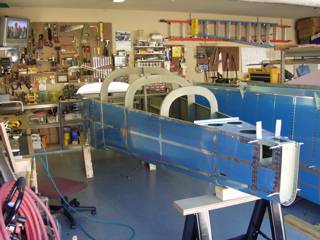
My dad came to town this weekend to help me with the plane. This was great because I needed some help to get these pesky rivets finished up. We worked most of the day on riveting, followed by some woodworking as I had to build a short stand to put the fuselage on. Then we had a big time flipping it over. It was cool to see the plane right side up for once. |
 |
| |
|
 |
 |
| |
|
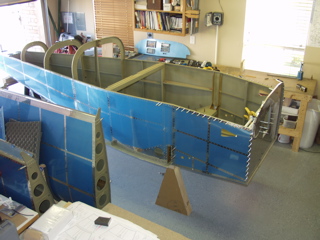
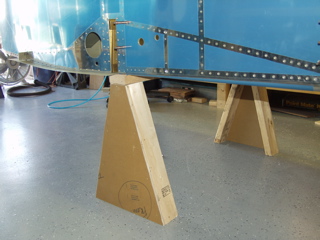
Here's the stand I built. I need to brace it laterally to keep it from collapsing if the fuselage is pushed sideways, but it is sturdy and level.
The benefit of this type of stand is that it can be used when fitting the wings. Others have built stands that attach to the spar where the wings go, only to have to redo their work when it comes time to fit the wings. There's a lot of stuff you can learn by reading other people's construction logs. :-) |
 |
| |
|
| Next: Top Skins |
|
| |
|
