| |
|
5/9/2004 - Rear Spar - 1 hour
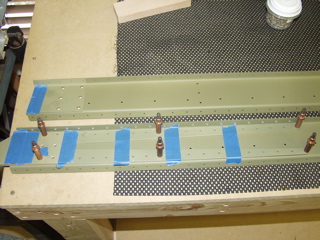
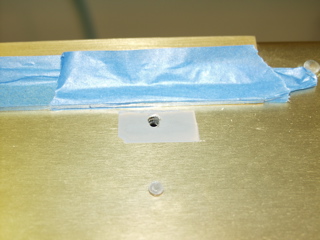
To begin the assembly of the rear spar, I spent some time determining which holes should not be riveted until later in the assembly process. These holes I covered with masking tape.
It is a bit confusing to look at the plans, which show only the left wing, and then try to extrapolate mentally what the right wing should look like. Fortunately, I am doing them at the same time, so I simply try to create a "mirror image" of the left spar.
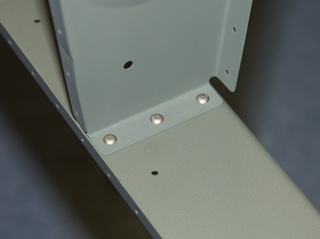
It also appears that some of the important holes are not marked as "rivet later" on the plans. You must decide for yourself that you have to put a bracket here, or a rib there, before you rivet. I found, for example, that the outboard aileron attachment is held in place by a bracket which must be installed over top of the rivets for the outboard main rib. Therefore, the rivets for the outboard main rib must be countersunk to allow the bracket to sit flush. |
| |
|
| 5/10/2004 - Rear Spar & Assembly - 3 hours |
I began by dimpling a few of the holes recommended in the instructions.
After verifying that the holes that shouldn't be riveted were covered by tape, I began riveting the spar.
Once again I am so extremely happy that I have a pneumatic squeezer. It made riveting these rather large rivets a breeze. |
 |
| |
|
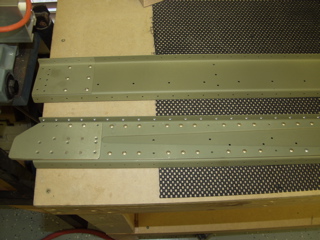
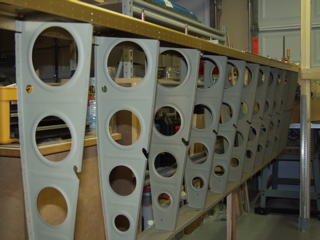
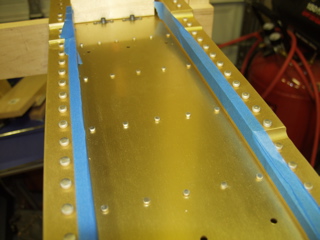
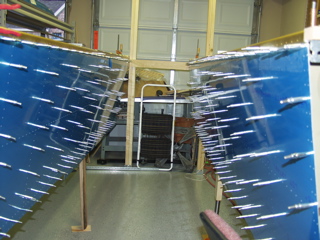
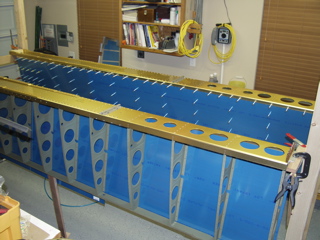
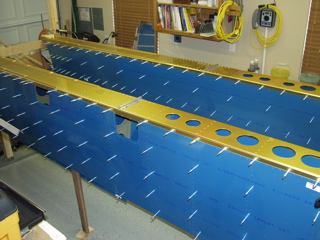
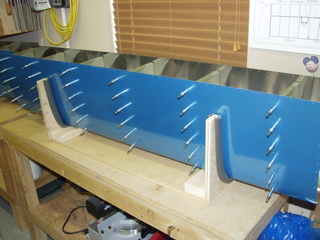
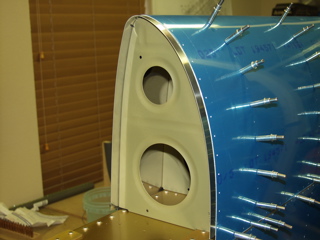
| Here are the rear spars after I finished. Nice, huh? |
 |
| |
|
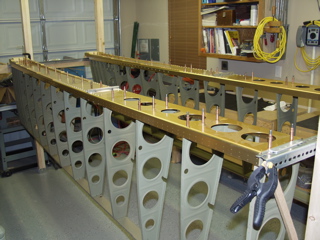
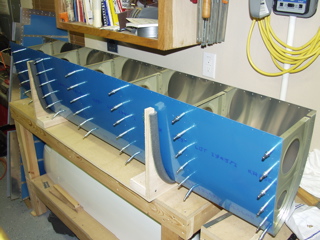
| After finishing with the rear spars I assembled the main ribs. This feels like progress. |
 |
| |
|
| 5/11/2004 - Drilling, Deburring - 4 hours |
I match-drilled the holes attaching the main ribs to the spars. This took a while since there are quite a few holes. On the rear spar there are only three holes, so it's drill, move a cleco, drill, move a cleco, drill, etc.
It was sort of depressing to take everything apart, but it has to be deburred, so once again I had a stack of ribs. |
 |
| |
|
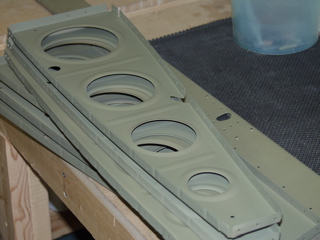
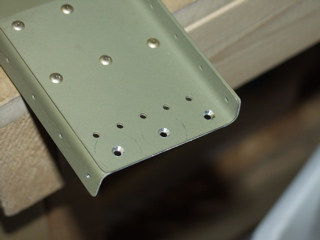
| The instructions call for aluminum angle to be bolted to the outboard main rib so it can be attached to the wing stand. |
 |
| |
|
All of the holes had to be deburred, so I deburred...
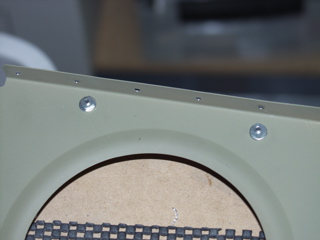
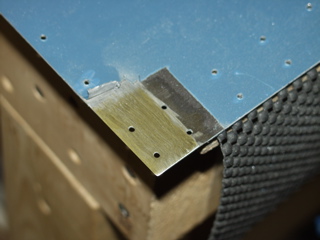
The rear spar needs to be countersunk on the outboard rib. |
 |
| |
|
| Looky here, back together again. |
 |
| |
|
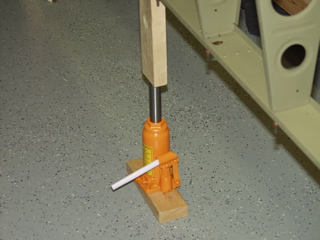
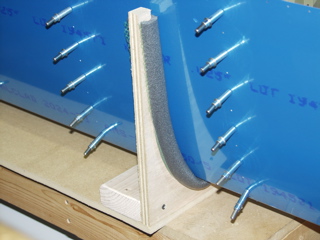
| Oh, I didn't show you the jack that I used to hold up the center of the wing. Here it is... |
 |
| |
|
| 5/12/04 - Riveting the Skeleton - 3 hours |
The wing main ribs are riveted to the main spar and the rear spar using mostly AN470 rivets, but it is important to note the sizes called out on the plans. Whenever there is a doubler underneath the rib, the rivet length is longer. I used the pneumatic squeezer for all of the rivets on the rear spar. |
 |
| |
|
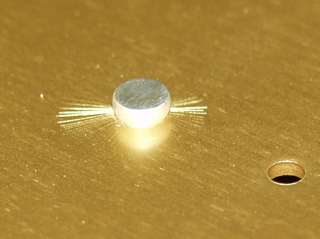
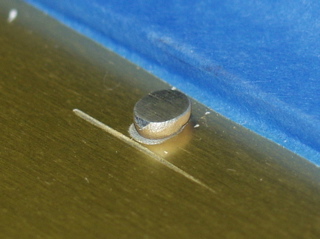
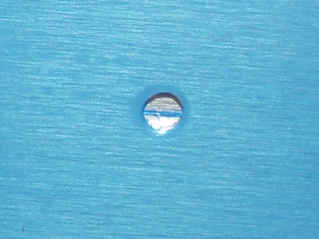
This is a bit weird. When I riveted the main spar in a couple of places, the anodized finish made sort of a spider effect radiating from the hole. This only happened in a few places, but I wonder if this is a problem. I am going to check into it.
Update: This is apparently a common occurrence with the Anodized surface, and won't propogate through to the spar. |
 |
| |
|
| On the main spar I had to use the rivet gun and bucking bar to set the rivets. I was able to do most of this by myself, but I stopped when I got to the rivets next to the big spar doublers. I messed one up pretty good as is shown here. I am going to have to drill it out and fix the scratch. |
 |
| |
|
I figure I'm about halfway through the riveting process on the main ribs.
|
 |
| |
|
| 5/14/04 - Riveting - 2 hours |
With the help of my son, Tim, I finished the rivets along the edge of the spar. We made some mistakes here and there, and I had to drill out a few, but most of them went easily.
The rivet gun needs to be at around 60 pounds of air pressure to be able to do these large rivets. Any less and the rivet gun just bounces around and tears up the head of the rivet. |
 |
| |
|
| Here is what the spar looks like where I had slipped with the bucking bar. I used a scotchbrite wheel and buffed out the scratch. Then I masked around the hole and sprayed primer on the raw aluminum. |
 |
| |
|
5/15/04 - SWRFI
I took today and drove down to New Braunfels for the EAA Southwest Regional Fly In. It was really fun. There were tons of planes and people to talk to. We walked around for about five hours and had a good time checking out all the planes. I saw several RV-9As, and I spoke with several of the builders. |
| |
|
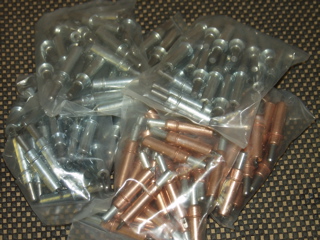
| Avery Tools had a tent at the show so I bought some necessary tools. I bought about 150 clecoes, which is probably still not enough, but it should be close. |
 |
| |
|
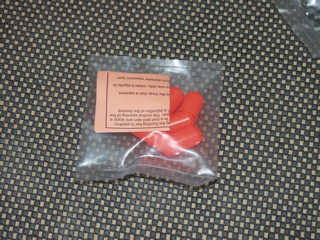
I also bought these boots for my rivet set. They are supposed to cut down on smiles. I'll let you know if they work.
I also found the Aircraft Spruce booth and they had some Alodine, so I was able to buy it without paying the hazardous shipping charge again.
So, although I didn't get anything done on the plane, I did make a little progress. |
 |
| |
|
5/18/04 - Spar Riveting - 1 Hour
I used the boots pictured above to finish the rivets on the spar. Man, these work great. I highly recommend these for riveting AN470 rivets. I didn't have any disfiguring of the manufactured heads at all. My son, Tim, helped me again, and it went great. |
| |
|
5/18/04 - Top Skins - 2 Hours
This was fun. There are a couple of situations where you can really tell how well designed these kits are, and this is one of them. After assembling the skeleton and worrying about fluting, having all the holes just match up is really cool. Yet another thing you quick build people are missing out on.
I had to "make" the wing walk doubler plates from some material specified only by it's size. The funny thing is that I didn't have to cut anything. All I had to do was line it up and drill it. |
 |
| |
|
This was also a great event because my wife finally got involved in the project. I have an extra pair of cleco pliers, so I got her going installing clecos.
I then match-drilled the holes, including the un-drilled holes in the wing walk doubler, which I couldn't find in the instructions but is pretty evident on the plans. This is thick material and it took a while to drill all of the holes. |
 |
| |
|
5/19/04 - J Stiffeners - 1 hour
I finished match drilling the left skin, then I cut the J-stiffeners to length.
The instructions say to slide the J-stiffeners into the skin, but the funny thing is that I can't open my garage door very far. Fortunately it was just enough so I could slide the stiffener under the door and into the groove in the wing ribs. Then I realized that I neglected to mark the center, so I had to remove them and do the whole process over again. |
 |
| |
|
5/20/04 - J Stiffeners - 1 hour
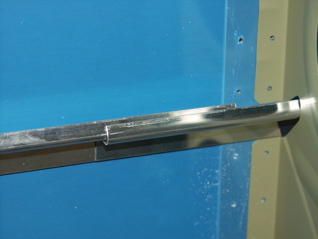
I made a quick call to Vans this morning because the instructions say to butt the edge of the j-stiffener up to the edge of the outboard skin. It appeared to me that it should be flush with the outboard rib. This turned out to be correct. I have included a picture because I couldn't find any pictures of this anywhere else. |
 |
| |
|
A line is drawn 3/8" from the flat edge of the stringer. This turned out to be too much by about 1/16", so I redrew the line and tried again. The results looked like this. Once you get started, as long as you keep everything together with clecoes, it doesn't wander around much. Just check to see that the line is centered in the hole before drilling.
I got the right wing mostly drilled before I had to quit. |
 |
| |
|
5/24/04 - Bottom Skins- 2 hours
I finished the rest of the right wing, and then the left wing. Next, I attached the bottom wing skins.
Running a bit low on clecoes, I distributed them in what I considered to be a satisfactory pattern to attach the skins, but I was still short, so I had to move them around a bit to make sure the skins were properly held in place while I match-drilled. |
 |
| |
|
5/25/04 - Skins - 4 hours
The bottom skins are a little easier because there is no j-stiffener.
The corner of the inboard skin beneath the outboard skin needs to be to tapered so that it sits flush to the tank skin. |
 |
| |
|
| Next, I build the cradle. I used some tubing insulation to pad the edges. |
 |
| |
|
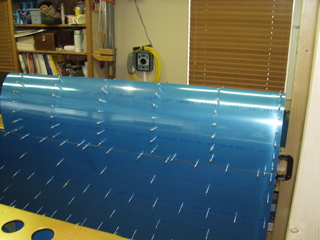
| The leading edge skin was next. I clecoed the ribs into place according to the plans. |
 |
| |
|
5/26/04 - Leading Edge - 3 hours
I built a second wing cradle so that I can do both fuel tanks at the same time.
I clecoed the ribs the same as the before, except since this is for the left wing, it is opposite the right one. There's nothing strange here except it is a little tricky to get the ribs in tight enough to match up the holes. Nothing a little pressure can't fix. |
 |
| |
|
| Next comes some more fun. I lifted the leading edge assembly out of their cradle and set it down on the main spar. Now that looks more like a wing. I attached it with clecoes in preparation for match-drilling. |
 |
| |
|
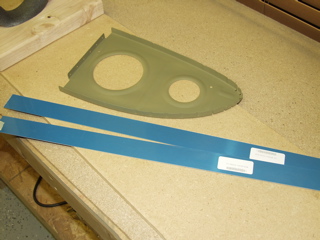
| The next step is to fabricate the W-919 attachment plates. The plans and instructions don't go into much detail on how to do this, so I spent some time on ye ole internet digging up some suggestions. I'll attack these tomorrow. |
 |
| |
|
5/27/04 - Leading Edge - 3 hours
To start, I pre-bent the W-919 plates around the W-908 rib. Then, I marked the desired length for th W-919. The material is easily cut with a pair of Wiss cutters.
The bad thing is that the material doesn't want to hold the shape that it is bent.
A centering line is drawn onto the W-919 so it can be positioned beneath the pre-drilled skin holes. |
 |
| |
|
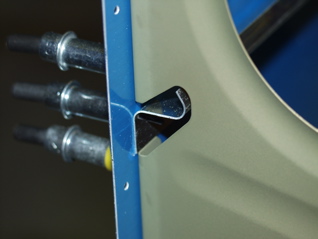
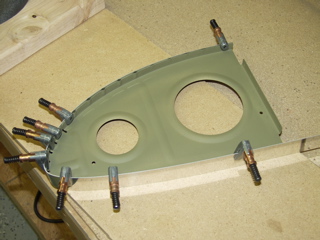
| Fitting the W-919 under the W-908 rib is sort of tricky. I found it easiest to leave the rear flange of the rib loose so I could push the rib inward until the W-919 is in place. Then, the rib can be pulled back into place. |
 |
| |
|
Here is the assembly all ready to be match-drilled. I match-drilled these parts, as well as all the holes in the leading edge skins. Finally, I match-drilled the holes in the rib flanges where they attach to the spar.
Everything is drilled. The instructions now say to "Get busy on the fuel tanks!" Yikes. |
 |
| |
|
| Next: Fuel Tanks |
|
| |
|
