| |
|
| 4/22/2004 - Countersinking - 3 hours |
|
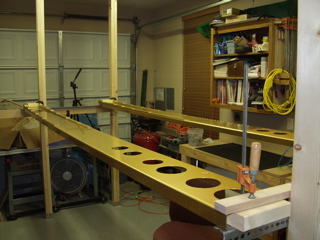
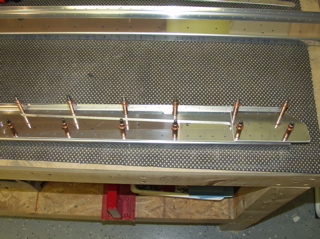
I spent some time getting the spars attached to the wing stand. I know I will need to remove them and reattach to the rib later, but this was the best way to keep the workshop from becoming a nightmare.
The left spar is on the left side, the right spar is on the right, with the tops of the wings on the inside. This will make visualizing the orientation of the parts much easier (I hope.) |
 |
| |
|
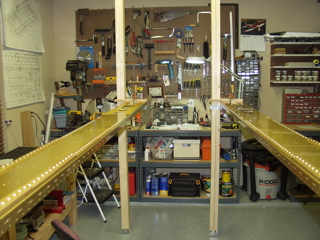
I am pretty happy with the space I have allowed between the wings. There seems to be plenty of room to work, which was my main concern. I used the bench grinder to take all the sharp edges off the steel angle that I used to attach the spars to the posts.
Finally, down to business. There are 62 nutplates which attach the tank to the spar of each wing (124 in all). I need to rivet the nutplates, and then countersink the screw hole to accept the dimpled skin. |
 |
| |
|
This is the first indication that the instructions for the wing are less verbose than the Empennage. The instructions say "rivet the nutplates to the spar." I am supposed to know that the holes must be drilled to #40, deburred, and machine countersunk. This is fine, but I need to be in the habit of "reading between the lines" in the instructions from here on out.
I got about half of them countersunk. |
 |
| |
|
4/23/2004 - Countersinking - 4 hours
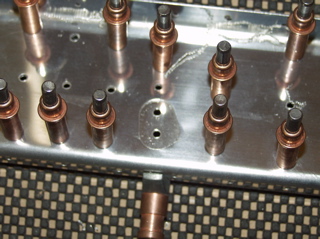
I finished countersinking the rivet holes for attaching the tank attachment platenuts to the spar.This was pretty easy, but there are a lot of them to drill. I went ahead and attached the platenuts with two clecoes so that I could be sure that both holes were properly aligned. The pneumatic squeezer made it really easy and smooth to rivet the platenuts. Notice in the picture that I put some tape to protect the underside of the spar in case I were to stray with the squeezer. |
 |
| |
|
Next, I made a test piece with a spare platenut so I could set the microstop depth. After several attempts I realized that my sample dimple was not properly formed, and after squeezing it more strenuously I was able to make a nice countersink for the dimple to sit flush.
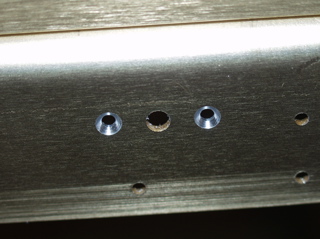
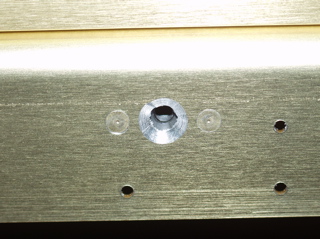
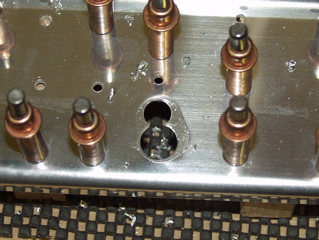
This is the "before" picture of the platenut. I got all set up with my microstop countersink and proceeded with the same approach as the countersinking I did for the rivets. Unfortunately, this didn't turn out so good. |
 |
| |
|
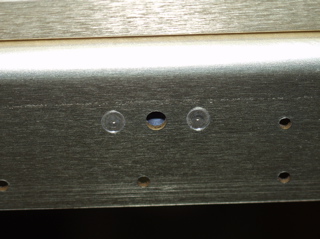
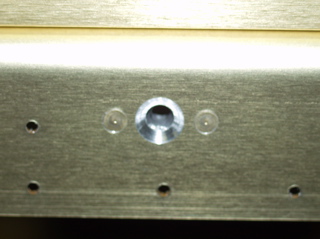
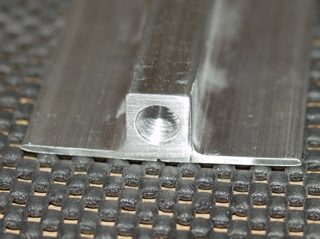
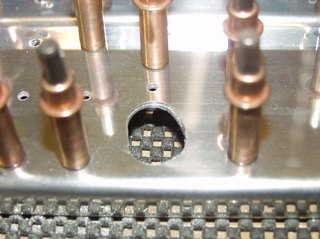
| This is the "after" picture for my first one. Notice that the hole is somewhat deformed. I discovered that if you don't take your time and feed the countersink into the material slowly, that it makes this unsightly hole. I found that if I hold the microstop cage securely against the spar and slowly fed the bit into the material, it would usually stay nice and round. At any hint of an oscillation I would back the bit up and slowly resume. This process took a lot longer and made my arms sore, but it worked. |
 |
| |
|
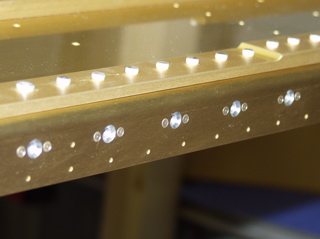
Here is a picture of the results of my new process. Notice that the hole is nice and round, and the bottom of the hole is not broken up like it is in the photo above.
The main problem stems from the fact that the pilot on the countersink is not engaged by the platenut until about halfway deep into the hole. So, it would actually get easier the deeper it went. |
 |
| |
|
4/24/2004 - Countersinking - 5 hours
After much labor I now have nice even rows of mostly round countersinks. This anodized aluminum is tough to drill. I think it may have dulled my countersink bit by the time I finished the 124 holes! |
 |
| |
|
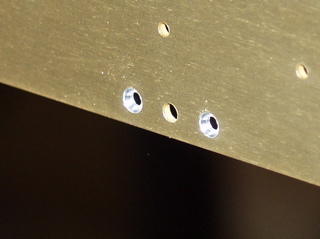
| Next came the inspection panel attachments. These are a different size. They hold a #6 screw instead of #8. I countersunk and riveted these to the spar. There are 24 of these in all. |
 |
| |
|
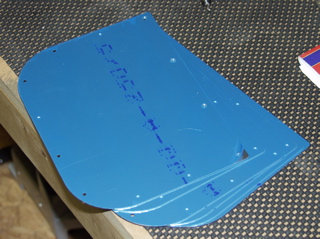
4/25/2004 - Inspection Covers- 1 hour
In order to properly set the depth of the countersinks for the inspection panel attachments, I had to go ahead and dimple the holes in the panels, so since I was already messing with them, I went ahead and did everything. I drilled, deburred, dimpled, and cleaned up the edges. The only tricky part is that there are two sizes of dimples. The holes along the flat side attach to the spar, and are #6 screws. The others are #8 screws. |
 |
| |
|
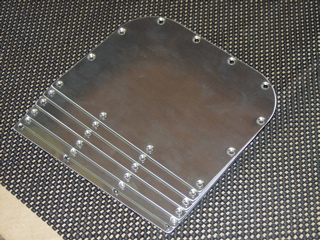
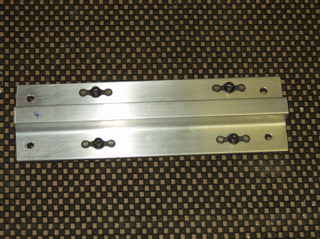
| Here is what they looked like once I was finished with them. |
 |
| |
|
4/26/2004 - Tiedown brackets - 5 hours
Tonight I started by installing the platenuts at the root of each wing which are used when attaching to the center section. I temporarily removed the spars from the wing stand so I could get the rivet squeezer over the end of the spar.
Next, the instructions say to prime the countersunk holes where I removed the anodized finish. I used Alodine and dabbed a bit on each hole. This turned out working great and the gold sort of matches the color of the spar. Not that anyone will ever notice... |
 |
| |
|
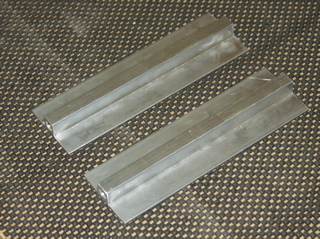
The majority of my time was spent fabricating and installing the tiedown brackets. These are installed differently than the ones on the -7 or -8. After watching the video I looked at my instructions and I think the -9 design is much more straightforward and easy to build.
The first task was to cut them to length. After cleaning up my cuts with the scotchbrite wheel I got to try my hand at tapping threads.
|
 |
| |
|
| I bought a cheap ($8) tap and die set from Harbor Freight. I clamped the bracket in my bench vise and then worked really slowly with the tap. They turned out great. I need to order a pair of tiedowns before I go flying! |
 |
| |
|
| Next, I drilled one of the holes as the plans describe, and I put a bolt in it. This first hole is drilled by measuring from the edge of the bracket the proper distance. The remainder of the holes are drilled in assembly, meaning that I had to go under the spar and drill up through the pre-drilled holes in the spar to create completely aligned holes in the bracket. |
 |
| |
|
Before drilling, I used a carpenter's square to make sure the bracket was installed square to the spar. The plans don't say anything about doing this. It only says to "attach" and "match-drill."
Yes, my square needs to be cleaned. |
 |
| |
|
Each time I drilled a hole, I inserted a bolt. Notice how nice and centered my bolts are? That's because I'm a Geeeeenius! I sure am glad I spent that year studying Geometry...
I'm also glad I didn't drill my finger. Since my spars are on the wing stand, I was drilling up through the bottom of the spar (because that's where the existing holes are) and I had to be careful not to hold the bracket where a hole was about to be made. |
 |
| |
|
Once the first four bolt holes are drilled, I match-drilled the second set of holes. These get platenuts, and will eventually hold the bellcrank brackets to the aft side of the spar.
A bellcrank is a mechanical thingy that the aileron will eventually be attached to so I can control the roll of the airplane. It will look a little bit like a bell, I guess, but it isn't supposed to make a ringing sound, just in case you're wondering. |
 |
| |
|
| Here you can see the platenut attach holes have been drilled. What you can't see is that these holes are machine countersunk on the back side of the bracket to accept flush rivets. That's because the platenuts go on the front side of the bracket and the bracket will still be able to sit flush on the spar. |
 |
| |
|
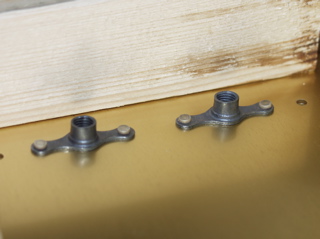
| Finally, the platenuts are installed onto the bracket. |
 |
| |
|
| After re-installing the bracket, the brackets are attached to the aft side of the spar. Oh yes, I had to double-check a bunch of times that the threaded end was on the bottom. |
 |
| |
|
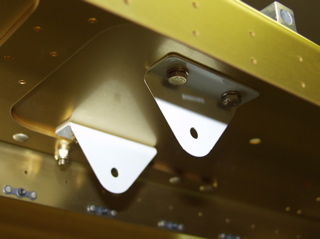
Here is a picture of the bellcrank brackets attached to the spar. You may notice that there are washers between the bolt head and the bracket. That's because they are screwed into the platenuts on the other side. Since the platenuts don't turn, the bolt gets the washer.
Oh yes, did I mention that I did all of this twice? Two wings, remember? |
 |
| |
|
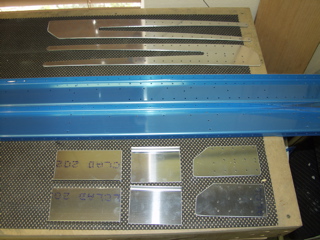
4/29/2004 - Rear Spars - 5 hours
The rear spar is much smaller and less intimidating than the main spar, and initially all I had to do was match-drill some holes, so I jumped right in.
I started by cleaning up all of the edges with a belt sander and a scotchbrite wheel. Some of these parts are made of thick material, so the belt sander was necessary so I didn't burn through my expensive scotchbrite wheels. |
 |
| |
|
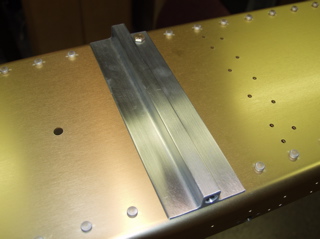
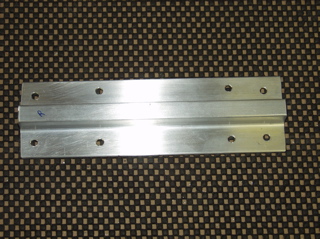
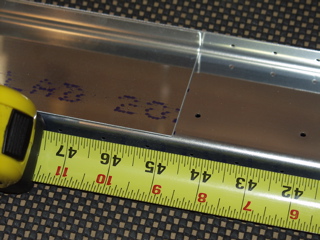
| Once the parts were deburred and cleaned up, I marked the left and right spars, as well as their orientation. The first step is to determine the correct position for the middle doubler plate. It is positioned 44 3/4" from the tip of the spar. |
 |
| |
|
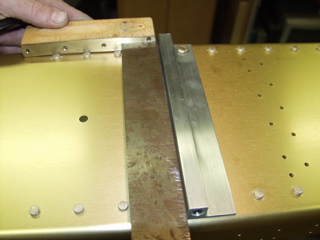
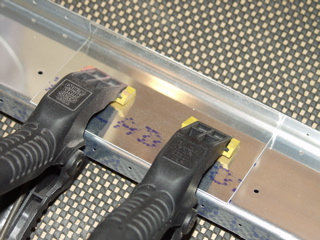
| Once in position, the parts are clamped so they can be match-drilled to the holes already punched in the rear spar. |
 |
| |
|
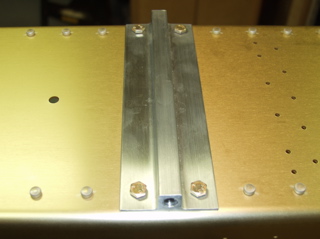
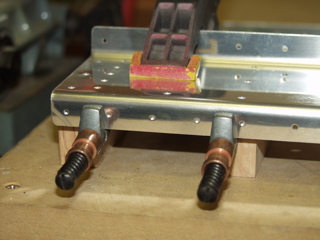
| One thing I did which was helpful was to place the piece I was drilling on top of a couple of wood blocks. This made the surface flat and minimized the amount of pressure I was placing on the clamps. |
 |
| |
|
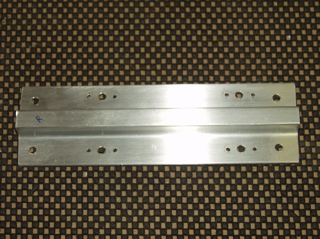
| There's a really big and oblong hole that must be match-drilled. This is the hole where the aileron pushrod will go. To do this, I first put two small pilot holes in the big hole. |
 |
| |
|
| Next, I used a Unibit to expand each of the holes. |
 |
| |
|
| Finally, I used a Dremel tool to expand the hole to match the prepunched hole in the spar. |
 |
| |
|
| Finally, the remaining parts could be match-drilled. I then took everything off and deburred the holes. There were a few holes which were countersunk as well. I am going to set this aside until I finish preparing the ribs, so I can spray primer on the whole mess at one time. |
 |
| |
|
| Next: Ribs |
|
| |
|
