| |
|
| Previous: Bulkheads |
|
| |
|
9/25/04 - Assemble, Drill, Debur - 12 hours
Today I started with a very specific goal in mind. I wanted to get the tailcone put together so I could see something that looks like part of an airplane. It has been a long time since I've seen any visible progress on the project, so I decided to work really hard to get this fuselage looking like something more than a bunch of scrap metal.
I started by cleaning up the garage and setting up the sawhorses. |
 |
| |
|
I had to cut the j-stiffeners to length and add the little cutout detail to each end. I mistakenly only put the cutout on one end, and quickly figured out (after assembling) that the other end needs the cutout as well. So, naturally there was a little disassembly taking place so I could fix my mistakes along the way.
Make sure you have your flanges bent to the same angle as the fuselage skins, or you'll be taking it all apart again to make the adjustments.
|
 |
| |
|
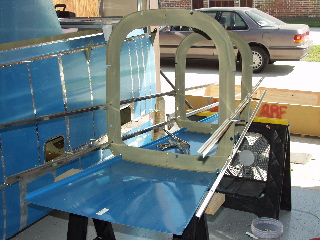
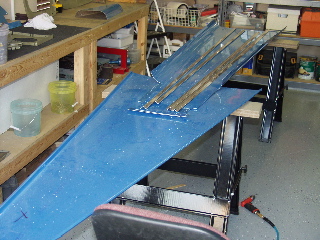
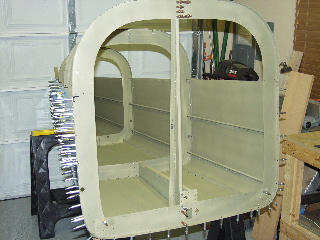
| Here is the assembly prior to installing the tail piece. |
 |
| |
|
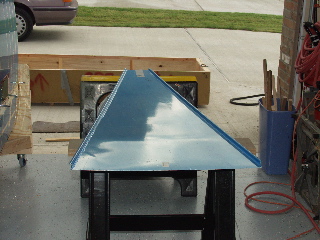
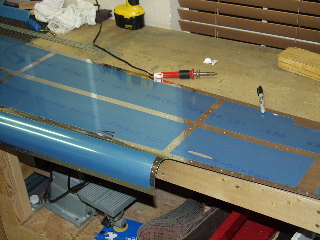
And here it is later with the tail piece installed. Note: the tail skin goes inside the main skins. Imagine if it were to rain on the plane. Do you really want a seam that catches water? No.
The tail piece is difficult to get into place. Just keep at it and try not to damage anything. |
 |
| |
|
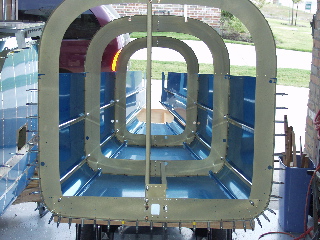
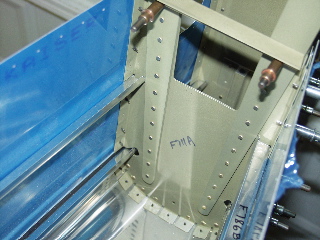
Once installed you will have to avoid putting rivets in the side holes where the skins join. That's because the lower j-stiffeners are attached to those holes as well, and they are not yet drilled. |
 |
| |
|
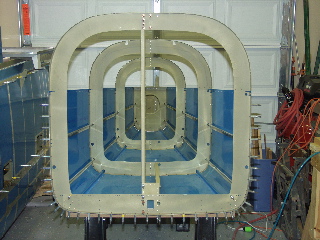
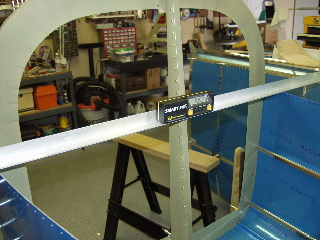
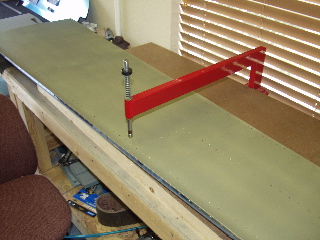
| Before drilling make sure there isn't any twist in the assembly. The instructions say to use a plumb bob to detect twist. I did that but was uncomfortable with the accuracy, so I also used my SmartTool to measure the angle at the front and the back of the assembly. One little shim and the numbers were on the money. |
 |
| |
|
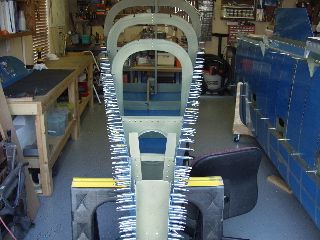
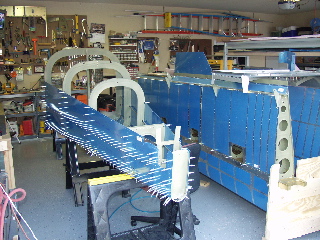
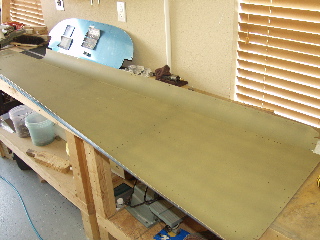
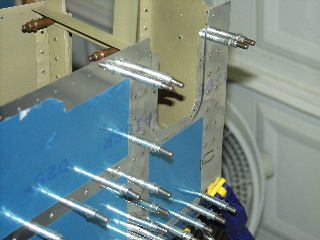
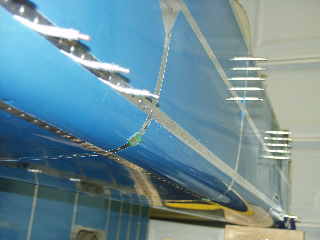
| Here is the side after drilling the j-stiffeners. Below are a couple of more pictures, just because it looks so cool sitting in the garage. |
 |
| |
|
 |
 |
| |
|
| Oh well, it was fun while it lasted. The next step was naturally to totally disassemble the whole business so the parts can be deburred, dimpled, and primed. |
 |
| |
|
I finished up this long day of work by removing the blue plastic from the skins and deburring all of the holes I had drilled.
Hopefully next time I can prep, prime, dimple, and then assemble it permanently! |
 |
| |
|
9/26/04 - Prep, Prime, Dimple - 6 hours
After having something assembled and looking good, I wanted to get it back together as soon as I could.
I started by prepping the edges of each of the skins and the J-stiffeners. These parts are all long and unwieldy, so I couldn't just use the scotchbrite wheel in the bench grinder. Instead I used a combination of the die grinder with a scotchbrite wheel and the handheld edge deburring tool. |
 |
| |
|
Many of the holes can be reached with the squeezer, but there are a number of holes on the skins that can only be reached with the c-frame. These skins are pretty thick, so it takes quite a smack with the hammer to create a good dimple. I destroyed one of my mallets doing this. They're cheap. I'll get another one.
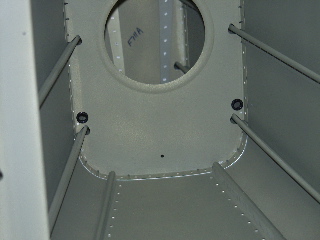
One thing to point out is that the holes along the top, which will eventually be drilled to the longeron, as well as the holes around the F-706 bulkhead, are not dimpled at this time. I did enough reading ahead in the instructions to realize that these are done after the center section is fit to the tailcone assembly. |
 |
| |
|
After whacking the c-frame dimpler for the millionth time my arm was really sore, but just as I was closing up shop one of my flying buddies came by to check out the project, so I had him help me reassemble the tailcone. So, now it's back together, and it ain't coming apart again.
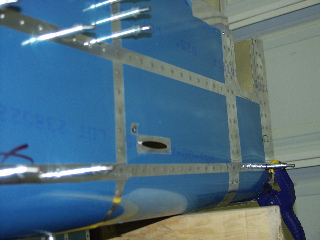
One more thing that I did: I drilled the holes for the static ports on either side of the fuselage. I also drilled holes in the bulkhead that will hold the static tube. I need to figure out what type of fastener I will use here. I only drilled #40 holes here which I can enlarge to accept whatever fastener I ultimately use.
Next up is to rivet this sucker. The instructions say not to rivet the skins to the bulkheads above the second j-stiffener. This makes it possible to (later) attach the longeron. |
 |
| |
|
9/27/04 - Riveting - 1 hour
I had to do a full day of "real work" today, so I didn't get started on the plane until fairly late in the evening. I didn't want to draw the attention of the neighbors, so I only did the rivets I could easily reach with the rivet squeezer. Because of that, and because the Cowboys are playing the Redskins, I only did an hour of work. |
 |
| |
|
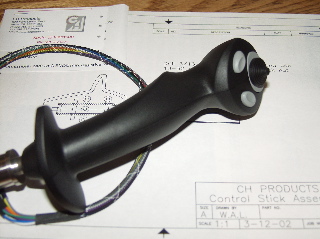
One cool thing happened today: I received the stick grips I ordered last week. I had seen these at Oshkosh this past July. They are made by CH Products. I like these a lot. They are ambidextrous and comfortable. They have several buttons including a "china hat" that I will wire for trim.
|
 |
| |
|
9/28/04 - Riveting - 2 hours
Once again work got in the way of play, so I only got about 2 hours worth of riveting done. The rivets back in the space between the F711 and F712 bulkheads are difficult to reach, and setting them must be done by feel more than by sight. My wife let me have a small make-up mirror that I used to peek at the rivets I couldn't see. My son, Tim, helped me rivet the bottom rivets, which was very helpful.
I also went flying for the first time in about five months. I went up with a club flight instructor who has built an RV-6 in the past. |
 |
| |
|
9/29/04 - Riveting, misc. - 2 hours
I got a few more of the rivets set on the side skins, leaving the bottom rivets for when my son can help me again. These are much easier to reach, and although they are hidden by the J-stiffeners, I have figured out the timing for the rivet gun, so it is going more quickly.
I also spent some time fabricating a few of the parts for the center section. |
 |
| |
|
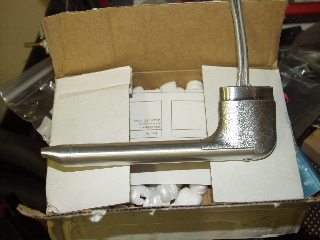
| I got my Dynon pitot tube in the mail. I really wanted a better pitot solution than the bent tube that Vans specifies in the plans. After looking at the various catalogs and finding the "certified" pitot tubes cost over $700, I went with the Dynon. I still don't know if I'll use the Dynon EFIS, but the pitot tube will work with whatever system I ultimately install. This tube does have support for the Dynon AOA (angle of attack) readout, which would be nice. |
 |
| |
|
| I also received my pitot-static installation kit from SafeAir1. This set contains just about everything I need to install the pitot-static and AOA systems in my plane. It comes with three different colored tubes to designate the pitot, the static, and the AOA lines, which should make the panel plumbing a lot less confusing. The funny thing is that I'll probably only have one instrument, but this is a good kit nonetheless. I'll update the status of this as I go. I did go ahead and drill for the static ports. This kit includes a set of nice, machined static ports in place of the pop-rivet port that Vans has in their static kit. |
 |
| |
|
9/30/04 - Riveting - 2 hours
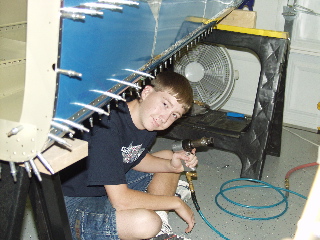
Continuing with the riveting, I had some help from good ol' Tim today. He climbed under the fuselage to shoot the rivets along the bottom. This was definitely a necessity, since I can't reach by myself.
This is easy riveting when you have a helper. The only tricky ones are at the bulkheads next to the j-stiffeners, which require some "creative bucking", if you know what I mean. |
 |
| |
|
That about does it for the rivets on the tailcone for now. The top section is not riveted until later, and the F-706 bulkhead is not riveted in place either.
Next: Center Section |
 |
| |
|
 |
 |
| |
|
