| |
|
| Previous: Forward Assembly |
|
| |
|
I have reached a point in the project that sort of matches what I would get if I had ordered the QuickBuild kit. It has taken me about a year of building to reach this point and I have learned a lot. I have made some mistakes and there have been some moments of difficulty, but overall it has been really fun. I don't think I would do it any differently.
The mental process has certainly changed. Up until now I have been focused on building the structure of the airplane. This has involved lots of repetitive tasks that are in a predefined sequence with specific milestones associated with their completion. As I contemplate the next steps in the process I can see virtually hundreds of things that all need to be done, but in no apparent order. This is slightly scary, and I have heard of QuickBuild builders who are faced with the same dilemma when they get their kit.
So I spent some time planning. I am going to spend the next few weeks working to get everything in the back of the plane finished up, then I'll move forward and attack the cabin systems. I have a paper checklist on which I have sequenced the steps so hopefully I won't get caught in a situation where I have to undo something.
This is very exciting, but there is also the reality that I have a ton of work left to do. |
| |
|
11/6/04 - Assembly - 6 hours
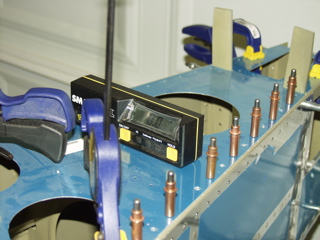
The first thing to do after flipping the fuselage is to level it. I have this cool SmartTool which gives me accuracy of 1/10 a degree. The instructions explain exactly where to take the measurements. I used some of the scrap aluminum that came with the empennage kit to shim the fuselage until everything was exactly level. When everything was level I placed the aft deck and clamped it in place, making sure it was still level. Mine had a slight twist, which was remedied by moving the deck slightly and then clamping it.
|
 |
| |
|
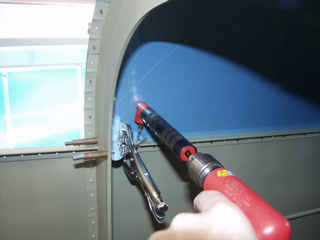
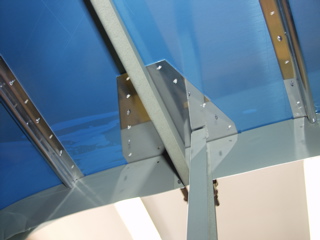
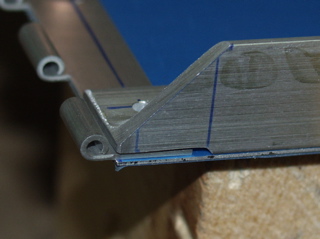
Here I have fabricated and installed the canopy gusset. Remember, I am building a slider, so this part will be different for a tip-up.
I didn't realize that this piece slips between the longeron and the top of the F705 bulkhead. I had been slightly concerned about the fact that the longeron didn't seem to fit tightly against the top of the bulkhead during construction, but I figured since that's where the skin was that it had to be right. Fortunately it was. Don't forget to radius the inside edge of the gusset so it can fit snugly into the inside edge of the longeron. |
 |
| |
|
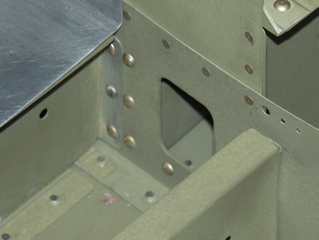
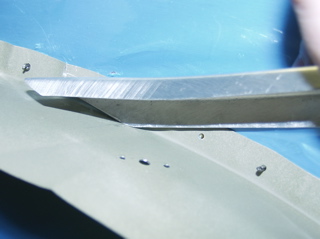
| I made a slight error when cutting the fuselage rails to accept the gusset, so there is a gap that shows between the top of the gusset plate and the bottom of the rail. I'm not going to try to fix it, but it is currently bugging me that it doesn't fit better. |
 |
| |
|
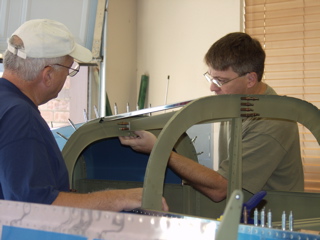
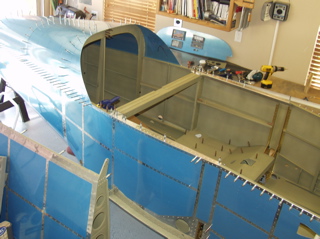
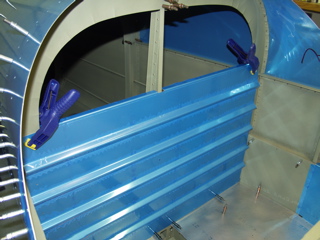
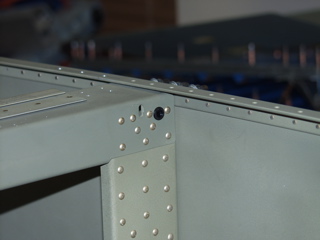
| With my dad still helping me I went ahead and fit the aft top skins. There are some J-stiffeners that I didn't get a picture of, but they need to be cut to length and shaped to fit into slots in the bulkheads. The main difficulty of fitting the skins is reaching through and moving the bulkheads slightly to line up the holes. |
 |
| |
|
I was uncomfortable installing the gussets before attaching the skins, because the bulkheads are so flimsy that it is difficult to tell if things are aligned. So, after installing the first skin I reached around and drilled the gussets using the angle drill. This worked out fine. I also did the next set of gussets (the ones on the F-706 bulkhead) the same way.
The top brace needs to be mounted between the bulkheads, but until the skins are installed, it is difficult if not impossible to tell exactly where the holes need to be drilled in the F-707 bulkhead. After fiddling with this for a little while I decided to go ahead and attach the skin and see how things lined up. |
 |
| |
|
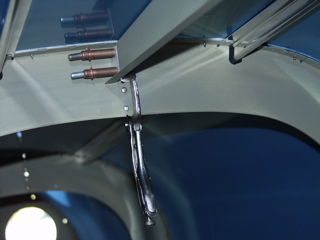
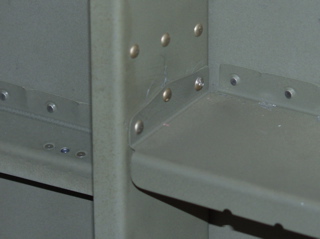
There is also an angle piece that needs to be fabricated. Fortunately, I had already made this part.
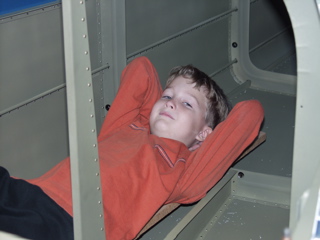
Jonny, one of my important helpers, can fit nicely back in the tailcone, so I placed a piece of wood over the bulkheads and let him scoot back inside the fuselage so he could clamp the stiffener to the bulkhead. I found out later that this is unnecessary, but he still enjoyed being the first "passenger" in the new plane.
I found out that to drill the stiffener you can peel back the right side of the skin and reach in with the stiffener still clecoed in place and drill it to the bulkhead. |
 |
| |
|
|
 |
| |
|
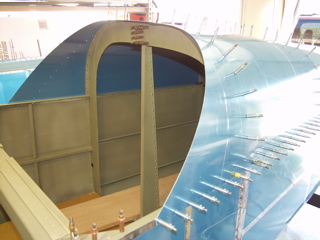
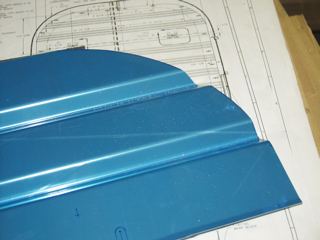
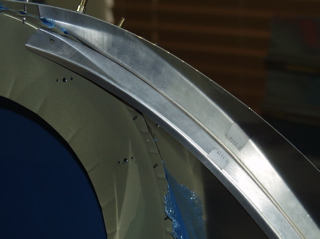
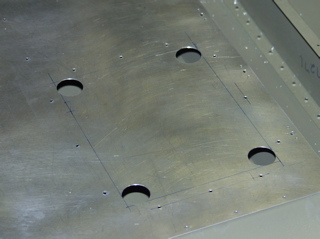
Another part that is unique to the slider version is this doubler plate that is trimmed and then installed and drilled. This is only placed after the skin is attached. It slides nicely into place, and you use a centerline to properly position it before drilling.
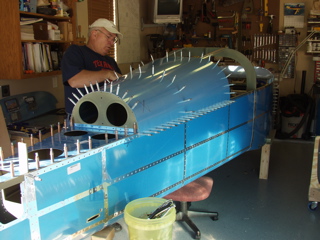
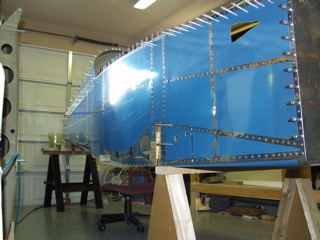
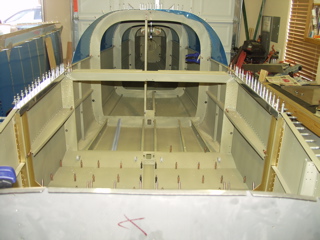
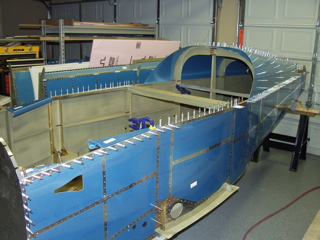
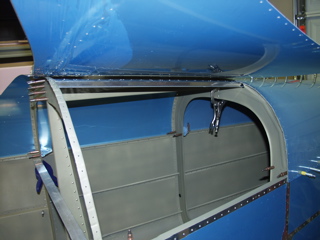
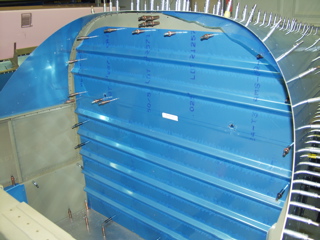
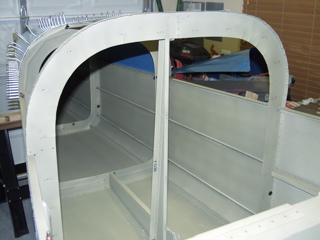
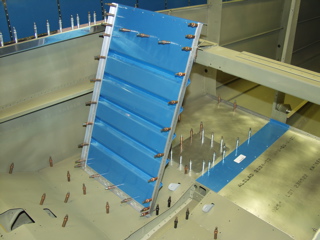
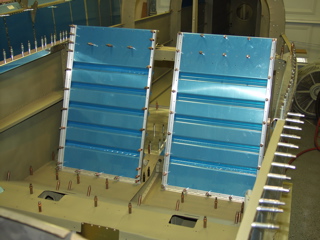
At this point the fuselage really is taking shape, so I had to take a few (okay, a bunch) of pictures. These photos really give you an idea of the size and shape of the fuselage.
I'm wondering if I can use one of these for my Christmas card picture this year?! |
 |
| |
|
 |
 |
| |
|
 |
 |
| |
|
 |
 |
| |
|
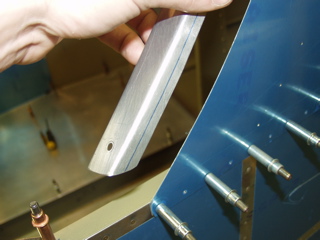
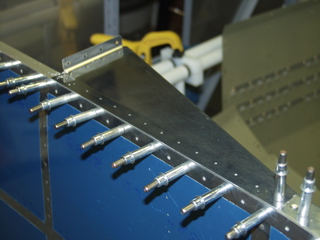
| I went ahead and drilled the firewall gussets. The holes go all the way through the gusset and the longeron and then through the powder-coated steel firewall attachment. The plans call out a lot of holes closely spaced, more than you will normally see. |
 |
| |
|
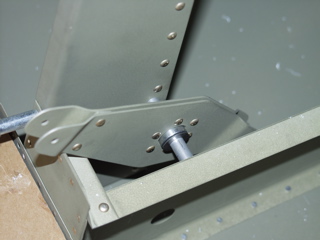
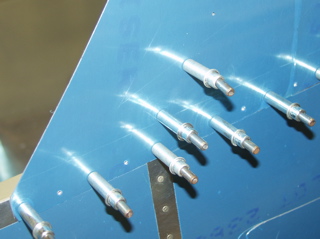
| One more thing just for grins, I had already assembled the bellcrank, so I went ahead and fit it to the supports. Perfect fit. |
 |
| |
|
11/8/04 - Misc. - 3 hours
I started trying to knock off some of the items on my "to do" list, starting with the F6111 ribs. I had posted a question to the RV-9A Yahoo list regarding the correct installation of these. I received a nice reply from Dick Tasker, who sent me several pictures. So after careful study of those pictures I promptly went and cut too much off the first one, making it unusable. So, I ordered a new one. It should be here in a week or so.
Next I peeled back the top skin to work on the top stiffener. |
 |
| |
|
I spent most of my time leaning over the side of the fuselage trying to set the last of the rivets along the bottom of the F706 bulkhead. I need to get this all finished so I can install the baggage skins.
I was fortunate that these rivets were at least marginally acceptable, sinc drilling them out would be a real pain. |
 |
| |
|
I went around and fixed any bad rivets and finished riveting things like the armrest, which I had not yet riveted to the F705 bulkhead. I did not yet rivet it to the F704 bulkhead, since I think it takes a pop-rivet once the covers are installed.
I placed my order to Van's for a replacement piece for the aft deck, the F6111 I messed up on, and a few other items that I've been needing. |
 |
| |
|
11/9/04 - Baggage Bulkhead - 3 hours
Continuing with my list, the next task was to fit the corrugated baggage bulkhead. This is a two-piece assembly. The bottom piece is pre-formed and has pilot holes along the bottom which match the holes in the F706 bulkhead. All I had to do was cleco the bottom holes, clamp the sides, and match-drill the holes for #8 screws. This made the holes in the F706 where later I will install platenuts. Easy stuff so far.
The top part of the bulkhead is a different story. It came as just a rectangular piece, which I had to cut to the correct shape. This involved scribing an 8 1/2" radius arc on the top corners. Not a big deal. I cut these on the bandsaw. |
 |
| |
|
 |
 |
| |
|
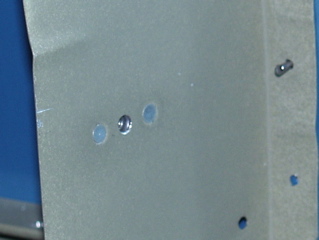
There are two slots that need to be cut to allow the seat belt anchors to pass through. There are specific dimensions on the plans to follow, so it is just a matter of marking the skins, drilling a 3/8" hole to create the top radius, and then using the bandsaw to cut the slots.
I also had to mark the locations for the screw holes on either side of the slots. |
 |
| |
|
 |
 |
| |
|
| Next I had to properly position the top part so I could match-drill the holes. This is difficult because there are no existing holes for reference. What I ended up doing is drawing a line along the bottom bulkhead skin and aligning the lower edge of the top skin with the line while I drilled the first hole. With that hole drilled, it was simply a matter of keeping it straight and drilling a hole on the opposite side. |
 |
| |
|
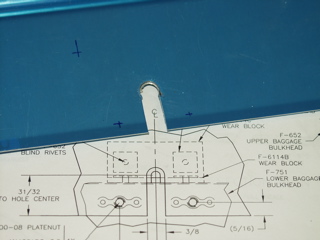
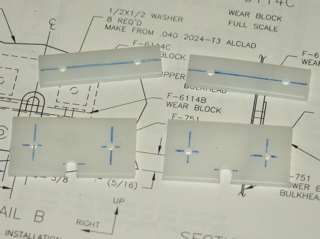
I am supposed to install some wear blocks where the seat belt anchors exit, but I can't seem to find them. I am now wondering if that is part of the finishing kit.
Today I also got the light kit I ordered from CreativAir. It all looks great. I will document my progress with the kit on another page. |
 |
| |
|
11/10/04 - Baggage Bulkhead - 4 hours
This little doohickey is my transponder antenna. It was $20. I like it because I don't have to worry about alignment. Just drill a hole and stick it through. I'm not sure where it's going yet, but possibly under the baggage floor.
I also got some random stuff from Avery. I ordered a set of pre-made rudder cable fairings. It was nine bucks for the pair, and they fit perfectly. I'll be installing those later as well. |
 |
| |
|
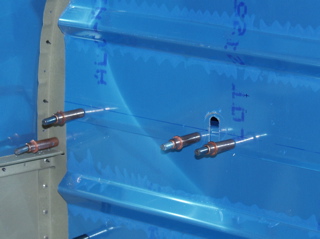
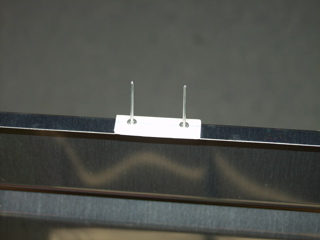
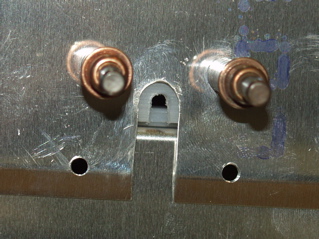
Anyways, back to the present. I finally found the wear blocks. They were in the bag with the seat belt anchor cables. The plans have specific locations for the 1/8" holes that need to be drilled, as well as the notch at the bottom of the large blocks. I marked them carefully and then drilled with a brad point wood bit, which seemed to work well because it didn't wander in the soft material.
The smaller wear block is attached to the flange of the lower bulkhead skin, and the larger one is attached to the back of the upper skin. When they come together, they form a little hole, where the cable will fit through eventually. |
 |
| |
|
 |
 |
| |
|
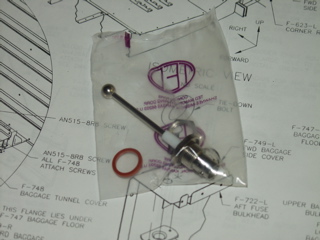
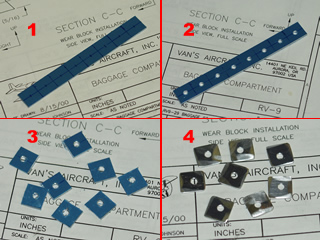
The next step is somewhat comical. I couldn't figure out what this piece of bar stock was doing in with the wear blocks. A little more studying of the plans shows that I had to make little square washers to go under the pop-rivets. I don't know why I couldn't just use regular round washers for this, but maybe it's all part of the 51% rule thing. Using washers would have pushed me over the limit! :-)
Anyways, here's how I did it, in picture form. First I marked, then I drilled, then I cut, then I sanded and deburred. The result is a nice pile of tiny washers. |
 |
| |
|
(For those of you who don't know, the 51% rule is an FAA requirement that says that I need to personally have a hand in constructing at least 51% of this airplane. The factory has done a lot of work for me, but they have convinced the FAA that their kit still leaves at least 51% more work to be done. So, any menial task that seems to needlessly take forever I jokingly blame it on the 51% rule! I get this mental image of some beurocrat looking over the kit, saying "Nope, it's still at 50.9%, but if you make him cut this tiny strip of aluminum into little tiny squares, and make him drill little tiny holes in each one, then that will probably just make it 51%! Oh, and make sure you don't provide any useful instructions on this step. That will eat up another couple of hours for sure!")
Okay, sarcasm and cynicism time is officially over. Time to get back to constructive work. |
| |
|
Also interesting about the wear blocks is that they are attached with pop rivets. The only thing I can think of is maybe regular rivets would try to expand in the soft material when they are driven.
Finally, I spent some time working on the platenuts on the F706 bulkhead. There are a bunch to do, so I will finish them up tomorrow. |
 |
| |
|
11/11/04 - Misc. Stuff - 4 hours
Today I received the replacement F6111 rib I ordered on Monday, so I went back to trying to get these things installed properly. I had emailed the Yahoo RV-9A group about the best way to install these, and got a nice reply from Dick Tasker who sent me some photos and gave me some advice. I quickly went out and ruined the first one, but now I have a better idea of what needs to be done, so I'll share it with you.
First, mark a centerline on the outside flange of the rib. |
 |
| |
|
Next, grind the bottom end so the bevel on the flange matches the angle that the rib must have in order to sit flush against the longeron.
The first time you fit this thing up in there, it's going to seem like there's no way it will fit. Don't worry yet. just position the bottom of the rib so that the line appears in the two bottom holes, and drill those two holes. Put clecoes in the holes.
Now you can take a look at where the rib hits the F706 bulkhead. You are going to need to grind a bevel on the flanges to match the angle where it hits the bulkhead. |
 |
| |
|
 |
 |
| |
|
This is an iterative process that took me several trips to the grinder to make the correct angle.
Once the rib is sitting against the bulkhead, you should be able to see your line in more of the holes. Work your way up from the bottom, drilling each hole that you can center the line in.
At this point you will be able to see what types of adjustments you will need to make to the top of the rib. On mine I put a small bend in the flange to account for the thickness of the bulkhead flange. |
 |
| |
|
When finished, you may want to grind the ends slightly to keep them from rubbing the longeron or the bulkhead.
Now you get to go do the same thing on the other side. Just take it slow and don't cut anything. On my first one I decided it had to be cut, only to realize that it just needed some beveled flanges. Oh well. Now they are attached and ready for deburring/dimpling/priming/etc. |
 |
| |
|
I went ahead and removed part of the top skin so I can have easier access to the F706 bulkhead so I could install the nutplates. The skin will probably stay off for a while. I have to prep it anyways, and I'll prime it the next time I get out the primer.
|
 |
| |
|
My next task involves the lighting system for the plane. I want to put my strobe power supply in a central location, but I want it to be hidden from view. There is some space between the inboard baggage ribs that I have seen some people use for storage, etc. So I have decided to install the power supply in there.
This is my first deviation from the plans in any real way, woohoo! I'm such a rebel! |
 |
| |
|
I am not going to make a fancy hinged door or anything. I am simply going to fabricate an access cover, and then mount the power supply to the cover.
So I laid out the size the hole needs to be, marking it with a pen. I decided to use one of the ribs as one side of the hole, since normally that rib is just riveted to the skin. I will be installing platenuts around the edges of the access hole, so in this case the platenuts will just be installed on the rib. |
 |
| |
|
I am not planning to install a doubler. I decided that this doesn't need to be mounted flush, since it's just the bottom of the baggage compartment. I will, however, use flush-head screws.
Next, I drilled 1" holes at each corner of the access hole. Tomorrow I will hopefully be able to finish this up, so stay tuned. |
 |
| |
|
11/12/04 - Not Much - 1 hour
I had tons of non-airplane-related business to attend to today, so I didn't get much done on the plane. I did, however, get the cover made for my super secret access panel. I used the edge roller to cup the edges downward for a better fit. Now I have to decide if I am going to use flush-head hardware or not. The center cover in the baggage compartment is attached with regular round-head screws, so it may not make sense to make these flush. |
 |
| |
|
| I also cut out these parts from z-stock. They are used to construct a little tunnel cover that hides the flap pushrod, etc. At least that's what I think they're for. We'll see in a couple of days... |
 |
| |
|
11/13/04 - Seat Backs - 9 hours
I can't believe I spent nine hours on these. Maybe I was watching too much college football or something. Most likely I was just being extra careful in my measurements, for better or worse. There are no instructions on how to make these, so I was probably being extra careful.
The seat backs are made from a piece of corrugated sheet, reinforced by angle stock. At the bottom are hinge pieces which attach the bottom to the seat bottom in the plane. There is also a support on the back, which is also attached with a piece of hinge. |
 |
| |
|
The side rails are notched at the bottom to account for the thickness of the hinge. This is a bit tricky, but I managed a satisfactory cut using my bandsaw. The hardest part was putting a radius in the end of the cut, which I made with the scotchbrite wheel in the grinder.
The plans are somewhat confusing, but if you look closely there are callouts for the distances for just about everything. I started by pre-drilling the holes in the side rails, since it is the thickest material. Next, I positioned the bottom hinge and clamped it in place while I match-drilled the corner holes that are common to the side rails. |
 |
| |
|
Then I removed the hinge and drilled the remaining holes in the hinge on the drill press. I then reattached the bottom hinge and match-drilled the skin to both the side rails and the bottom hinge.
There is a piece of angle that runs underneath the bend in the top of the seat skin. It's vertex has to be rounded so it will fit into the bend of the skin. I fit it, then I pre-drilled the holes, leaving the holes on the corners undrilled. This allowed me to match-drill the corners to the already drilled side rails. Then I just match-drilled the skin to the remaining holes in the top rail. |
 |
| |
|
The seat supports receive four lightening holes. I cut these with a cheap hole cutter, which I find works just about as well as the fly cutter and is a lot less dangerous, assuming I have the correct size.
The seat support is attached using yet more hinge material.
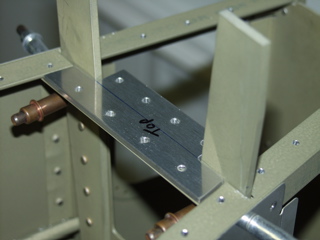
Hey, did you ever wonder why I went to all the trouble to install the angle and bent metal along the top of the F-905 bulkhead? Me too. I finally figured out why. It accepts the seat support. It's a perfect fit. |
 |
| |
|
So here are the two seats set in position. I know they don't look too comfortable at this point, but there will be some cushions eventually.
|
 |
| |
|
11/14/04 - Seat floors - 3 hours
Once again there are lots of measurements to make, so this took longer than I expected. I had to make sure that each hinge is parallel to the front edge of the seat floor.
I will reiterate that it is much better to match-drill when the thicker material is pre-drilled, rather than the other way around. The thicker material keeps the bit from wandering and making the hole the wrong shape. |
 |
| |
|
Here are the seat floors temporarily in position. I have not finished figuring out my wiring runs to the rear of the plane, so I am waiting on riveting these parts until I install some conduit. So I spent some time figuring out some of the lines that need to be routed through the seat. There are:
- Pitot and Static lines
- Lights (position, strobe, and landing)
- Antennas (com, nav, transponder, elt)
- Control (elevator trim, aileron trim)
- Audio (headsets for pilot and passenger)
- Stick (ptt, trim, etc.)
- Autopilot
|
 |
| |
|
All of these (and possibly more that I haven't figured out yet) need to be routed from the front of the plane to the center section, and then out to the tail or the wings, where appropriate.
I went ahead and installed snap bushings for the static line, which runs to the back of the plane along the left longeron. I also made measurements to determine the location for the conduit coming from the wings, and I drilled an appropriate hole through the skin and the seat rib to accept the wires.
I am trying to figure all of this out before I rivet the baggage and seat floors into position permanently. |
 |
| |
|
11/15/04 - Prepping Parts - 3 hours
I took the aft top skins off the plane and did the whole plastic removal and deburring thing. I also spent some time deburring the bulkheads. |
| |
|
11/16/04 - More Parts Prep - 6 hours
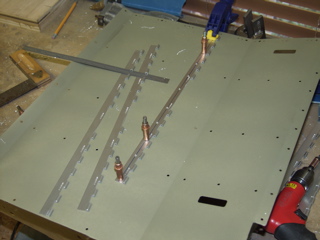
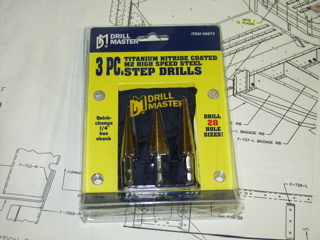
I stopped by Harbor Freight and bought a cheap set of "step drills" so I can enlarge the holes in some of the ribs to accept my conduit. These have a 1/4" shank so I can use them in my small air drill.
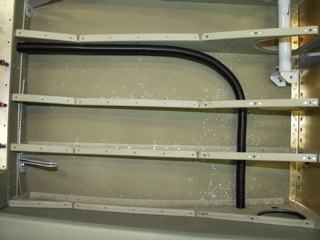
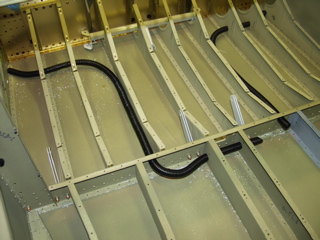
I am going to attempt to put a few pieces of conduit in place before I rivet the baggage and seat floors permanently. This should simplify the wiring of lights and such. The conduit is held in place by the fact that the holes are smaller than the OD of the tubing. I am also planning to install Adel clamps to secure the conduit along the ribs. |
 |
| |
|
 |
 |
| |
|
Here are some items I had to postpone because I had inadvertently used the material for something else. I ordered a replacement piece from Vans and now I am going to finish this up. These are just spacers to make up the difference between the tops of the bulkheads and the aft deck.
These spacers are cut to size, and then match-drilled using the aft deck as the template for the holes. |
 |
| |
|
I drilled and deburred these spacers, as well as the holes in the longerons and bulkheads.
The remainder of the time was spent disassembling and deburring things like the seats, the aft deck, and all of the baggage compartment parts. |
 |
| |
|
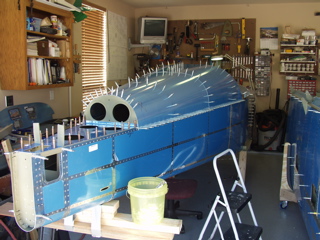
11/16/04 - Scuffing - 6 hours
I spent just about the entire afternoon scuffing the alclad surfaces in preparation for priming. This is a boring job, but I've already primed the rest of the plane, so I'm not about to stop now. This is one of the last "big" priming jobs I will have to do on this plane, although the forward cabin area does have a bunch of parts, so I plan to do this at least one more time. |
 |
| |
|
It started to look like rain, so I didn't attempt to prime this stuff today. I'll see if the weather is better tomorrow. In the mean time I did manage to get a few other items completed.
I fit and drilled the canopy decks to the front of the side rails. These are drilled to the longeron and to a tab on the side rail. They required a little bit of filing and shaping to get a nice fit, but they turned out good, so I am happy. |
 |
| |
|
| Lastly, I drilled the seat belt anchors. These are mounted just forward of the F-909 bulkhead. I drilled these for AN3 bolts, but I didn't tighten the bolts yet because they will interfere with riveting the top skins, so I just left everything finger tight for now. I'm going to have to get a "small helper" to get back here and torque these bolts at the appropriate time. |
 |
| Next: Cabin Stuff |
|
| |
|
