| |
|
| Previous: Top Skins |
|
| |
|
11/17/04 - ELT - 1 hour
I didn't have much time to work on the project tonight, but I did get the access panel made for my ELT. I will be installing it under the baggage floor. The ELT instructions say that it must be attached to a part of the plane that is able to withstand something like 100 pounds of force in any direction. It specifically says not to attach it to the aircraft skin. Okay, so I am attaching mine to the baggage floor, and I am reinforcing the cover with two pieces of angle. It won't be readily accessible, but it should be easier to get to than it would be if I placed it in the tailcone. The ELT will be attached to the access plate, which is then going to be screwed to the baggage floor. I'm pretty happy with the way this is working out. I'll take a picture later. |
| |
|
11/18/04 - Primer - 3 hours
The weather cleared up enough this morning, so I played hookie from work and went out and sprayed primer on a bunch of parts. It was really humid, and there was some condensation from the compressor that wasn't caught by the dryer, but overall it went well.
This evening I went to the local EAA chapter meeting. This isn't really a group of builders, although there are a few who are building or who have built planes. It's still fun to talk about airplanes for an evening. |
| |
|
11/19/04 - ELT Mount, Visitors - 5 hours
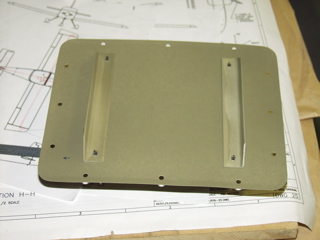
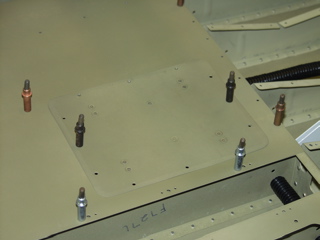
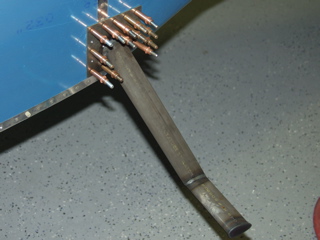
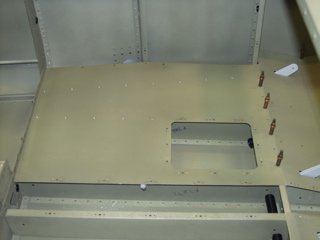
Here are some detailed pictures of my ELT mount. I have decided to mount the AmeriKing ELT on a removable access plate in the baggage floor. So, I cut an appropriate size hole in the floor skin and fabricated a cover with some .032 aluminum that is large enough to overhang the edges of the hole. This will be attached with platenuts and screws.
I installed two pieces of angle running across the cover. These will serve as stiffeners as well as to match the thickness of the "strap" on the ELT mount. |
 |
| |
|
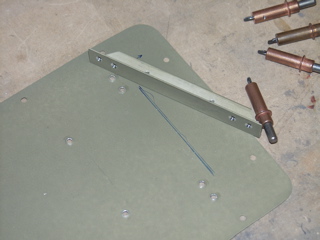
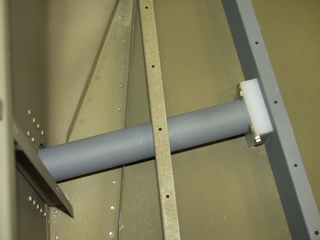
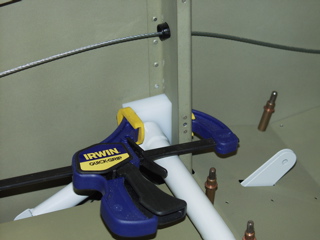
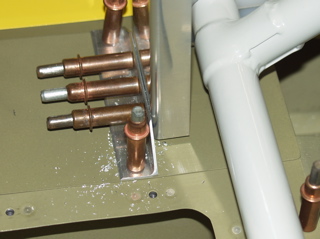
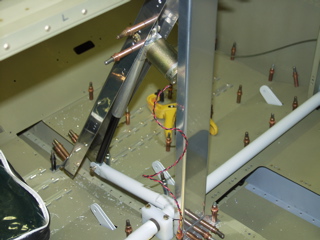
The mount that comes with the ELT is then set in place, and I match-drilled some holes through the angle and into the mount. These holes need to be countersunk to accept the flush head of the rivets. I used my deburring tool with the long extension to be able to reach in and create the countersink.
I dimpled the cover, and countersunk the stiffeners, then I riveted the stiffeners to the cover. Next, I match-drilled the holes that go through the ELT mount (and the strap), and then I dimpled those hole in the skin. The holes in the strap are large enough to accept the dimple without countersinking. |
 |
| |
|
 |
 |
| |
|
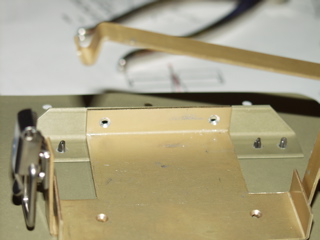
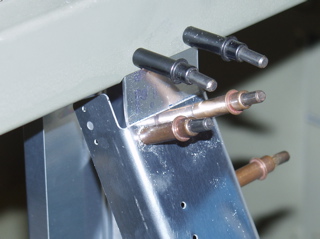
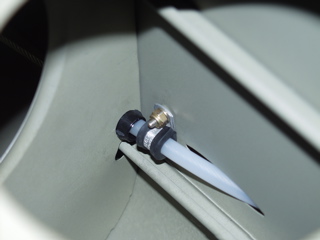
I made the rivets that attach the strap "double-flush" with the shop head being formed with my back rivet set. This allows the ELT to sit snugly in the mount without interference from the rivets.
Here's the ELT mounted in place. Nice, huh? |
 |
| |
|
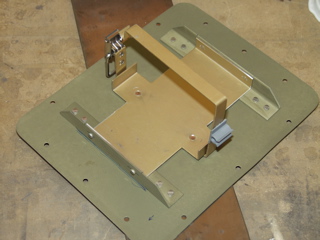
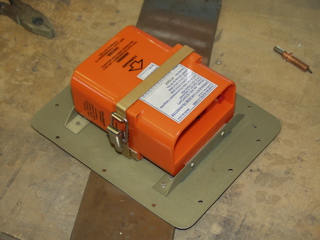
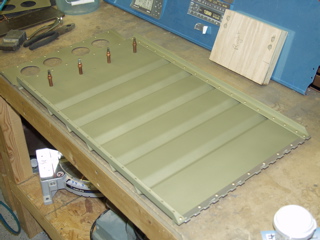
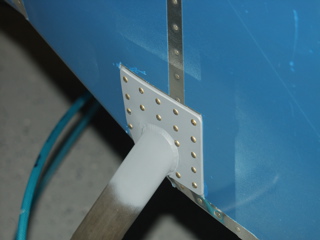
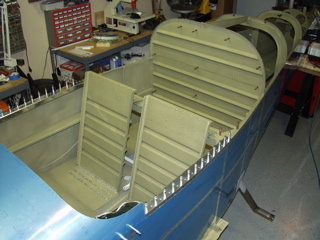
| And here's the whole contraption set in place in the baggage floor. Now all I need to do is install the nutplates and, of course, wire it up. I am really pleased how this turned out. |
 |
| |
|
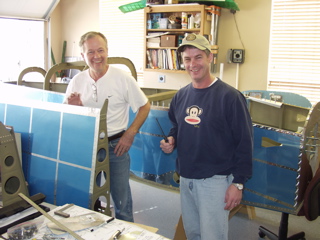
I had some visitors to the project today. Tony and Monte from SafeAir1 asked if they could look at my wing. They are making a mounting kit for the Trio autopilot servo, and it is different for each RV model. They are great guys and I highly recommend them if you are looking to buy accessories for your plane.
I was asking them a bunch of questions, so it probably took them longer than they expected, but I enjoyed having them visit. |
 |
| |
|
The Trio is a nice autopilot. I plan to install one once I am flying. The mount for the servo is installed just inboard of either wingtip, and can be added to a flying plane fairly easily.
They looked over my plane and said it probably wouldn't fall apart, so that was encouraging. The more people I have look at the plane, the better I feel about my work. |
 |
| |
|
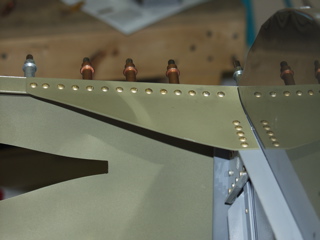
| Finally, I got the aft deck installed and riveted. It's good to finally get this done, since it's been on my to-do list for a while. |
 |
| |
|
11/20/04 - Steps - 6 hours
I installed the gussets that reinforce the connection between the longerons and the firewall. There are a bunch of rivets very closely spaced. Done.
Next, I attacked the steps. For some reason I have not looked forward to installing these. I need to install them so I can finish up the baggage floors and side walls, but every time I look at these steel plates I seem to find something else to do. Well, I decided not to put it off any longer. |
 |
| |
|
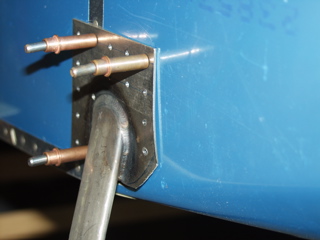
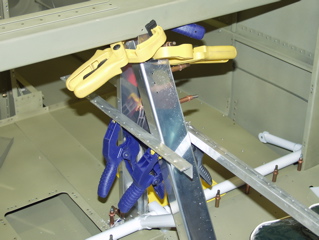
First I drilled the hole pattern into the steel plate. There was one spot where I simply could not fit a rivet due to the thickness of the weld, but I don't think it will matter. There are about 16 rivets holding each of these on.
Once I pre-drilled the holes, I placed a level on the top of the plate. When it was level I drilled a hole through one of the top holes, and then again at the bottom. This secured it so I could see what sort of modifications I might need to make. Yep, I had some tweaking to do, so out comes the Really Big Hammer! |
 |
| |
|
This is a major trial-and-error process. I would whack the snot out of the plate, then I would pin it back in place to see how much more I had to do. The bench vise came in handy.
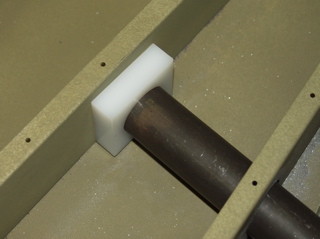
After all was fitting pretty good, I attached one of the bushing blocks. These are attached to one of the baggage ribs. |
 |
| |
|
 |
 |
| |
|
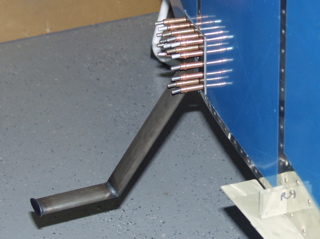
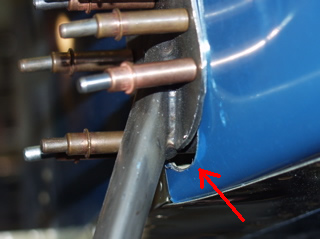
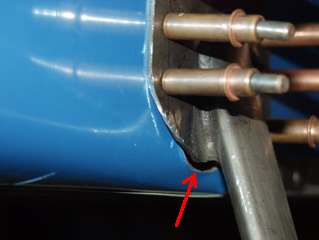
| One thing that I am not happy with is the amount of space there is underneath the steps. It's not noticeable from above the step, but when you look at it from underneath you can see daylight. I guess I will use ProSeal or something to make these areas watertight, but I think these could have been done better. Maybe next time. |
| |
|
 |
 |
| |
|
11/22/04 - Steps, Misc. - 4 hours
I drilled the plastic bushings for the steps. First I drilled the holes into the plastic on my drill press, then I clamped everything in place inside the plane and used the angle drill attachment to match-drill the holes into the step and the rib. |
 |
| |
|
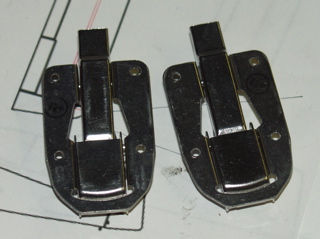
| I bought these latches off ebay. They are Hartwell flush-mount latches that I plan to use on the oil door on the cowl. They are brand new and I paid probably half as much as Aircraft Spruce was charging. |
 |
| |
|
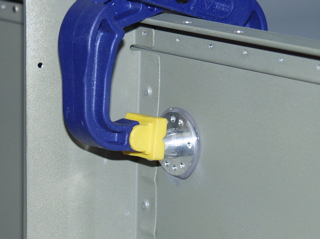
I finally decided to go ahead and ProSeal my static ports. These can be riveted as well, but I decided that I have much less chance of making a mess of them if I use ProSeal, so I opened up the container and promptly got hit with that familiar stench. Gladly, I only had to mix a small amount.
First I scuffed the primer around the area I was going to bond. Next, I covered the openings of the ports with tape and used about 1/16" thick coat of ProSeal over the flange of the port. I then clamped them into position and let them sit. I'll give them a few days before I mess with them. |
 |
| |
|
I went ahead and riveted the right seatback. It turned out good. No surprises.
I need to decide if I am going to paint the steps or if I want to try chrome. Chrome would look really cool, but I am not sure about the rivet holes. Also, the chrome place quoted a two-week backlog, so that would mean I couldn't close up the baggage floors for a while. |
 |
| |
|
11/23/04 - Seat backs, etc. - 4 hours
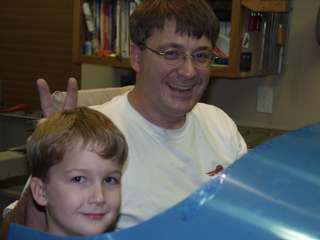
I finished the second seat back, and then I got to try it out! My son, Jonny, helped me test out the cabin. Except for the fact that I was using pillows as cushions, it was great to finally be able to try out the fit.
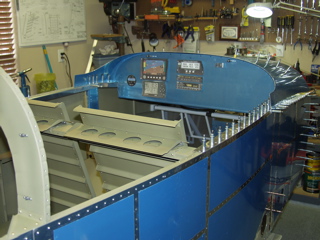
I went ahead and attached the instrument panel and while I was at it I clecoed on the forward upper skin. |
 |
| |
|
| I've been trying to figure out what to do about the instrument panel. I have considered the modular one sold by Affordable Panels. I have also exchanged emails with Laird Owens regarding his composite panel which only works with a slider. Of course, I could just use the stock panel...naah. I also considered making my own composite panel, but this may be more work than I expect. |
 |
| |
|
11/24/04 - Steps, Baggage Area - 8 hours
I finally decided just to prime the steps and deal with finishing them later. This way I can close up the baggage areas and continue building.
So, I spent about half the day installing the steps. They came out good. I had some help from Tim to do the riveting. |
 |
| |
|
Here is the outside. I went ahead and primed the skin underneath the step plate as well. Not bad.
These things are pretty sturdy. I am not going to step on them yet, but I am convinced these things are going to hold up nicely.
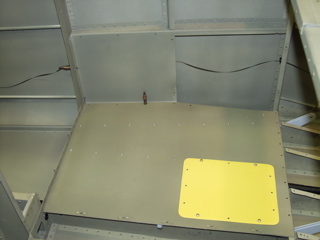
The other half of the day was spent installing the baggage floors. Before I installed the sides I ran some string along the walls where the rudder cable needs to go. This is so I can run the cables later (hopefully) without access behind the panels. |
 |
| |
|
 |
 |
| |
|
11/25/04 - Thanksgiving - 2 hours
We had family over today so I didn't do much other than show off the project to my brother-in-law, who flies Flight Simulator once in a while. He was the only one I could find who was interested. :-)
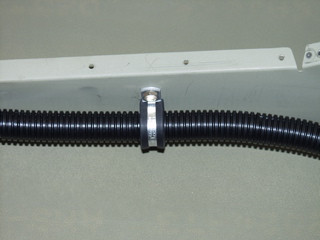
In the evening I did manage to install a few adel clamps to hold the conduit securely to the seat ribs. I did some other random stuff, but nothing worth bragging about. |
 |
| |
|
11/26/04 - Electric Flaps - 5 hours
Today began with the annual After Thanksgiving Shopping Trip. I spent about an hour waiting in line at Best Buy. I got a rolling tool chest at Sears for $59 bucks! Yes it is insane, but I had promised my wife that we would take care of Christmas shopping today, so that's what we did.
In the afternoon I had some time to work on the plane. One thing that was bugging me was the fear that I wasn't going to be able to run the rudder cables using the pull strings I had installed. |
 |
| |
|
So I went ahead and installed them. It was No Big Deal, and everything worked as I had planned with the pull string. Now I need to install my little exit covers for where the rudder cable exits the fuselage.
Only after installing these cover brackets did I realize that I made them an inch too short! I guess I'll have to place another order with Van's.
Meanwhile, Van's is supposed to be shipping my Finishing Kit next week. |
 |
| |
|
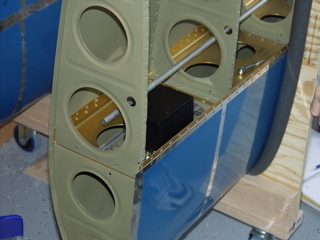
| Back to the electric flaps. Here is the actuator arm before I installed it in the fuselage. |
 |
| |
|
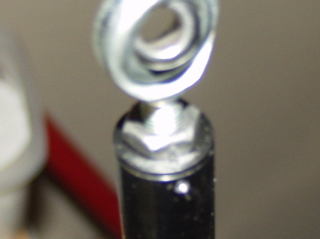
Here is probably the worst photo I've ever posted. It is supposed to show the hole I drilled through the base of the flap actuator. Instead all I got was this out-of-focus mess. Oh well. I just wanted to show the hole that they tell you to drill. I used a tiny drill bit in my Dremel Tool to drill two holes that meet to make a safety tie hole.
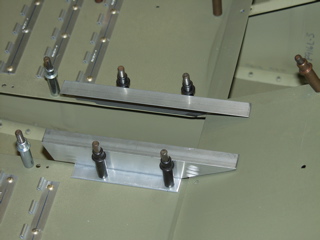
Below are pictures of the bushing blocks being installed. |
 |
| |
|
 |
 |
| |
|
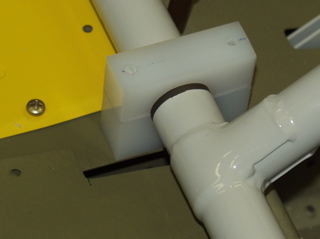
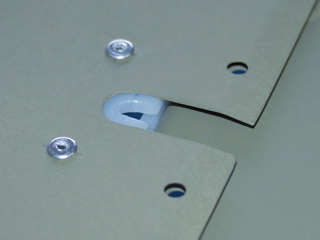
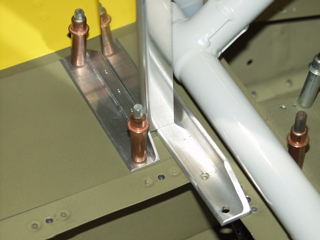
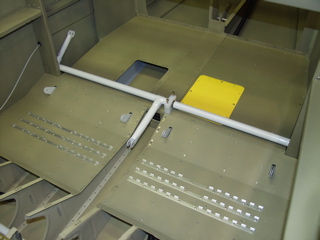
Here if you look closely you can see the notch I had to cut in the baggage tunnel cover to make room for the center bushing block.
One other thing you might notice is that the screw holes for my custom access plates are just barely accessible behind the flap actuator bar. Any further forward and I would have had a real problem. So, if you elect to do something like this, you should definitely take into account the flaps when deciding where to position the hole. I was fortunate, but I could have easily been up a creek. |
 |
| |
|
11/27/04 - Electric Flaps - 2 hours
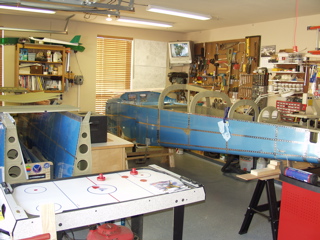
Before I could do any work on the plane today, I had to spend a while rearranging my garage so that I could turn the fuselage the long way in my three-car garage. I needed to do this so I can install the empennage and motor mount/landing gear (eventualy). So, I hung up the kid's bikes and made some other drastic changes. This took most of the day, but the result is that I can now walk all around the fuselage with enough room to spare to add the empennage and engine mount. I have officially "taken over the garage!" |
 |
| |
|
| I finally got around to installing the little bushing blocks in the baggage bulkheads. |
 |
| |
|
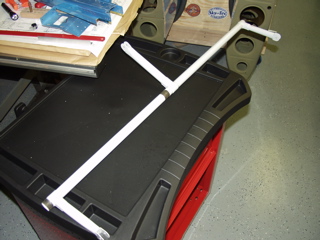
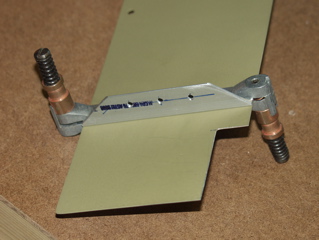
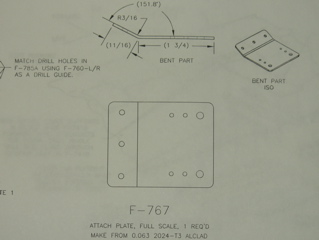
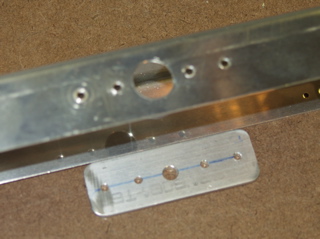
I fabricated a bunch of the parts needed for installing the flaps. These parts come in all shapes and sizes, and each one takes a wile to decipher from the plans.
Below is an example of one piece in particular. What is missing from the plans? How about the dimensions of the part?! It shows the distances to the bend, and the amount of the bend, but nowhere does it mention the size of the part itself. The only reference is the note that the drawing is "full scale." So, after much deliberation, I measured the picture and used those dimensions. At the right you can see the part after it was bent. |
 |
| |
|
 |
 |
| |
|
11/28/04 - Flaps - 4 hours
Continuing with the flaps, I match drilled the thick doubler plate that goes between the channel and the actuator motor. This is apparently a place where a lot of people misread the plans, so I worked slowly and got it right the first time. What a concept. |
 |
| |
|
You can see here how it is supposed to look. The channel receives a 5/8" hole to allow the AN4 bolt to rest directly on the doubler plate.
Next is another area that I knew to be careful about because of several other builder sites that I have read. I used a piece of .125" angle to hold the rear channel up off the "floor" while I drilled it to the angle. This provided the proper 1/8" clearance as called out in the plans. Simple and effective. I'm feeling pretty smart right about now. That won't last, I'm sure. |
 |
| |
|
 |
 |
| |
|
| To make sure the two pieces of channel were in alignment, I clamped pieces of angle to each side, and then clamped everything else just as well as possible. Then I went around and around trying to verify that everything was in proper alignment before I drilled. |
 |
| |
|
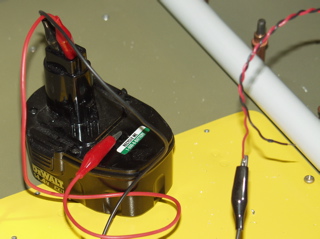
I drilled the holes attaching the channel to the F-905. Everything looks good. Now it's time to assemble the motor inside the channel. I took the advice of other builders and removed the channel so I could install the motor on the bench, which made it go much more smoothly. Then I just put the channel back in place and ran a bolt through the actuator to the flap control arm.
The instructions say to run the motor to its extreme positions, and then set it at the midpoint. I am not yet ready to install this stuff permanently, but I couldn't pass up a chance to do something cool, so I grabbed a cordless drill battery and ran the motor. Sweet. |
 |
| |
|
 |
 |
| |
|
| Finally I installed the side covers and match-drilled the holes. Then I took all of this stuff back out of the plane so it can be deburred, sanded, primed, dimpled, and countersunk. Fun. |
 |
| |
|
With everything out of the plane, I decided it was time to rivet the aft seat skins to the ribs. These are pop-riveted except for the platenuts that are attached with solid rivets along the inboard ribs.
With these riveted permanently, everything is a lot more sturdy in the cabin. |
 |
| |
|
11/29/04 - Misc. - 2 hours
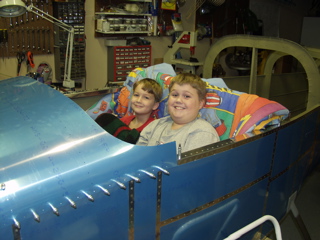
With the seats in, I let my twin boys try out the cockpit. Since I don't have cushions yet, I put blankets and pillows inside. They had fun watching Monday Night Football sitting in the -9A.
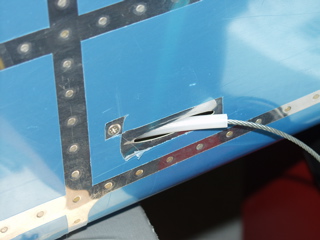
I installed the adel clamps to hold the rudder cables in place where they exit the rear of the fuselage. I also have some neato streamlined covers that I need to cut and rivet in place. |
 |
| |
|
 |
 |
| |
|
I went ahead and installed the baggage bulkhead covers to make sure they were right. Good thing I did, because I had installed the bushing blocks the wrong way.
Next: More Cabin Stuff |
 |
| |
|
