| |
|
Previous: Moving the Project |
|
| |
|
12/10/05 - Attaching the Wings - 7 hours
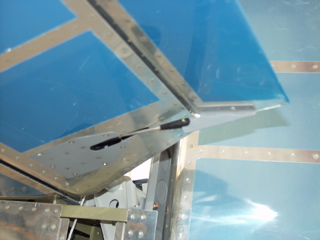
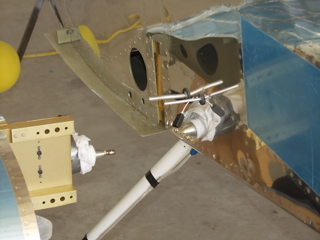
Today is Saturday and I was able to get out to the airport by about 9am for a good day of working on the plane. I started by working on the trim servo. I shrink-wrapped the cables at the connection point and attached the pushrod to the control horn. Then I tested it to the extreme up and extreme down positions to make sure it didn't bind on anything. |
 |
| |
|
Here's the extreme up position. Everything is perfect, so I went ahead and put the cotter pins in place.
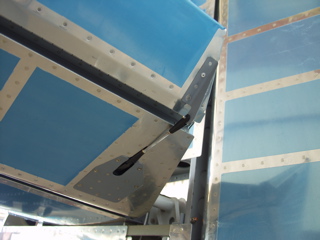
Next, I started working on the wings. When I did the rivets on the wings I had to leave four rivets until later because the servo for the autopilot was in the way. Well, today I removed the servo and bucked those four rivets. It took probably an hour to remove and replace the servo...all for four rivets. |
 |
| |
|
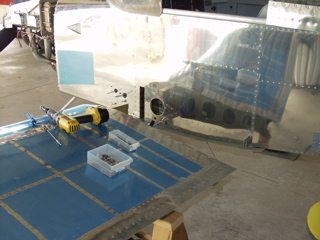
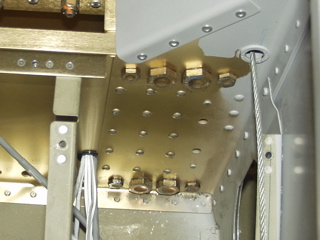
Here's the inside of the wing with the servo moved over to the side. If you look carefully you might be able to see the four holes which still need rivets.
When I was finishing up this task, my buddy Todd stopped by the hangar to go fly his Sonex. It has by now turned into a gorgeous day for flying. Before he left to go fly, I roped him into helping me with one of the wings. |
 |
| |
|
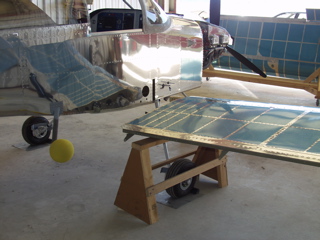
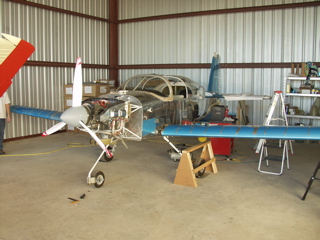
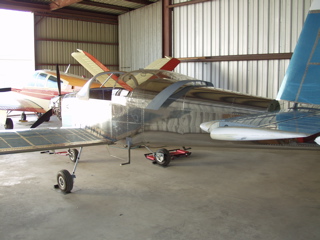
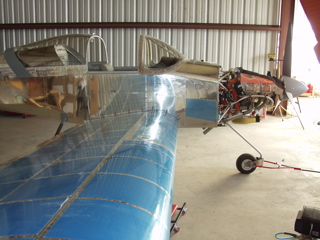
We set the right wing on sawhorses so I could get everything prepared. The spar is a really tight fit, so the instructions say to put a bevel on the end of the wing side to make it easier. So I did that, but it really wasn't going in very easy, so we backed off and I put some lubricant on the spar. I also cut the fuel tank lines down a little bit so they wouldn't interfere with the wing. This time it went a lot easier and I was able to install the drift pins. |
 |
| |
|
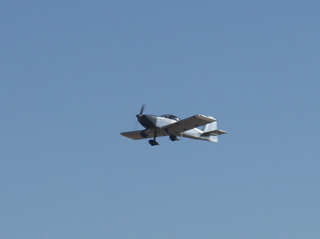
Todd went flying in his Sonex and came back with a bunch of cool pictures of the Red River and his test area. He's still flying off his hours, so he has to stay in the test area, but it looked like he had some really nice weather. |
 |
| |
|
 |
 |
| |
|
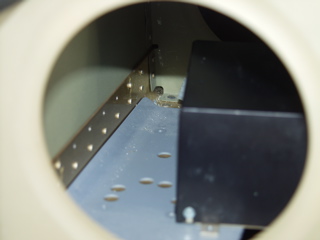
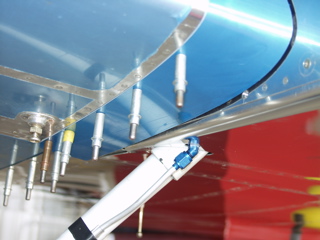
The next task was to clamp the tank attach bracket and match-drill it to the fuselage. This required that I climb into the cabin and drill from the inside. I got these holes drilled, but I haven't yet drilled the hole that attaches the two brackets together. I'll do that after the wing incidence and sweep is set.
Just about at this time my friend and fellow RV-9A builder/flyer Clay stopped by the hangar. He flies out of Lancaster, which isn't very far by air. He was also meeting another -9A builder friend of mine, Jim, to give him a demo ride. |
 |
| |
|
So, do you get the picture now that I'm doing lots of chatting and not much building? That's okay, it was tons of fun. We even had some of the guys from the local EAA chapter stop by and look at the plane. At one point there were 8 or 9 guys in or around the hangar.
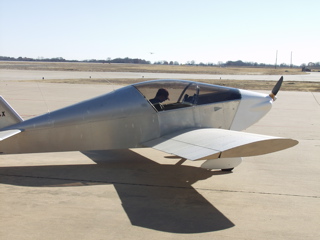
Here's a picture of Clay taking Jim for his demo ride. |
 |
| |
|
Here's Clay and Jim climbing out after takeoff. I really need to finish this plane...
My wife stopped by with Tim. He was scheduled for his Civil Air Patrol flight, so he left to go flying in the CAP Cessna 172. He had a blast. Anyways, gotta get back to working on the plane.
After Clay returned we went over my engine installation and he had some good suggestions for me. I really am glad to have these visitors who can help guide me through the process. |
 |
| |
|
Some of the things he pointed out were bolts that didn't have adequate threads showing, wires that might chafe, and safety wire that needs installing. He also gave me some clues about shields around the cylinders to enhance cooling.
After Clay left, Jim was nice enough to help me install the left wing and drill the tank attach bracket. So, finally, at the end of the day, I did have the wings installed after all. Unfortunately they're only on temporarily. Next I have to drill some holes for the root fairings, etc. |
 |
| |
|
12/11/05 - Root Fairings - 5 hours
Today I started by installing a BNC connector on the ELT antenna. I had ordered the BNC connector from B&C (ironically) earlier in the week, and it had arrived yesterday. So now the ELT antenna is done.
Next I turned to the wing root fairings. With the wings temporarily installed I was able to install the fairings without trouble. I was unsure how to do this until I looked at the parts and found that they were pre-drilled and they matched up perfectly. |
 |
| |
|
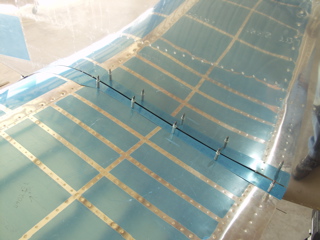
The aluminum wraps around the leading edge of the wing, so I carefully drilled one hole at a time all the way around the wing. I first did this with a #40 bit. I spent much of this time laying under the plane reaching up with the drill. The result is that I have sore arms as well as aluminum stuff in my hair.
The wings are now detached once again. Each of these holes receive platenuts, but I'm out of time for the day. |
 |
| |
|
 |
 |
| |
|
12/24/05 - Platenuts - 2 hours
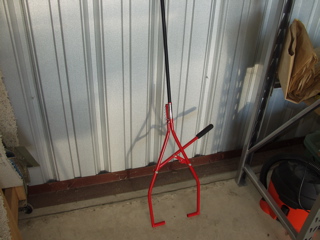
As you may have guessed, I've been out of town on family vacation for the past week. It was a fun time with the kids. When I returned there was a package waiting for me from Spruce. Inside was the Bogey Bar that I ordered before I left. I really need this thing to move the plane around the hangar. |
 |
| |
|
I wanted to get everything ready for attaching the wings as soon as I had an assistant, so I finished installing the platenuts. These are used to attach the root fairing to the wing. |
 |
| |
|
12/27/05 - Attaching the Wings - 7 hours
This is a terribly short entry to cover an event that took all day. Sorry for the lack of detail, but it was all I could do just to get it done. I also had some help today. My brother-in-law, Beau, was here for the holidays, so he came out with me. Also, my pal Todd showed up to lend a hand. Here's a rundown of the steps we took.
I started by installing the tank brackets on the fuselage. They will come off after they are drilled. I also flared the fuel line fittings. The next step was to put a thin layer of oil on the spar to ease in installation. |
 |
| |
|
Oh yeah, during all of this I had the wing bolts in the freezer. I think this is just an old wives tale, but I'll take any advantage I can get.
With all the help on hand, the wings went on without trouble. The drift pins went in and the wings were on once again. This time, however, I installed the fuel lines and ran the conduit through the fuselage.
The top bolts went in without trouble. The bottom ones, however, were quite a pain. |
 |
| |
|
After what seemed like an eternity we finally got the bolts installed. The most difficult part was getting the nuts on the lower bolts. Fortunately Todd is quite adept at confined spaces and was very helpful.
After a break and some food, I set up a plumb line and dropped plumb bobs from the tip and root of each wing. Right on target. |
 |
| |
|
12/28/05 - Alignment & Incidence - 3 hours
Today was one of those days where I didn't feel like I was getting much accomplished. The goal was to set the wing incidence and sweep and to drill the all-important rear spar bolt holes. I started by leveling the plane as best I could. I did this by running the mains up onto some 3/4" plywood pieces and letting the air out of the nosewheel until the Smart Level showed 0 degrees. I also leveled it side to side. I made a spacer block of the correct size and then set about to checking the level of each wing. |
 |
| |
|
It really was nearly dead on from the start. If I didn't have the digital level I would have called them level by looking at the bubble in the level. But, since I have the luxury of the digital level, I obsessed over getting both wings to say 0 degrees before finally clamping the rear spar and drilling the hole.
I also drilled the holes in the fuel tank attach brackets and I slotted the one on the fuselage as described in the plans. |
 |
| |
|
12/29/05 - Lots of progress - 7 hours
Today I arrived at the hangar nice and early, set to do a whole day worth of work. I started by installing the platenuts on the tank brackets. Then I reinstalled the brackets thanks to the help from a random passerby...I think his name was Rex. Anyways, he was willing to hold the wrench on the outside of the plane while I tightened the nuts inside the fuselage. |
 |
| |
|
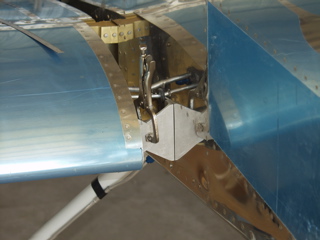
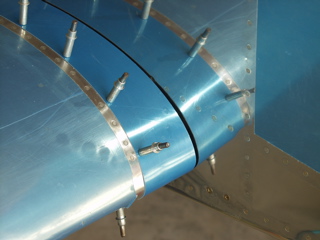
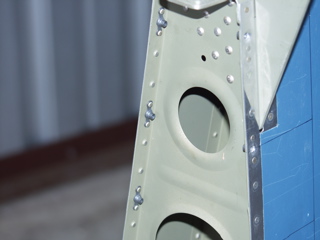
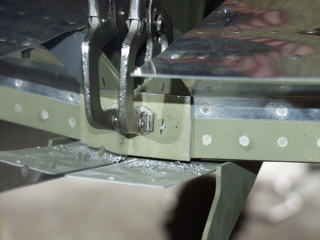
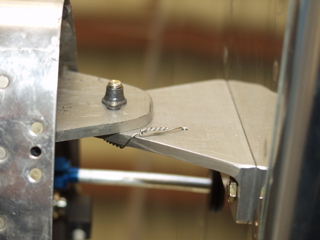
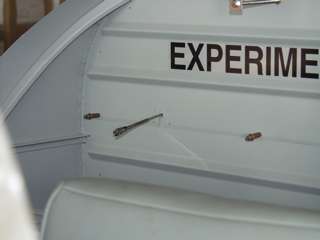
In these two pictures you can see the attachment that is made using a large washer and a bolt with a drilled head for safety wire. I drilled the bracket to accept the safety wire and then safetied the bolt.
Next, I torqued the rear spar bolts and installed cotter pins. I also installed the screws along the bottom of the wing. The wings are now totally attached. |
 |
| |
|
The controls came next. I attached the aileron pushtubes to the control column. I did this by first setting the neutral position of the left aileron using the alignment tool I had made several months ago. I attached the left one making sure the stick was vertical. Next, I did the same for the right aileron.
With the ailerons hooked up the next thing to do was to attach the elevator pushtube, again setting the neutral position with the stick vertical. I spent way too much time getting the little spacer washers in place, but the result was good. |
 |
| |
|
Next I turned to the hinge bolts on the elevator. I had left these loose in case I needed to remove the elevator for some reason, but whatever. It's time.
When I got the elevator all set, I noticed that the counterweights are doing their job perhaps a bit too well. I'd drill out some of the weight, but with the paint shop waiting in the wings, I'm not sure if that's a good idea. |
 |
| |
|
 |
 |
| |
|
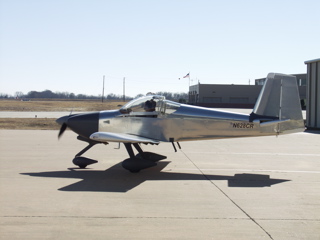
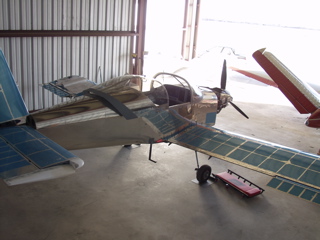
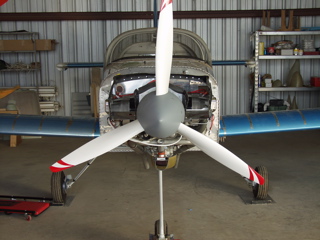
Walking around the plane I'm really starting to get the sense that this thing is nearing completion. I have a list that's more than a page long of things I need to do, but the big items are getting done and the little items don't take too much time. I think I may be ready to calibrate the fuel tanks pretty soon.
Below is the shoulder harness attachments as they protrude through the baggage bulkhead. |
 |
| |
|
|
 |
| |
|
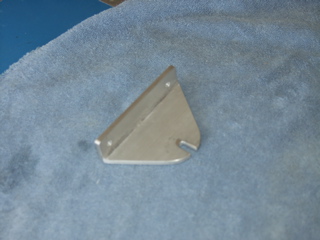
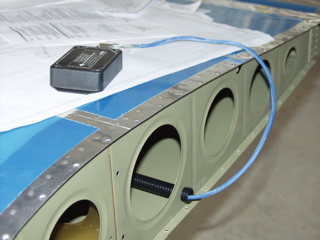
Tomorrow I hope to install the magnetometer in the left wing. I need to make a bracket that will hold the device in a level attitude relative to the fuselage.
Next: Misc. |
 |
| |
|
