| |
|
Previous: Panel Install |
|
| |
|
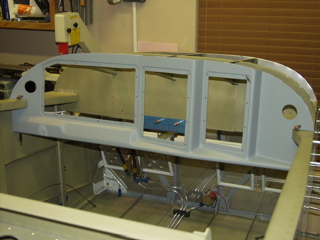
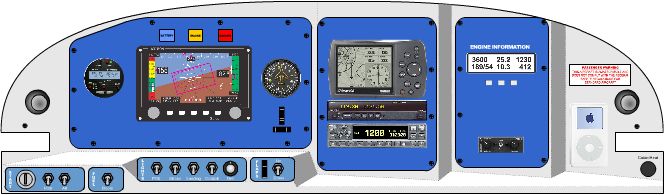
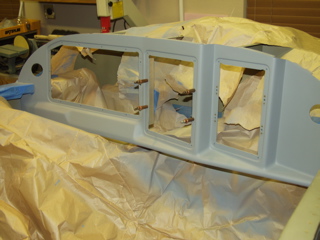
1/21/05 - Panel, Engine Mount - 4 hours
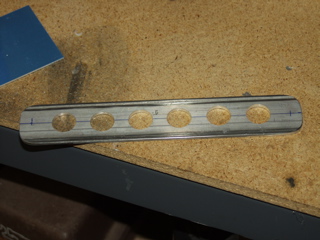
I have sort of burned myself out trying to get a perfect finish on the panel, so for now I am installing it as-is so I can hopefully move on to more productive tasks. I really like the way the panel has turned out. I spent some time designing the layout. Below is a sample of what I've come up with. You can read more on my Panel Layout page. |
 |
| |
|
 |
| |
|
Meanwhile, I went ahead and drilled the engine mount bolt holes and attached the engine mount to the firewall. It is going to have to come off, but at least the holes are drilled.
First I drilled the top-left hole. Then I put a level across the mount. When it was level I drilled the top-right hole. With bolts in the upper holes I was able to drill the lower holes in their proper locations. After some seriously long drilling sessions (steel is a pain to drill, especially with a huge drill bit) and a lot of deburring (steel makes terrible burrs) I got it all done. Bring on the engine! |
 |
| |
|
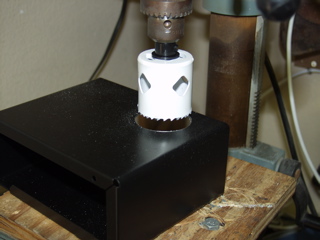
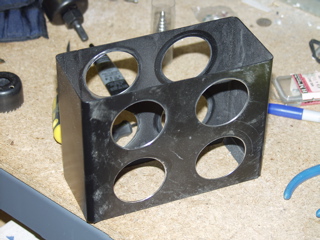
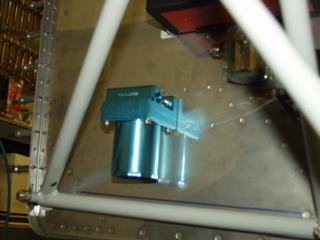
1/22/05 - Battery Box - 4 hours
Next I decided to tackle the battery box. It is so nice and neatly painted when you get it from Vans. Too bad I have to tear it all up! Using a 2" hole saw I was able to cut the "optional" lightening holes. It took me a while because my drill press is starting to slip, and a big cutter like this tends to want to stop the drill from turning. Ugh. |
 |
| |
|
Sidenote: don't you figure that the "optional lightening holes" are really only optional if you are lazy? I mean, if the extra material isn't necessary, why would you want the dead weight in the plane?
Here's the tore up and deburred battery box before I repainted it. By the way, this battery box fits an Odyssey PC680 battery perfectly. If you plan to use a different battery, don't order this battery box from Vans, because it probably won't fit your battery. |
 |
| |
|
 |
 |
| |
|
| Finally, here is the battery installed on the firewall. I had to drill out three rivets on the firewall and enlarge the holes to accept AN3 bolts. This wasn't very difficult, and it is cool that I was able to use existing holes. I probably need to seal the holes with RTV or ProSeal. I'll do that the next time I have to seal stuff. |
 |
| |
|
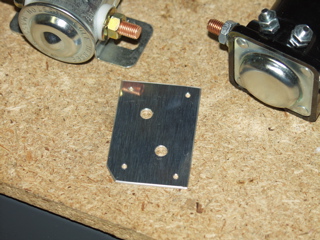
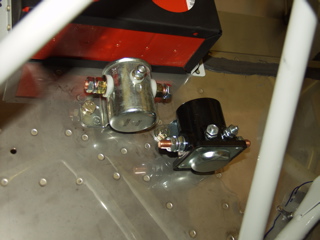
1/24/05 - Firewall stuff - 3 hours
Below the battery there are two electrical items that must be installed using platenuts attached to a doubler plate. Interestingly, the instructions and hardware for installing these items is included with the battery box kit, so if you don't buy Van's battery box, I'm not sure how you would do this.
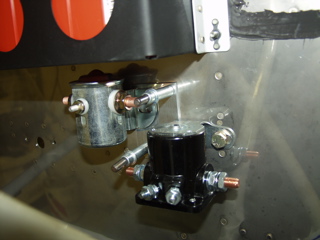
The top (silver) unit is the master contactor. This is a big relay that switches on the battery power to the plane. It is controlled by a toggle switch mounted on the instrument panel. |
 |
| |
|
The lower unit (black) is the starter solenoid. It switches power to the starter when another switch on the panel is engaged.
These units are placed in close proximity so that a copper bar can be attached to their studs to provide a secure electrical connection between them.
Anyways, a pair of nutplates need to be installed through the firewall behind the reinforcement angles, and the doubler plate has to be drilled to the firewall. I did this by temporarily positioning the master and starter, and aligning the 1/4" holes to the doubler, then back-drilling it to the firewall. |
 |
| |
|
The doubler goes on the inside of the firewall, so the firewall was dimpled, and the doubler was countersunk. I got my son, Tim, to help me drive these rivets. With the two of us it was an easy process.
Oddly, although the copper bar is shown on the plans, including a full-size cut pattern, it is not included in the kit. So last week I ordered a piece of bus bar from Vans that I will fabricate into a bar that will attach these together. It's only about two bucks, so I can't imagine why they don't just stick one in the kit. |
 |
| |
|
I went ahead and attached the gascolator. Remember that I had previously installed the doubler for this, so attaching it was quite easy. Probably the most difficult part was finding the correct lock nuts. They are very small, all metal lock nuts that don't look like any other nuts I've been using so far.
I do have a question about the quick drain. It looks like I need an extension for the quick drain so it will be accessible with the cowl in place. I didn't see anything in the parts I received, so I guess I need to figure it out on my own.
I'm still working on the electrical plan. |
 |
| |
|
1/26/05 - Pinholes - 2 hours
Matthew Brandes sent me the part number for the quick drain extension that I need to order. It can be found here. I need to remember to order it the next time I order from Vans.
I spent most of the evening with a tube of glazing putty trying to fill any pinholes that I could find in the instrument panel. Then, after letting it sit for an hour, I worked on it with sandpaper for a while. Finally, I sprayed some primer on it. I think I'm getting close. |
 |
| |
|
| Next: Misc. Cabin Stuff |
|
| |
|
