| |
|
Previous: Avionics 2 |
|
| |
|
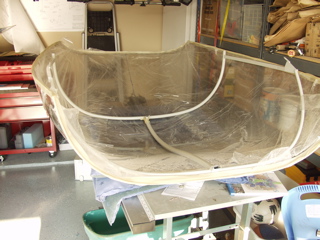
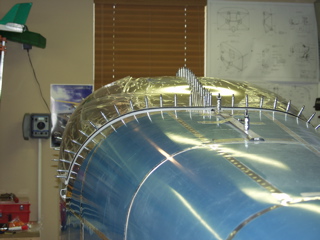
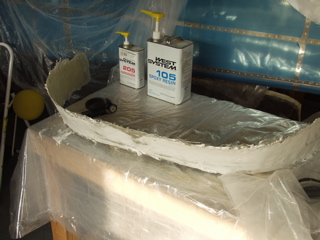
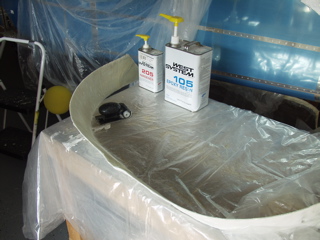
6/24/05 - 6/25/05 - Canopy - 8 hours
I have put off the inevitable cutting of the bubble for long enough. Initially I had saved this because it was sort of cold when I received it, and I didn't want to have to try to heat up the garage to work on it. Mainly though, it was just an excuse to not deal with it. I have been apprehensive about cutting this thing, mainly because of all the cautions and warnings that I have read everywhere, including the instructions. This was the weekend, however, that I was to cut the canopy, so I got up my nerve and arranged the required tools. |
 |
| |
|
It was Friday evening when I got started, and the weather was cooperating. It was in the high 90s during the day, and it was still really warm outside. I brought the bubble outside to avoid filling my shop with plexiglas dust.
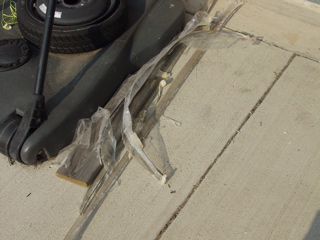
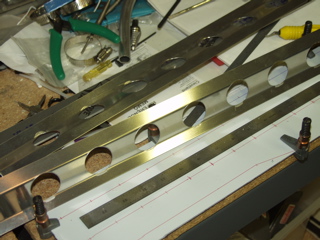
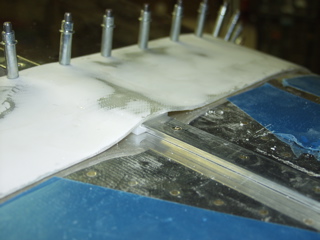
I must have read the instructions a dozen times before this to make sure I knew what to do. I started by trimming the outer edges of the canopy, making a big pile of plexiglas cutoff material that you see here. I really think this is just an exercise to get you comfortable cutting this material, as it only really serves to make it easier to clamp the frame for the next step. I trimmed all the way around the canopy , drilled the hole for the latch handle. I was concerned when the little nub for the latch handle wouldn't "sit down" into the hole, but I found out later that it doesn't matter. |
 |
| |
|
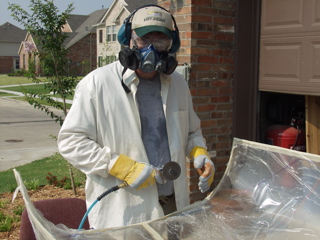
Saturday morning arrived and I was committed to getting this thing cut into shape. Here I am in my "plexi cutting outfit." Most of this stuff is to keep the plexi dust off of me. The best way to describe it is to liken it to going to the beach and not showering off good before driving home. You find beach sand in everything, right? Well, that's the same thing that you get with plexi dust. It gets everywhere. Even in your ears if left uncovered.
I had bought a right angle die grinder at Harbor Freight. This thing works well for making these cuts. |
 |
| |
|
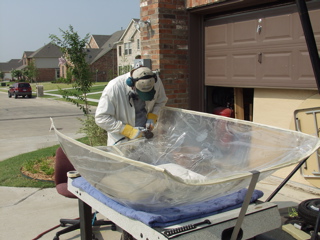
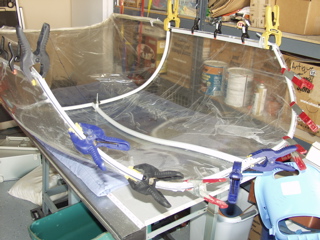
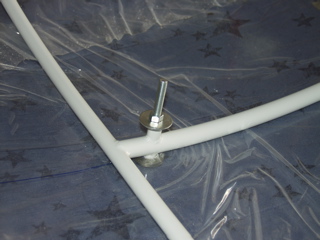
The sun was cooking the canopy (and me) on Saturday morning as I made the trim cuts. I had marked the locations for the cuts with a sharpie, and it was just a matter of cutting along the lines. In some places I would reinforce the already cut material with some tape to keep it from binding against the grinder, but really it wasn't that big a deal. It was so hot out there that it wasn't going to crack no matter what I did. I made these secondary cuts and then put everything away so I could go to the kids' baseball game.
Here's the canopy with the frame clamped in place. Notice the "clamp" I made from a spare bolt and some washers. Although just finger tight, this helped to keep the canopy close while marking for the next cut. |
 |
| |
|
 |
 |
| |
|
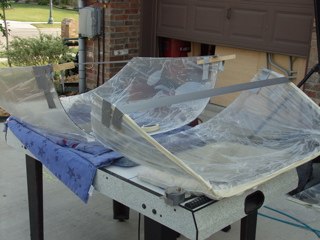
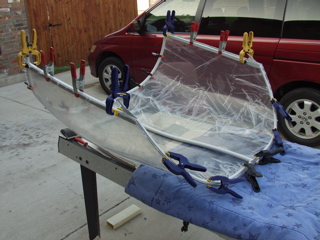
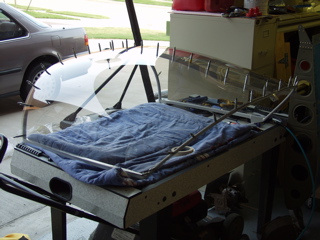
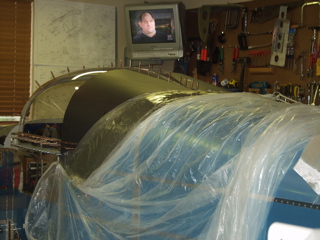
In the evening I got it back out in the driveway and, after careful consideration and some help from Tim, was able to successfully split the canopy into two parts. You may notice on the picture that I had some paint stirring sticks taped to the sides. This kept the already cut material together while I cut the rest of the way. I think it helped, but the biggest help was the 95° temperatures. Notice the air hockey table. My wife and kids really want to play air hockey one of these days when there aren't any airplane parts on it!
Here's the initial fit after the big cut. Everything looks good, so I went ahead with the trim cuts along the side rails.
After the whole stressful ordeal, Danny, one of my sons, comes out and says "Wow, that's a lot of clamps!" That's all he had to say. |
 |
| |
|
 |
 |
| |
|
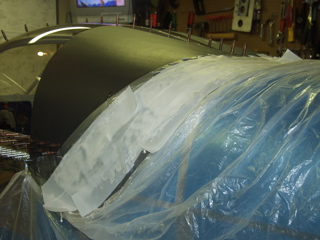
Remember I said the canopy wasn't sitting down around the latch handle stub? Well, after the cut you can see that it indeed nests in there quite well.
A note about the edges: after each cut I would stop and "dress" the edges of the plexiglas to get rid of the burr and to remove any possibility of cracks starting from the rough edge. I bought a fancy scraper from Avery, but I have been unable to find it when it's needed :-< so I just ended up using the following: I start with a file, which works really great. Next, I use two grits of sandpaper, 220 grit and 400 grit. I tried to round the edges and make everything smooth. |
 |
| |
|
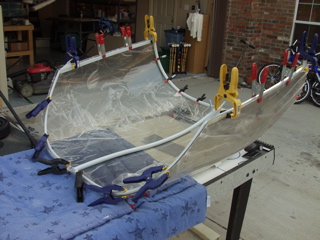
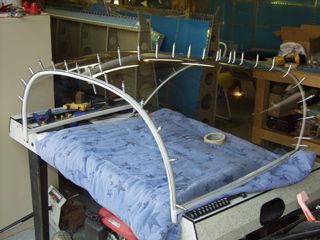
| So here's the result. The canopy is formed to fit the frame. It is all ready to be drilled, but I need to read the instructions a few more times before I tackle the next step. |
 |
| |
|
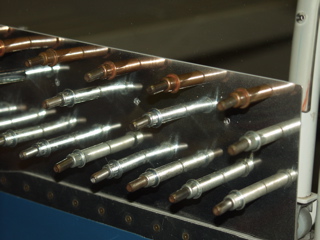
6/28/05 - Drilling - 4 hours
After a couple days off for kids baseball and such, I got to spend the evening working on the canopy. I measured and marked the hole locations at 2" intervals along the front and rear bows, as well as along the top. I then carefully drilled them using a brand new #40 drill bit. |
 |
| |
|
Another test fit. I noticed that my rollers are somewhat stiff, so I plan to take them off and adjust them to roll more smoothly.
This picture was taken a bit off center so it looks like the canopy is sticking up from the fuselage. It's not really.
Next comes the countersinking. |
 |
| |
|
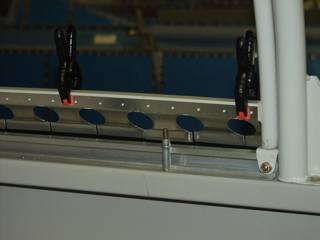
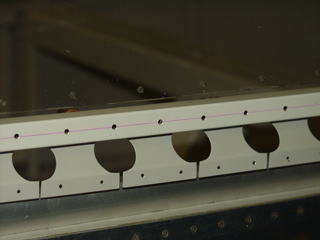
The instructions say to mark the holes that will receive rivets directly as opposed to those which will receive dimpled aluminum. As far as I can tell the only ones that receive dimpled aluminum so far are the ones along the top. That may change as I fit the side skirts.
I used a #40 countersink and practiced on a piece of scrap. Then I countersunk the holes on the forward bow to accept rivets, and along the top to accept the dimpled aluminum. I left the aft bow alone for now. |
 |
| |
|
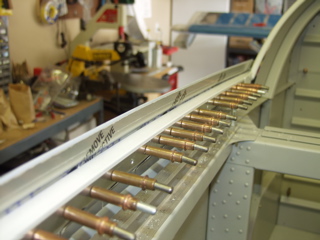
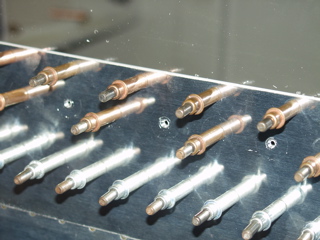
I then enlarged the holes in the canopy using a special plexiglas bit, and I enlarged the holes in the frame using a regular #30 bit.
You may notice that I have removed the protective platic. I finally got frustrated with all the plexi dust inside the plastic making it difficult to see the holes. So I took it all off. I may regret it later, but right now it is a lot easier to work with. |
 |
| |
|
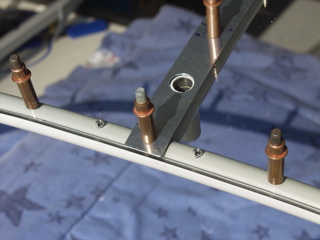
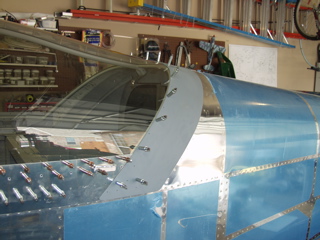
Here's a close-up of the cover strip and the countersunk holes, just for fun. I made the big hole in the cover strip using a unibit.
The next step (I think) is to work on the side skirts. I think I will need to trim some more from the bottom of the canopy to allow for the side pieces. |
 |
| |
|
7/10/05 - Update - 6 hours
Family vacation has taken me away from the project for a while, but before I left I was able to do a few things that didn't make it onto the site. So, now that I am back in action for a couple of weeks, I can update the site with the stuff I did before I left.
Most of the work I did on the weekend leading up to the 4th of July was on the canopy. I had to go buy a 1 1/4" hole saw from Home Depot so I could cut the holes in these side skirt parts.
|
 |
| |
|
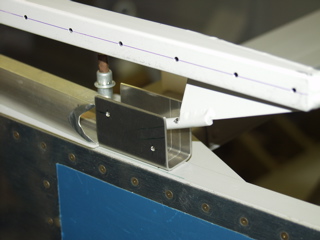
Here it is clamped in place after I pre-drilled the #40 holes in the upper flange. These will be drilled to the canopy frame in the next step.
Next comes the side skirt (below). The instructions say to pre bend this piece so it roughly matches the curve on the frame. Again, I pre-drilled the #40 holes to use when match-drilling into the frame.
When making the pre-drilled holes on these parts, I sped things up a bit by clamping the left and right skirts together and drilling through both of them. Since they are mirrored, it worked out great. |
 |
| |
|
 |
 |
| |
|
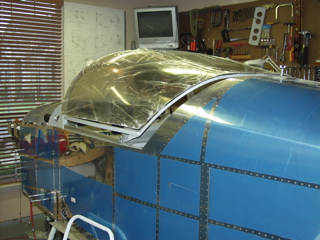
| Here you can see the "sandwich" effect of the inner and outer skins. The canopy is held between these two skins, and then the whole mess is match-drilled. |
 |
| |
|
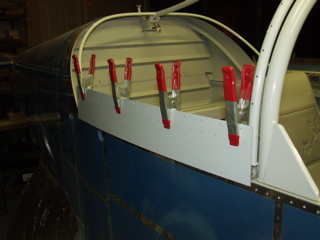
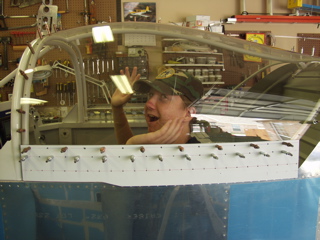
You really need a helper to get the braces drilled to the skins. Here I have captured Tim inside the cockpit so he has no choice but to help me. :-)
|
 |
| |
|
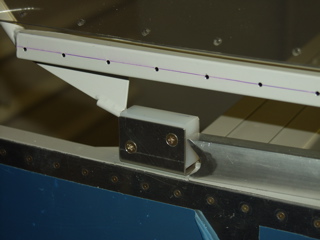
| Before doing anything else I decided it might be important to get these side latch things in place. So, I removed everything and started trying to figure out where it goes and how I am going to drill the holes in the UHMW blocks. It's here that I stopped and left on my vacation. |
 |
| |
|
7/12/05 & 7/13/05 - Misc. - 4 hours
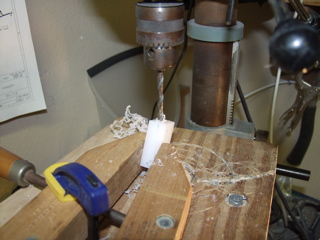
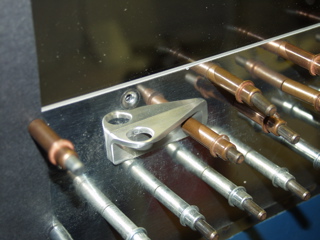
I started out by drilling the small reference holes in the latch blocks. These holes are just 1/16" deep, but they are enough to allow the tips of the pins to be captured, allowing me to mark the angles for the bigger holes. The instructions say to drill the block using a drill press and a vise. I don't have one of those on my drill press, so I used a couple of clamps to simulate the use of a vise, as you see in the picture here. |
 |
| |
|
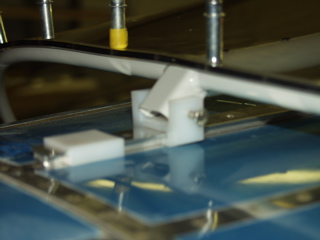
| Now I can install the block in the bracket. |
 |
| |
|
 |
 |
| |
|
8/2/05 - Back in action - 3 hours
Yes, I know it's been way too long. Here are my excuses: family vacation, real work, and Oshkosh. The trip to AirVenture this year was different because of our attempt at being an exhibitor, but I saw lots of RVs and spoke to a bunch of builders. AirVenture has definitely motivated me to push this project through to completion. Besides, my avionics are becoming obsolete as I write this, so I better hurry up and fly.
I took a close look at a bunch of sliders while at Oshkosh, and what I saw was a variety of levels of fit and finish. I also spent time talking with a few builders who had finished sliders. The consensus: just get it done. |
 |
| |
|
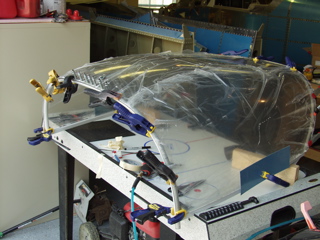
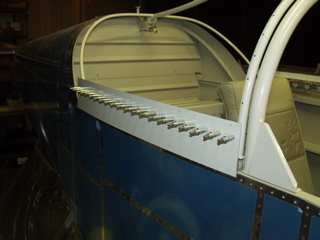
First I tried once more to squeeze the frame so that maybe I could get the rollers to roll more freely. You can't just bend it in place, so I had to totally disassemble the frame from the canopy to make the adjustment. I put it all back together and it definitely was an improvement, so I am going to consider it finished and move on.
I then match-drilled the side skirt to the frame to enlarge the #40 holes to #30. These will receive pop rivets. |
 |
| |
|
| With the skirt removed once again, you can see where these holes are located on the frame. I deburred all the holes and then I enlarged the upper holes. The holes along the top of the skirt accept #6 screws. The skins are drilled to #27 to fit the screw, but the canpy can't be match-drilled. Instead, I had to first countersink the canopy holes while they were still #30, so the countersink pilot would still fit. Then I enlarged the hole to 5/16" to account for the #6 screws. It's not a difficult process, but there are steps involved that can be a bit confusing. |
 |
| |
|
A friend had borrowed my #6 dimple dies, so I had to run over and borrow them back. I then dimpled the top row of holes to accept the #6 flush screw heads.
Finally, I machine countersunk the second row of holes to accept the MSP-42 flush pop rivets. Don't dimple these, or you'll have to countersink the canopy frame itself, which would be lots more trouble.
It's good to be working on this thing again. |
 |
| |
|
8/3/05 - Rear Skirts - 2 hours
I looked at a lot of sliders at Oshkosh and confirmed the fact that the C-666 rear skirts are really difficult to fit. I spoke with a guy at our airport who made his to fit the fuselage by using fiberglass. This seems to be an incredibly sensible thing to do, since there's almost no way to make the transition between canopy and fuselage perfectly seamless using aluminum. So that's what I've decided to do. |
| |
|
| My mold is going to be the plane itself. I am using duct tape to span the gap between canopy and fuselage. This will become my layup area. I will put a mold release on the duct tape. I have marked the front and back edges by doubling the thickness of the duct tape, which should create a scribe line in the fiberglass. Four layers of bid cloth and some micro and I should have a perfectly fitting rear skirt. Stay tuned for the results. |
 |
| |
|
8/4/05 - Rear Skirts - 3 hours
I cut a bunch of strips of bid cloth about 5" wide and 36" long. These are long enough to cover half of the skirt with 6" of overlap.
To do these layups I covered my workbench with plastic and pre-soaked each piece of fiberglass cloth prior to placing it on the fuselage. I'm no fiberglass expert, but this seemed like a neater way than trying to slop epoxy on the fuselage. |
 |
| |
|
I did them one piece at a time, alternating from left to right side of the skirt. This picture is after the first layer of cloth had been placed. I then put three more layers of cloth. This took less time than I thought it would, and before long I was pressing out bubbles and cleaning up my mess.
I let the epoxy cure for several hours, and then I mixed up some micro and attempted to smooth the contour a bit. This will take some work. I used peel-ply on the micro and left it to cure for a few more hours. |
 |
| |
|
 |
 |
| |
|
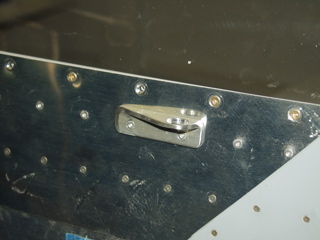
| While the epoxy cured, I worked on a couple of small details. I wanted to add handles on the sides of the canopy to assist in opening from the outside, but I didn't want large protrusions on the fuselage. The sliders I've seen are difficult to open if you don't have a handle. I think I've come up with a design that I like. You can see it in the photo. I made one for each side. They will attach to the outside of the skirt at the rear of the slider, and will be pop-riveted to the frame. They are long enough to capture two of the rivet holes, which should be more than adequate. |
 |
| |
|
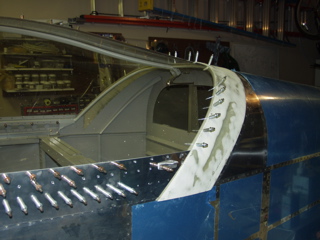
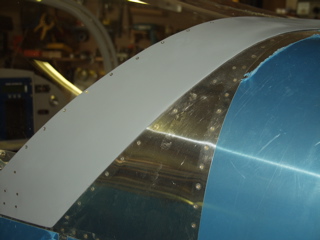
Just before beditme I went out and pulled the skirt from the mold. I had used paste wax on the duct tape for a mold release, and it worked great. The skirt popped right off. It looks a little rough right now.
The edge lines that I made with duct tape worked perfectly, giving me a scribe line for trimming. I trimmed using the die grinder and it's looking a lot better. I placed it back on the fuselage and it fits perfectly. Now I've got a lot of sanding and filling to do, but I'm happy with the results. |
 |
| |
|
 |
 |
| |
|
8/5/05 - Rear Skirt - 4 hours
Today spent some time sanding the rear skirt. Actually, I spent a lot of time sanding. There are no pictures of the sanding process, but it was a lot of labor. The good thing is the results look really good.
I did some cleanup, removing the tape and plastic and such from the fuselage, and getting the plane basically dusted off from all the fiberglass dust. Then I used my new hole duplicators that I got at Oshkosh to drill the holes in the skirt where it will attach to the frame. |
 |
| |
|
One of the coolest parts of building the skirt of fiberglass is the little opening for the rear track. Vans gives you a little preformed aluminum thing that would require quite a bit of work to get the correct fit. My solution was to form the skirt right over the slide, making a seamless transition.
I added more micro and did more sanding. |
 |
| |
|
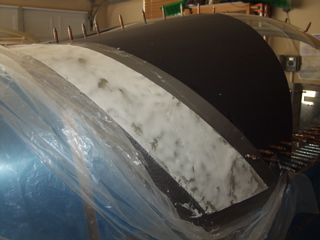
After all the sanding I decided to throw a coat of primer on it and see what it looks like. There are still some pinholes and minor imperfections, but I am extremely happy with the way this thing turned out.
Next: Firewall Stuff |
 |
| |
|
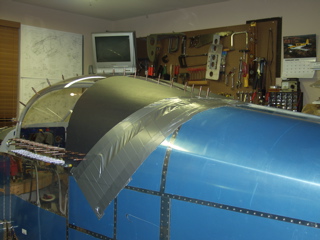
8/14/05 - Finishing up the Canopy - 6 hours
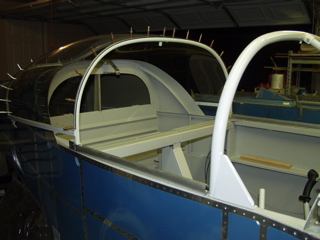
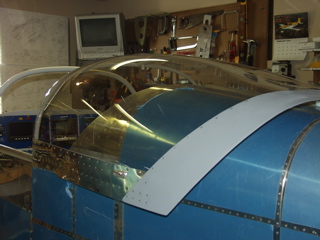
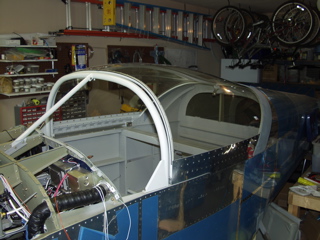
I sanded, filled, primed, and re-sanded this rear skirt a bunch over the weekend. Each time I had to let the epoxy cure, so it was a long process, but I finally got it close to what I wanted it to look like, so I finally went ahead and assembled the slider. I wasn't sure I would be able to rivet the solid rivets along the bottom of the side skirts, so I squeezed those before attaching them to the frame. This led to a little pre-planning to make sure I would be able to all the parts in place at the right time. It went together well, and here are the results. |
 |
| |
|
 |
 |
| |
|
I am a big fan of the fiberglass rear skirt. I think it should be seriously considered by any slider builder.
Next: Firewall Stuff |
 |
