| |
|
Previous: More Misc. |
|
| |
|
It's the beginning of November and I'm starting to plan my move to the airport. I have several steps left to accomplish before the actual move, but I feel I need to make a plan and work towards finishing up the last chores in anticipation of flying the plane. I had hoped to fly this thing in 2005, but I am not going to rush just for the sake of being done.
Right now I am finalizing the firewall forward work and putting the finishing touches on the cowl. The next big thing is the windscreen. |
 |
| |
|
10/27/05 - 11/1/05 - Cowl - 14 hours
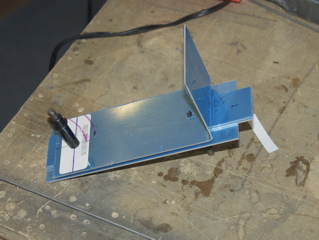
There's a weird looking bracket at the bottom of the cowl that attaches to the engine mount. It secures the part of the cowl that doesn't have any hinge material holding it in place. This has been a pile of parts sitting on my workbench for a while, so I finally decided to figure it out and mark this item off my list.
I started by marking up the individual pieces according to the plans (I don't even bother with the instructions at this point.) I found it easiest to first match-drill the holes for the screws that will penetrate the entire mess. With those drilled I was able to cleco it together and get an idea of where everything else is supposed to go. |
 |
The bend on the flange that attaches to the engine mount was difficult to understand at first. I ended up putting the cowl in place, setting the assembly inside the cowl, and noting where it touched the engine mount. I then measured the distance that the bracket was sticking out from the back of the cowl and used that to determine where to make the bend.
|
| |
|
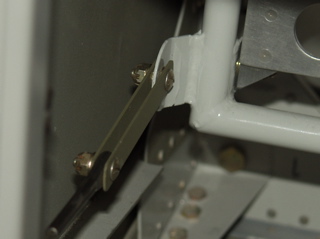
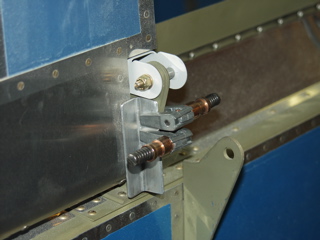
| I should have taken more pictures of this, but I didn't. Anyways, here it is after I bolted it to the weldment. You've got to be a contortionist at this point to fit the washers and nuts into the tiny space available. Notice that I still have the cleco edge clamps holding the upper part of the brace. I waited until everything was lined up before I drilled the rivet holes. |
 |
| |
|
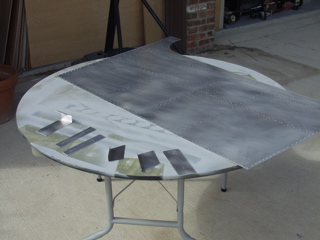
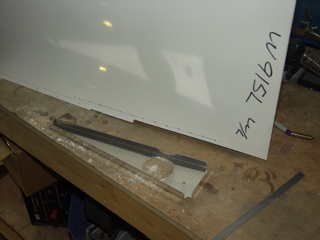
That last picture was a little out of chronological order, but whatever. Here is a picture of what might possibly be my last priming session. Maybe. The big piece is the forward skin for the fuselage that needs to go on permanently before I can install the windscreen. The other pieces are for the bracket thing shown above.
I also primed the steel parts for attaching the rudder pedals. I figured out a cool way of determining the length for these: I used some pieces from an old Erector Set. They have holes every 1/2 inch or so, and I was able to test the length that way before making the parts from steel. |
 |
| |
|
 |
 |
| |
|
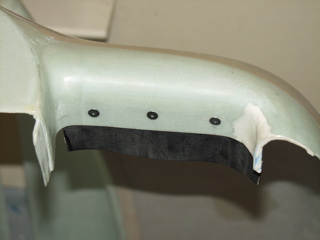
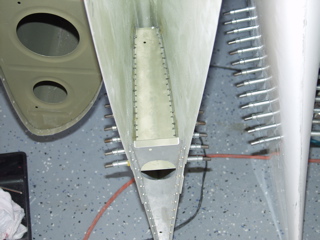
Jumping back to the cowl, I attached the baffle seal to the lower cowl air inlet. I may need to trim this a bit. I put a piece of aluminum strip on the other side of the seal to give the pop rivets something to grab ahold of.
I also finally got around to permanently installing the hinges on the cowl. I used a small amount of ProSeal on the side hinges to help keep them together. |
 |
| |
|
 |
 |
| |
|
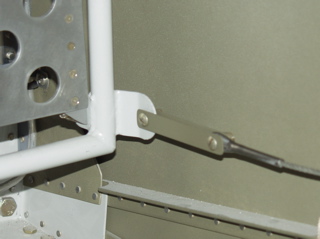
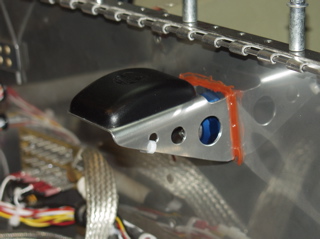
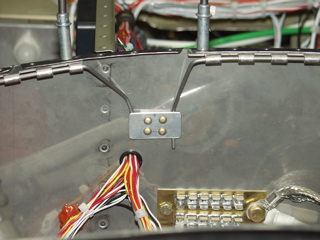
Another jump. Wanna see how I mounted my GPS antenna? I made this bracket from a piece of .063 aluminum and used one of those eyeball things for the firewall penetration. That way I can remove it without having to disassemble the cable. The antenna will sit under the fiberglass of the cowl and should have a clear line of sight to the sky. |
 |
| |
|
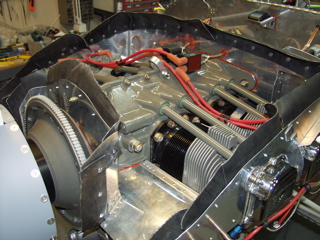
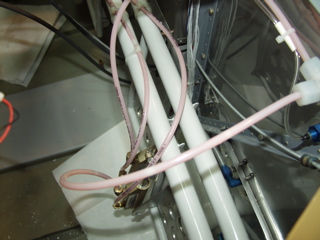
I also finally attached the high tension lines to the coils for the electronic ignition. They pass through the rear baffles using rubber grommets, and then I covered the entire grommet with red RTV.
|
 |
| |
|
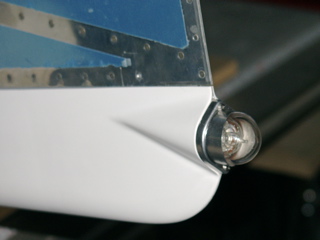
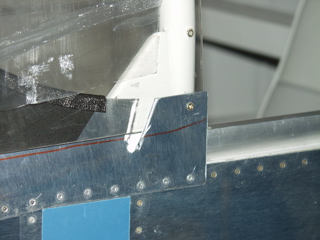
Jump to the back of the plane. I installed the light on the rudder tip. I had trouble figuring out how to do this, but what I ultimately decided was to first fill the area with about 1/2" of T88 epoxy. I then bored the hole to fit the light, and then I tapped the screw holes for 4-40 screws, which hold the thing in place. |
 |
| |
|
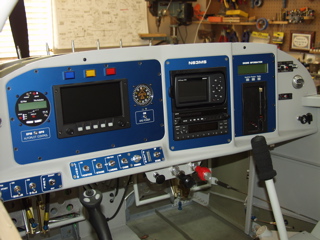
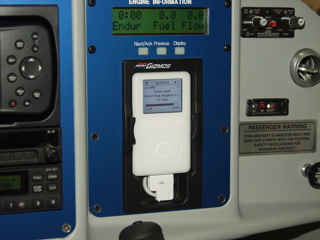
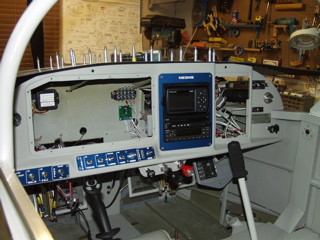
Finally, how about some panel pictures. I made some adjustments to the subpanels and replaced my AirGizmos Panel Dock with a new one that works with my 396. I also wired an additional cigar lighter plug (whatever it's called) behind the panel so I can power the iPod. |
 |
| |
|
The iPod is held securely in my panel with the AirGizmos iPod Dock (another shameless promotion). It is now wired into the intercom and into the main bus for power. This is more for my passengers than for me, but the intercom will cut the volume of the iPod during radio traffic, so on long trips I might indulge in some Texas Blues to pass the time. This mount will also hold the new Video iPod. Imagine having a movie entertainment center for your passenger, all in the size of an iPod. Cool stuff.
Notice I also installed the passenger warning placard. |
 |
| |
|
11/2/05 - 11/3/05 - Brakes, etc. - 6 hours
Trying to finish up stuff under the forward skin, I wanted to go ahead and get the brakes done because it is much easier to reach the brake parts with the "lid" off the plane. So I grabbed the tubing bender and set to work making these wacky looking curly bends around the gear legs. They really weren't that much trouble other than trying to visualize the left side being opposite of the plans. |
 |
| |
|
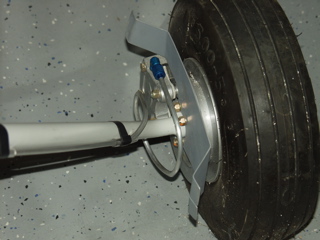
Here you can see the attachment at the root of the gear leg. You can also see the spacer I made from some cheap Home Depot tubing, and then secured with electrical tape. Really, this is how the plans show to do it.
Thanks to some detailed instructions from my buddy Matt, I was able to bleed the brakes without much trouble. I have a little oil can that I used to pump fluid into the system. I made a big mess on the floor of the shop, but fortunately I only had one leak that was fixed by tightening one of the AN fittings. |
 |
| |
|
 |
 |
| |
|
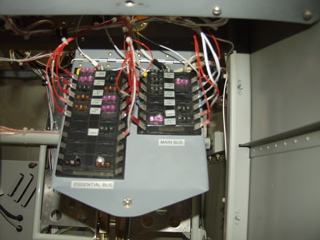
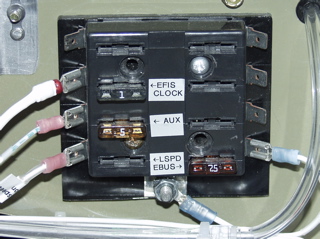
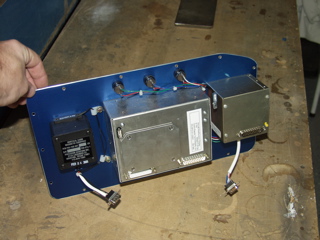
Moving along. Here is a picture of my fuse blocks. They are attached to a hinged panel on the passenger side, making it much more convenient to deal with fuses. I went ahead and labeled each fuse, so I don't have to try and read the little labels on each wire.
There is one other fuse block. It's the battery bus, and it's located right next to the firewall. I labeled it as well, although I'll probably never be able to read it. These pictures are for my reference in case I need to mess with the fuses later on. |
 |
| |
|
 |
 |
| |
|
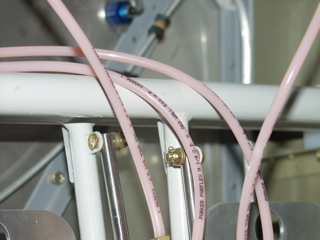
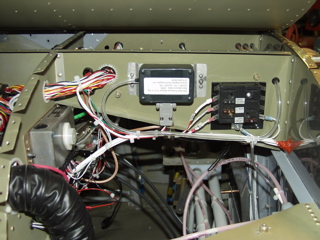
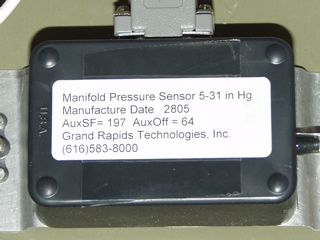
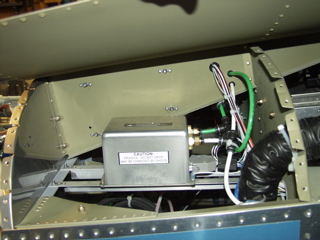
Also for future reference, here is the Manifold Pressure sensor and it's necessary details.
|
 |
| |
|
Also, here's one last shot of the AHRS under the left side. This thing is installed with platenuts just in case I need to remove it.
|
 |
| |
|
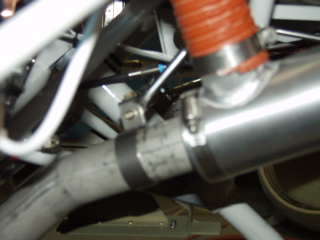
Here's a terrible picture to show that I installed the exhaust hangars. I'll try to get better pictures of this next time. |
 |
| |
|
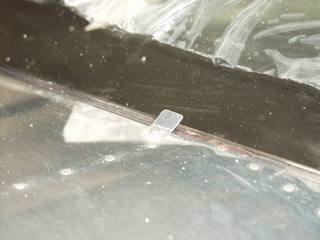
I made this little retainer clip to hold the ends of the hinge pins along the upper part of the cowl. It is simply a spacer of the same thickness as the pin, and a piece of aluminum to act as a clip. Spring tension holds the ends up under the retainer, but I can release them by reaching up through the oil door and pulling.
|
 |
| |
|
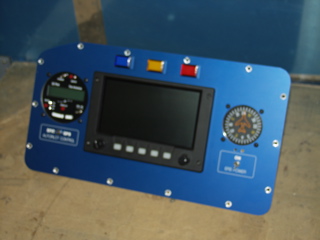
Now that I think I have everything done up front, it's time to rivet the upper forward skin. I've been holding off a long time on doing this, but I really need to do the windscreen, so here goes. I first removed the subpanels from my instrument panel, leaving two gaping holes which are perfect for accessing the places that need rivets. The panels are easy to remove since there are just a few connectors to unplug.
Below, you can see the main panel removed from the plane nice and neat. |
 |
| |
|
 |
 |
| |
|
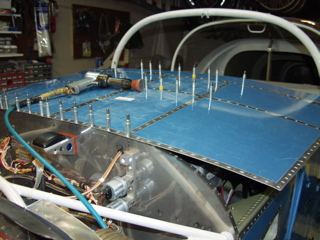
My main helper (Tim) was unavailable this evening, so I figured out a way to rivet some of it by myself. I left the sides open so I could reach underneath and rivet the center ribs. I had worked hard to make sure I didn't limit access to the rivet lines by installing wires or anything too close to the top of the ribs, and this was a good thing as I was able to reach in and do a lot of them without any help.
|
 |
| |
|
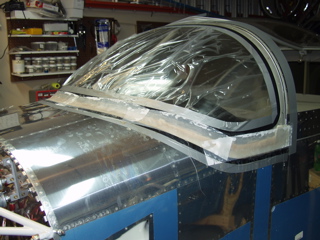
11/4/05 - 11/13/05 - Windscreen - 20 hours
Most of this stuff was accomplished last weekend, while this weekend was mostly spent sanding the fiberglass.
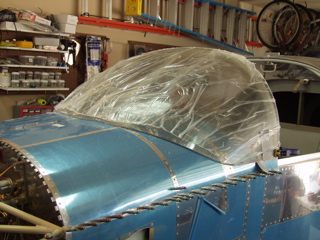
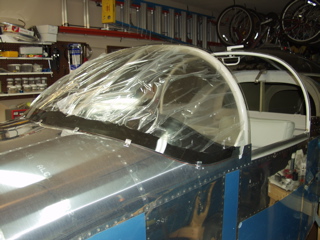
I started by trimming and re-trimming the windscreen. This piece has been sitting under the fuselage for many months waiting to be cut. |
 |
| |
|
Yea, it fits!
I solicited some help with the difficult to reach rivets up under the instrument panel. I am still sore from laying on the fuel selector for an hour! Ultimately, however, I was able to get all of the rivets bucked. Thanks to my fellow builder, Todd, for his help. |
 |
| |
|
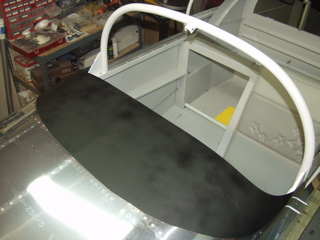
One deviation from my Grand Plan: I decided to simply paint the dash, rather than to use the fancy dash covering material that I had purchased. I decided that it wasn't worth the added weight. I guess I can add it later if I want.
So, I masked off the entire airplane so I could paint this one section. I used a can of black Krylon texture paint that I got from Home Depot. It worked great. |
 |
| |
|
Here it is while I waited for it to dry. By painting it now, I don't have to worry about messing up the windscreen later on. |
 |
| |
|
Next I spent some time getting the holes drilled and countersunk, and tapping the holes in the roll bar for #6 screws. I had a heck of a time tapping the holes, not because it was difficult, but because I went through two taps before I finished. One broke, and the other went dull. So, after two trips to the hardware store I finally finished tapping the holes.
I fabricated and installed the little clips that hold the front of the canopy in place. These will be hidden by the fiberglass layup. |
 |
| |
|
 |
 |
| |
|
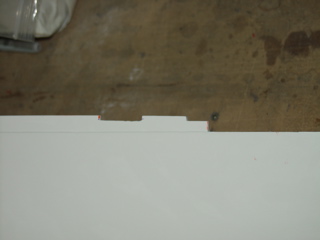
Here's one detail that I had difficulty figuring out. Van's only shows this little cut in one place on the plans, and it doesn't seem to be mentioned in the instructions, but a lot of other builders seem to do it this way, so I thought about it a while and decided to do it as well. I figured that otherwise I was going to have to install another clip, and then I would have to account for the bulge where the windscreen overlaps the skin. So, this way everything has the same dimensions where it meets the sliding part of the canopy. |
 |
| |
|
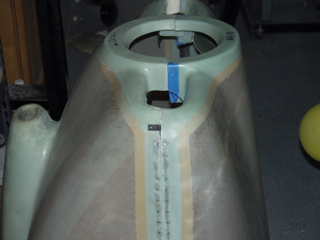
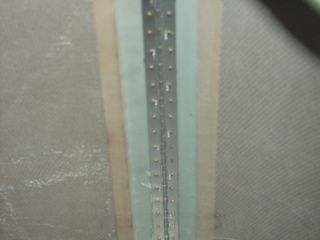
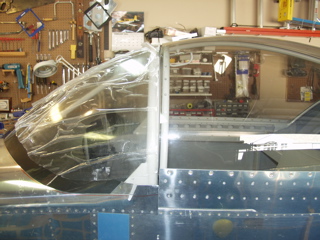
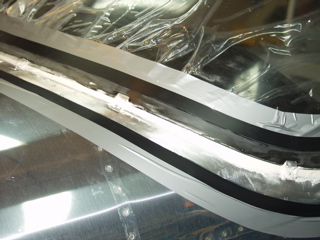
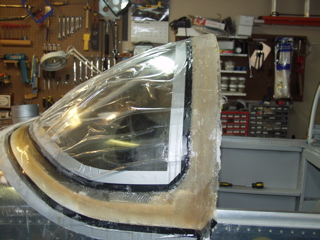
With the clips installed, it was time to mask off the bonding area and scuff everything with sandpaper. I used two different colors of tape so I could tell if I was sanding through the first layer. This worked out great. The silver stuff is the thick electrical bundling tape that 3M sells. The black, of course, is regular old electrical tape.
|
 |
| |
|
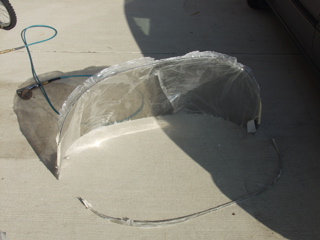
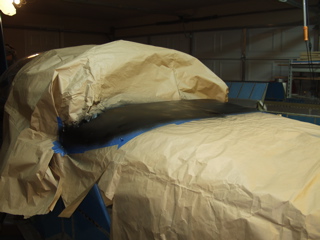
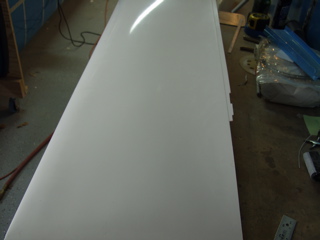
Time for fiberglass. I laid it up according the plans, starting first with thin strips and ending with thick strips. I covered the entire mess with peel-ply. Notice that I didn't do the rollbar yet. |
 |
| |
|
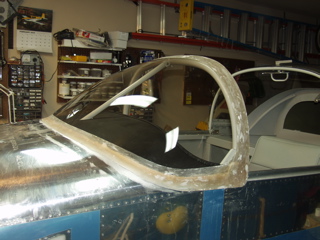
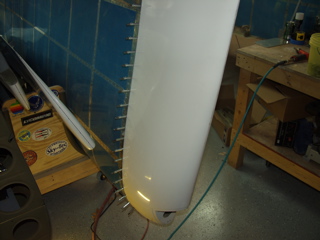
The next step was to do the rollbar. This required me to close the canopy and latch it shut, and then put some tape to act as a release agent on the sliding part of the canopy. I also used some wax on the tape. I later had to unstick the epoxy from the tape by running my thin metal ruler between the fiberglass and the tape.
I spent the remainder of the weekend sanding, filling, sanding, filling, and sanding some more. |
 |
| |
|
11/14/05-11/15/05 - Windscreen - 2 hours
I spent more time sanding, and filling, and finally decided that I had to move on to something else, so I removed the masking from the windscreen and am considering it done for now. The painter will finish this, so I am not even going to put primer on it. |
 |
| |
|
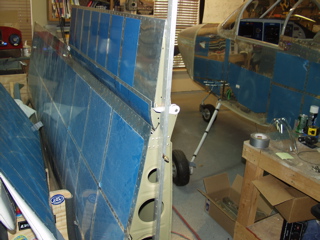
11/26/05-11/27/05 - Wingtips - 8 hours
Last week I had some visitors to the project. They are a couple of firefighters who will be helping me move the plane to the airport. They wanted to get an idea of the dimensions so they could decide which trailer to use. After some discussion we have tentatively discussed this Thursday as a possible day for the move. We'll see how it goes. Mean time, I've got a few Items that I can work on. |
 |
| |
|
First, I decided to forgo the joy of making my own fairings, and so I sent Bob at Fairings, Etc. an order for gear fairings. I received mine last weekend, and they are far better than anything I could have produced. Besides, it's one less thing I have to work on before I move the plane.
Next, I started working on the wingtips. The first picture (above) shows the positioning of the ailerons. I held them in position with some clamps on the aileron hinge. |
 |
| |
|
Fitting the wingtips involves trimming the flange of the wingtip to fit. The first one went really slowly, as I made small cuts until it finally fit properly. The second one was much quicker because I knew what I was doing.
Next, I did my best to hold the tip in proper position relative to the aileron as I drilled the screw holes to #40. I was sort of successful. The tips fit nicely, but they didn't match the ailerons perfectly, so I had to make adjustments when I re-drilled to #30. Ultimately I will be at #27 for the #6 screws. |
 |
| |
|
 |
 |
| |
|
Next came the ribs that go inside the tip to give it a little bit of structure. These are slid in place while the tip is attached, and then the tip is removed for drilling.
The horizontal ribs are bonded to the inside of the wingtip prior to being riveted. This is supposedly to make it look more smooth. |
 |
| |
|
 |
 |
| |
|
11/28/05-12/1/05 - Getting Ready to Move
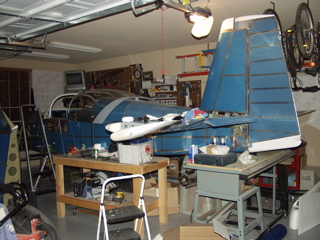
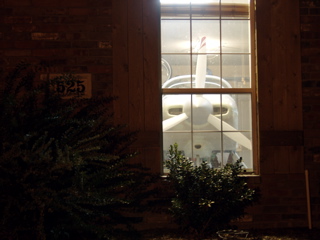
Here's the view most of my neighbors see every night if they drive by my house. I'm sure they are wondering how I'm going to get this thing out of the neighborhood. The past few days I have been wondering the same thing. My first plan was to use a trailer that a friend of mine owns. He had volunteered it over a year ago and I thought it might work, but after we measured the wheel base, we realized the trailer wouldn't work. So, time to move to "Plan B." |
 |
| |
|
I called a local towtruck owner who has a flatbed towtruck. He measured the width and it was 92", which is perfect for my purposes. So, I scheduled the truck for first thing Friday morning. In the mean time, I did all of the remaining little things to be able to move the project. I cleaned off my workbenches, packed the fairings into the cockpit, installed the oil door with duct tape, and I removed the empennage from the fuselage.
Next: Moving to the Airport |
| |
|
