| |
|
Previous: Delivery/Inventory |
|
| |
|
12/29/04 - Fuel selector - 4 hours
Okay, I'm back from vacation and ready to roll.
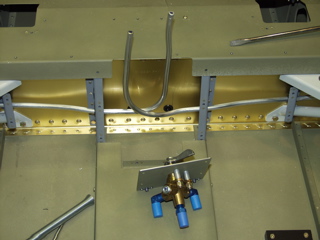
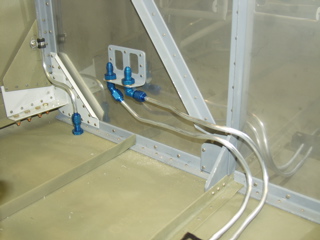
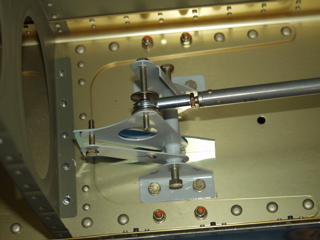
Earlier in the week I fiddled with the fuel selector and got it attached to the plate. The callouts for the lengths of the aluminum spacers is wrong, so I had to tweak them and add a washer to get them right. Using some spring bending tools that I picked up at Home Depot, I ran the fuel lines along the spar and through the sides where they will eventually attach to the wings. |
 |
| |
|
The route through the gear mounts was tight, but I was able to work my way through the lightening holes with the bending spring in place. I didn't see it on the plans, but I went ahead and installed a rubber bushing at the gear lightening holes so the tubes don't start to rub. No picture of that.
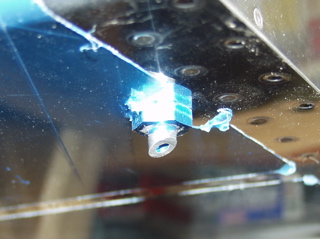
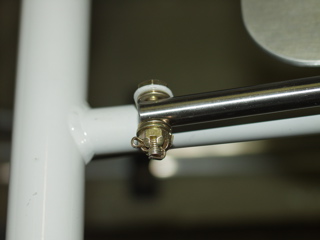
Here you can see the first of the connections. The ends of these tubes are flared. This tubing is the thick 3/8" stuff, and it is difficult to maneuver once you've cut it short, but I think I did okay. |
 |
| |
|
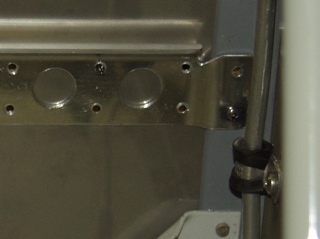
I made two of these cool spacer blocks out of some UHMW plastic that I bought from Van's. It is the same stuff that the flap bushing blocks are made of. These spacers are going to go on the floor in the cabin to hold the fuel and brake lines above the floor and keep them from rubbing against one another. I made these by first drilling holes for the tubes, then drilling the holes for the screws, then cutting it in half, and finally tapping the bottom hole for threads. The screw holes are countersunk on top.
Next I installed the brake line fittings. |
 |
| |
|
 |
 |
| |
|
| The fuel vents are interesting. The threads are removed and polished, and then I had to cut a 45° angle. The plans call for some sort of screen to be glued to these, but I don't have any screen so I guess I'll take a trip to Home Depot Aircraft Supply later to see what sort of screen material I can dig up. |
 |
| |
|
12/30/04 - Vent and Brake Lines - 6 hours
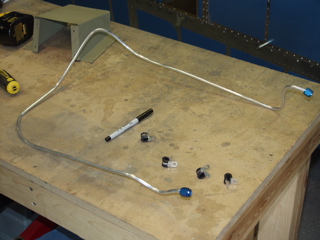
The vent lines are made from 1/4" tubing, which is easier to bend than the 3/8" stuff used on the fuel lines, but is also easy to collapse if you make too tight a bend. Again, I used the spring bender. I started at one fitting and worked my way around to the other one. Then I took the whole mess out and put the fittings on each end. I found that I had to leave the last bend straight until I had the fitting installed, otherwise there wasn't enough room for the flaring tool to attach, since the sleeve won't go around the bend. |
 |
| |
|
 |
 |
| |
|
 |
 |
| |
|
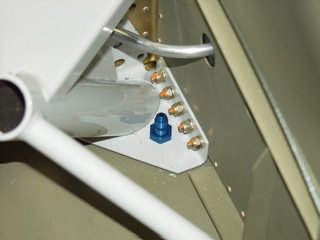
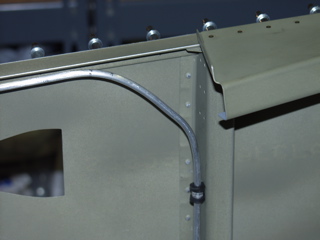
| The adel clamps hold the rigid tubing fairly well, but I made sure to leave at least 1/8" distance between the tubing and any hard surface. One of the screws had to be trimmed (according to the plans) so it didn't stick out and touch the skin. |
 |
| |
|
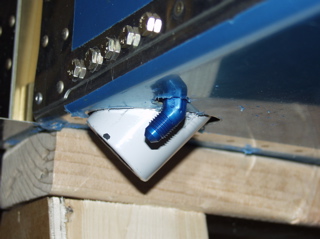
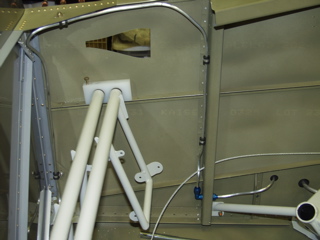
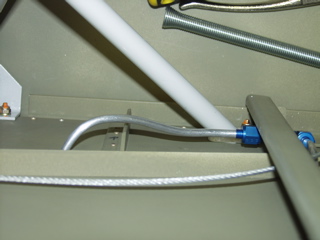
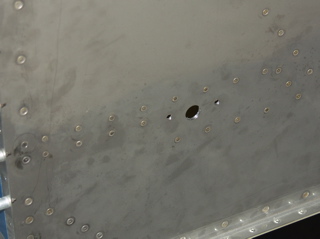
| This picture is taken from the top, looking down at the floor, to show the vent line exiting the fuselage. |
 |
| |
|
| The brake lines were next. I worked with 6' long pieces, only cutting them to length after everything was situated properly. |
 |
| |
|
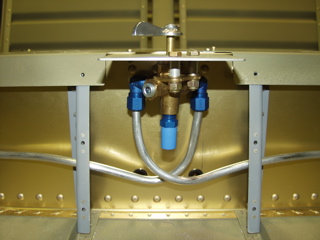
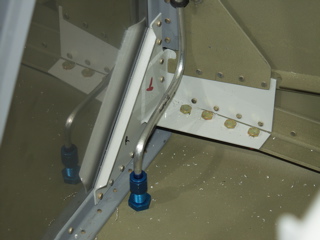
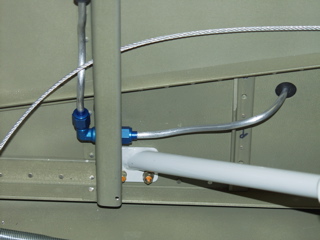
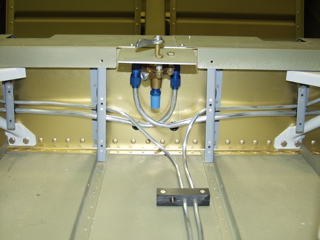
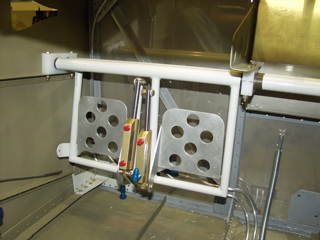
| Here's another shot of the fuel selector valve, this time with the brake lines installed. Eventually there will be another 3/8" line running up through the floor, as well as a bunch of wiring. |
 |
| |
|
12/31/04 - Project Visit, Misc. - 5 hours
I placed an order with Aircraft Spruce for the Facet electric fuel pump and some EZ-Turn. I want to try to wrap up all of the cabin plumbing before I permanently install the upper deck components.
I started today by installing the brake reservoir on the firewall. This is my first firewall component, but it was pretty easy to position and drill. The bolts run through one of the support beams, and extra washers are called for to help the top of the canister clear the firewall when it is bent forward. I used three washers. |
 |
| |
|
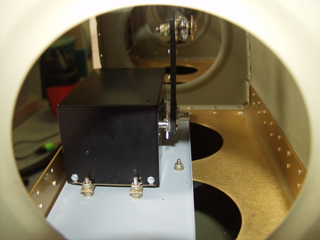
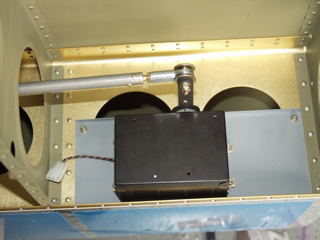
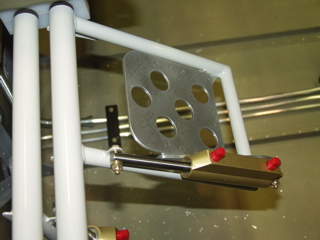
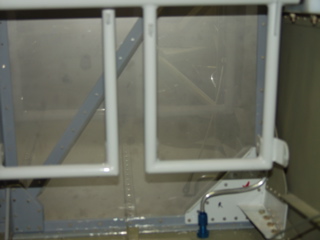
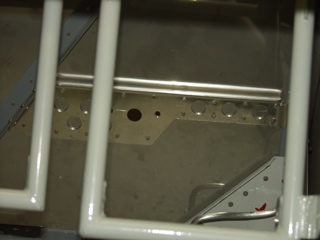
Today I expected a visit from Tony from Safeair1. He needed to test his Trio Autopilot servo mount kit for the RV-9A, so he stopped by for a few hours and installed the kit. After working for an hour or two, including me asking his expert advice about a bunch of things on my plane, he had installed the servo in my right wing. This picture is taken through the lightening hole in the right wing. The servo attaches to the bellcrank with a pushrod. Nice and clean. Unfortunately he didn't leave the servo. :-) I'll have to order mine later. If you are looking to install a Trio autopilot, give Tony a call. Tell him you read about it on my site. |
 |
| |
|
 |
 |
| |
|
After some deliberation, I decided it is time to go ahead and instal the rudder pedals and firewall recess permanently. The recess requires some riveting prior to installing it, so I dimpled and squeezed the flush rivets first. I will rivet this thing to the firewall soon.
Mean time, I started gathering the parts I needed to install the pedals. I riveted the center support to the firewall brace, and then I bolted the pedal assembly in the forward-most position. |
 |
| |
|
1/1/05 - Happy New Year - 4 hours
Happy 2005! Looking back over the past year I have completed most of the airframe, but none of the systems or controls. Hopefully 2005 will be the year I fly it! I better get busy.
I have assembled the forward deck before, but I wanted to make sure my plumbing didn't interfere, so I reassembled the parts.It's really not in the way with the top skin off, so I think I'll leave it for now. |
 |
| |
|
 |
 |
| |
|
Time to install the brake pedals. I was surprised to find that the pedals didn't line up like they did when I drilled them a few months ago. The only thing I can think of is that I didn't use all the spacer washers recommended in the plans, so the master cylinders were angled, causing the pedals to be at a different position. Anyways, I had to remake the side "ear" of the left pedal so it would line up with the right pedal.
With that done I set about putting the hardware together, including the cotter pins. By my best guess, it looks like this hardware is just supposed to be "snugged," but not torqued. I don't want sloppy pedals, so I may have made mine a little too tight, but they will get looser once they break in a bit. |
 |
| |
|
1/2/05 - Fabricating - 3 hours
There are a bunch of small parts related to the forward deck that need to be fabricated, so I decided to tackle some of them today. Unfortunately, my bandsaw blade has gone dull, so this took way longer than it should have. I have determined that these cheap Harbor Freight blades don't like steel. They will go dull in no time if used with steel. So, I guess next time I am at Harbor Freight I will buy a couple, but for today I just had to make do with a dull one, which I hate, but that's life. |
 |
| |
|
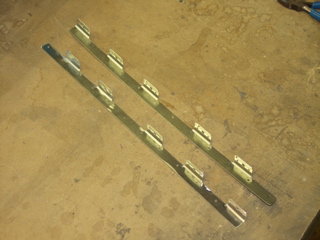
| The first two parts are already fabricated, but I had to spend a while cleaning them up on the Scotchbrite wheel because of all of the tricky bends in the metal. These are almost worse than deburring ribs. Fortunately there are only two of them. They attach to the back side of the panel with screws/platenuts, and to the skin with rivets. |
 |
| |
|
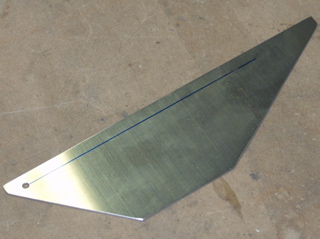
Next I had to fabricate this doubler plate from .063 Alclad. I must have already used the piece that Van's supplies for this part, because I had to raid the finishing kit for a piece big enough. I'll probably go ahead and order a replacement from Van's next time I place an order, just in case.
This part is used to reinforce the location on the center rib where the canopy reinforcement bar attaches. |
 |
| |
|
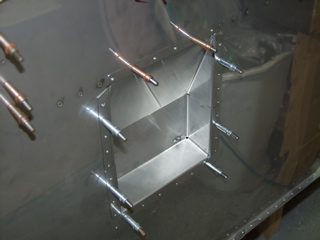
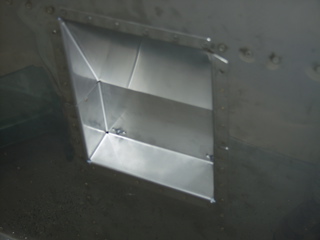
| One last thing: for better or worse I have permanently riveted the firewall recess. I have been told that it needs to be sealed up really well around the edges and corners, so I will get out the ProSeal in the next few days and do this at the same time I install the NACA air vents. |
 |
| |
|
1/3/05 - Gascolator, etc. - 4 hours
There is a bracket that comes with the firewall forward kit that attaches to the cabin side of the firewall to allow you to install the gascolator. I decided that it was probably better to install it now while I still have a little bit of access. I have already installed the rudder pedals permanently, so it will be a bit more tricky already, but there are no brake pedals on the right side, so it shouldn't be an issue. |
 |
| |
|
After determining the correct position for the bracket, including drilling out one rivet, I clamped the bracket to the firewall reinforcement angles and match-drilled the dozen or so rivet holes. There are also two AN3 bolt holes and a large pipe fitting hole that need drilling, so I did those as well.
Deburring steel is no fun, but I eventually got everything cleaned up. I used the little pop-rivet dimple die set that I got from Avery a long time ago, and it worked great. I also had to countersink one of the holes that overlapped a reinforcement angle. |
 |
| |
|
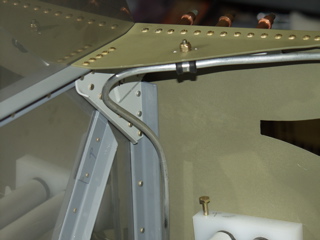
Here's a little interference I had with the vent line. I went ahead and temporarily disconnected the vent line and gently moved it out of the way so I could rivet these more easily.
The Sugar bowl is on, so I am splitting my attention between the plane and the tube. Not always a good idea. I might miss a play. :-)
Below you can see the completed and riveted gascolator reinforcement bracket. If you are reading this before building your firewall, order the bracket now and install it when you build your firewall! |
 |
| |
|
 |
 |
| |
|
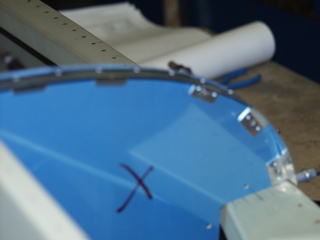
One thing has been bugging me lately. There are no holes in the center rib where it is supposed to be riveted to the firewall, and no holes in the firewall either. There is no mention of this omission in the plans or instructions, and no apparent way to determine the proper location. So, I scratched my head for quite a while on this. Finally, after reading some other websites and not finding much, I decided that I could set the position of the center rib using the upper skin.
So, I clecoed the skin in place, but I offset it a hole or two so I could see the rib. Next, I clamped a piece of angle between the right rib and center rib to make sure the center rib was straight. I measured and re-measured, and finally I marked the location of five holes, matching them to the holes for the left and right ribs by using a straightedge between the existing left and right holes. |
 |
| |
|
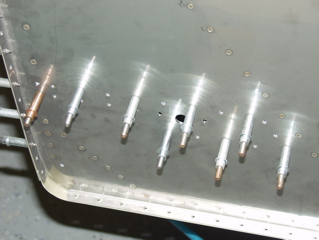
Finally, I measured and marked a centerline down what should be the center of the rib flange. Then I took a deep breath and drilled the first hole. Good news, it went through the flange! Install a cleco and continue. Five holes are now drilled, and it looks like they are in good position on the flange.
I don't know if this is the best method, but it seemed to work for me. Just be very careful, because you only get one shot at this.
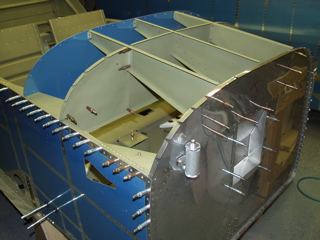
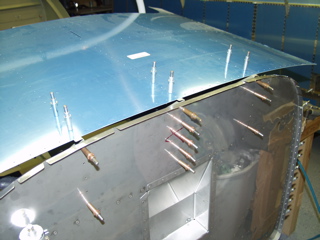
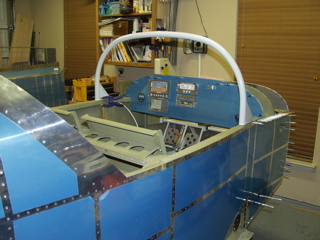
Finally, just for grins, I set the rollbar in place just to get an idea of how it is going to fit. |
 |
| |
|
| Next: Panel Install |
|
| |
|
