We are coming up on Easter weekend, so naturally I started thinking about what I've accomplished in the past year (on the plane at least.) If you follow this link, you can see that last year at this time I was working on the left elevator. I had not yet received the wing kit. So since then I have completed the wings (except for wingtips and riveting the bottom skins), built the fuselage, and I am currently working on the finishing kit.
I have spent over 1100 hours on the project so far, and right now it seems like my 1500 hour estimate might be just a bit on the low side, but I'll keep it right now just for fun. Here's where everything is:
Empennage: The surfaces are all complete except for the fiberglass tips. I have installed and removed the HS and VS several times to check the fit and clearance of various devices, wires, and what not.
Wings: I have intentionally left the bottom skins just clecoed on because I wanted to be able to add the wiring and plumbing (pitot) when I knew more what I was doing. At this point I think I can go ahead and finish up the wings and close everything up. I have already installed the lights in the wingtips.
Fuselage: The fuselage (the part that comes in the fuselage kit) itself is really finished. I haven't yet riveted on the forward top skin because I need access while I wire the panel.
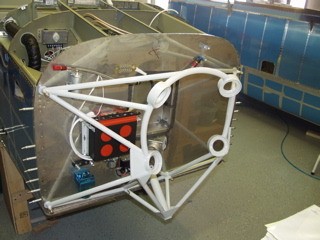
Finishing Kit: The most significant incomplete part of the finishing kit is the canopy. The frame is installed and bent, although I'll probably make a few more adjustments to it. I have been waiting for warmer weather before tackling the plexiglass bubble, but with Spring upon us, I'm not going to be able to put this off for much longer. I have not put the fuselage up on the landing gear either because it makes accessing the interior much easier. I will need to put it on the gear before I install the engine.
Instrument Panel: I have spent way more time than I probably should have, but the composite instrument panel is installed and looking good. I have installed the radios and am awaiting delivery of the engine monitor and GRT EFIS. I have not yet purchased the autopilot, and I am still debating on a couple of the instruments, but I think I've got time right now.
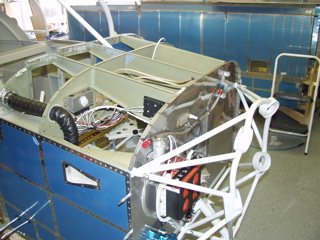
Electrical: I am in the process of wiring everything right now. Most of the "big wires" are done, except for the ones that attach to the engine.
Engine: The engine is up at AeroSport Power getting overhauled. I spoke with Sue yesterday, and she said that it had been disassembled and the parts were being tested. Hopefully I will have a better idea by next week. Fortunately, this is not work that I have to do, only pay for.
Interior: Abby Erdmann is doing the interior and she expects to deliver it in about three weeks.
Propeller: I have ordered a three-bladed composite prop from Craig Catto. These take about four months, and I ordered mine about two months ago. That means I should receive it by June.
Fiberglass: I did get some fiberglass experience when I installed the instrument panel, and it wasn't too bad. Hopefully the tips will go according to the plans.
Firewall Forward: I have all the parts from Vans for hanging the engine, including mounts, hoses, oil cooler, heat baffles, and exhaust system. I'm sure this will all take a while to get just right.
So the natural question is: When will it fly?! Well, lately I have been spending a lot more time on "real work", and a lot of the major components of the plane are on order, so I can't really say at this time. I'd like to think that it will be sometime in 2005. We'll see. Meanwhile, it's back to the electrical system....
One more thing: this whole process has been totally one of the most fun things I've ever done. Up to this point I have thoroughly enjoyed just about every aspect of the project, and while it has taken a lot of my free time, I get a lot of satisfaction from the sense of accomplishment that comes from building something of this magnitude.
3/25/05 - Electrical Planning - 2 hours
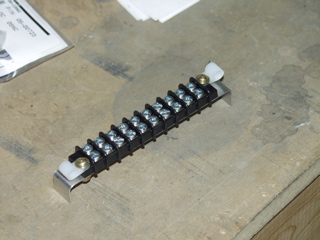
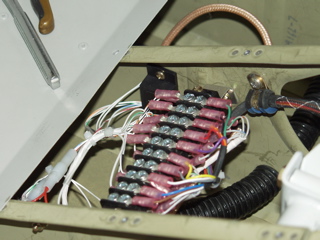
I have been worrying about getting the stick grip wired to the multitude of function buttons. Actually, there are only four buttons, plus the china hat, but it's still a lot. I decided to use a terminal block to do the wiring, but soon figured out that 10 terminals was not enough. I drew up a diagram of all the wires that need to be hooked up, and this is what I came up with.
3/26/05 - Wiring Madness - 8 hours
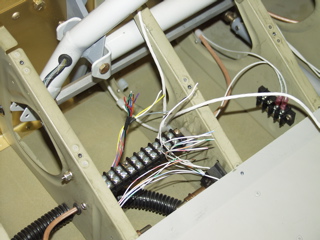
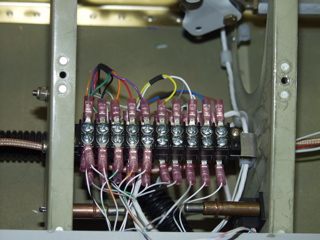
After looking at this for way too long, I finally decided to make a "double terminal block" by mounting them back to back on a little shelf I made to go between the seat ribs. Now I have 20 circuits that I can deal with at the same location, making it much easier to attach all of the relevant connections.
Before I could wire the stick, I had to...um...install the stick. Without my seat cushions I had to figure out another way to estimate the right height, so I went and found a pillow and sat in the plane, making airplane noises as I estimated where would be a comfortable location for the stick grip. I then marked it and used my die grinder and a cutting wheel to cut the stick down about 6".
The CH Products stick grip includes a bushing that fits snugly inside the standard stick grip. It also has a hole to accept a set screw, which allows the grip to be secured to the stick. I also figured out that there is a little ridge around the shaft of the grip that would allow the stick to turn freely while still being secured to the stick. This would mean that the stick could turn on its axis during flight, possibly making it more comfortable. I'll have to play with this to see if it's something I want or not.
Anyways, I did this process three times before I got it to the height I think will work for me.
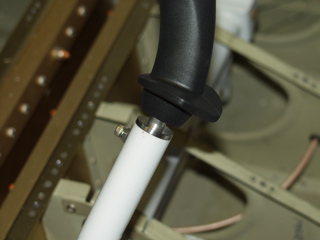
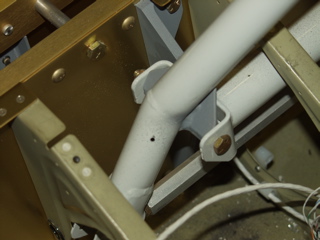
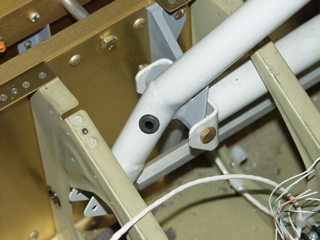
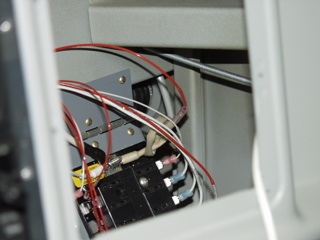
Next, I drilled a hole in the base of the stick to allow the wires to exit with the least amount of stress. I made a pilot hole just below the pivot point on the stick, which is where I believe to be the least amount of overall motion. I drilled the hole at a 45° angle to the two axes, thinking that this will also help to keep the wires safe. Who knows. Anyways, after drilling a #40 hole, I enlarged it to accept a rubber grommet.
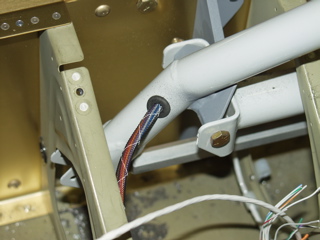
The CH stick comes pre-wired with some Techflex (or something) wire protector around the wires. This worked out great, making a nice, protected bundle coming out the bottom of the stick.
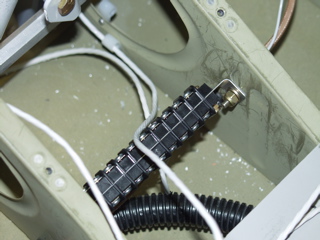
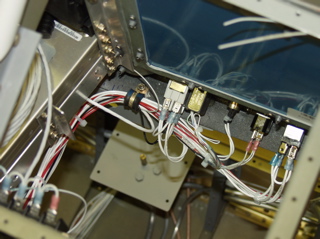
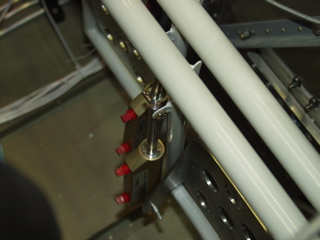
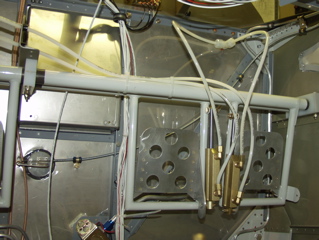
Here you can see the adel clamp that I installed to secure the wire to the floor rib. I can now assume that anything aft of the adel clamp is not going to move, so I can attach the wires to my terminal blocks.
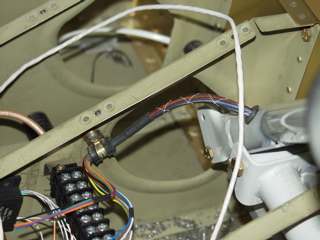
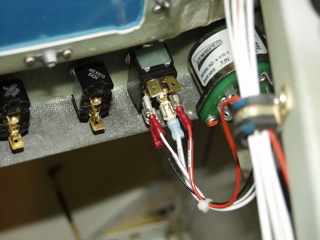
Here are some of the wires, ready to be attached. Notice that I installed the servo relay decks, one on each side of the terminal block assembly.
I then spent about two hours with a wire stripper and terminal crimper. The result is an organized mess of wires and terminals. There are several wires remaining to be attached, including PTT and other functions, but the trim system is ready to roll...except that the servos aren't attached to the plane yet. Oh well. That's another task for another day.
3/27/05 - Master switch - 2 hours
My wiring plan is designed according to the Aeroelectric Connection, which is totally invaluable when doing a project like this. I highly recommend getting this book if you haven't already.
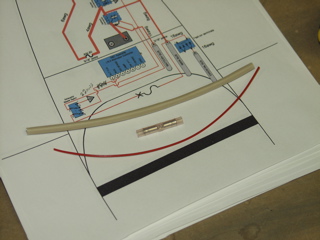
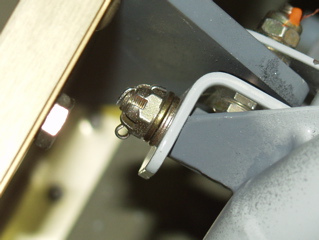
One of the items I received last week was a 2-3 switch for my master. So I went to my wiring plan and started wiring it up. The first thing I noticed is that I needed to build a fusible link. This is a slow acting fuse, of sorts. It is made from a piece of wire and some insulation.
One of these will replace an inline fuse, and isn't as prone to blowing accidentally due to a momentary voltage spike. At least that's what I understand. Anyways, this thing goes between the main bus and the master switch.
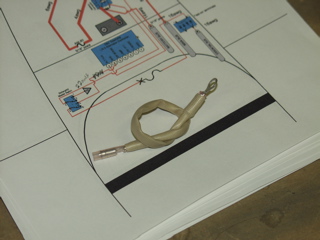
Here it is, installed and ready to go. It's not really anything magical. It's just a piece of wire, four wire gauge sizes smaller than the wire it is protecting, covered by a thick piece of insulation. If it blows, it won't affect anything around it because the insulation keeps all of the action inside.
Finally I wired the switch, which is the easy part. Four fast-on terminals crimped and it's ready to roll.
3/29/05 - Not Much - 1 hour
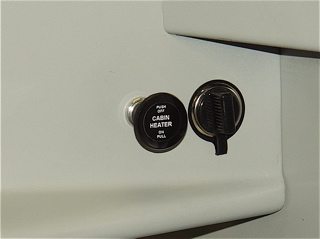
I've been totally swamped with "real work", but in an effort to do something on the plane every day, I went out and found some things that needed doing. I had ordered a label for my cabin heat knob from Aircraft Spruce, so I stuck that on. I was sort of wishing they had one that said EJECT. I also ordered the passenger warning dry transfer that ACS sells, but I don't know if it's going to work for me.
I also spent some time trying to figure out how I am going to organize the wires that go to the strobe power supply.
3/30/05 - Engine Update - 1 hour
Again I didn't have much time today, but I did get a call from Sue at AeroSport Power with the news about my engine overhaul. You can check out my updated engine page for details, but the short story is that the engine is going to be ready in about two weeks, and will be back here in about three weeks!
3/31/05 - Random wiring - 5 hours
There are many small details needing to be attended to, so this afternoon I came out to the garage, er, hangar, and decided to get some of them taken care of. I received in the mail a package of stuff I had ordered from Wicks, including a mess of screws in varying lengths. These I need for mounting small items here and there. For starters I needed to mount the servo relay decks to the seat ribs. So, those got mounted first. Next, I replaced a few screws that I had used that were too long.
One thing that I was worried about was how the location of the wiring block that I installed would affect seatbelt installation. Indeed, if I wanted to install five point harnesses this block would be right in the way. So, I guess that decides it for me: four point harnesses are the way to go, baby!
I finally got around to installing the cotter pins in the stick bolts. I figure these aren't coming out again now that I've got the whole thing wired up.
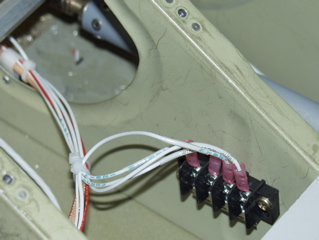
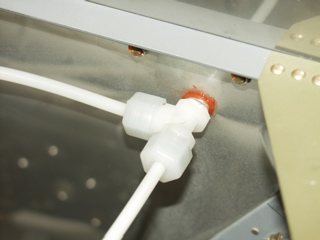
Next I finished wiring the position light distribution block. The idea here is that there is one wire coming from the switch on the instrument panel, and there are three position lights that need to be hooked up. Rather than splicing them together I am using a terminal block I got at Radio Shack. Now the wires are all nice and organized. These wires actually end at the wing roots. I am installing some AMP Mate-N-Lock connectors so that I can easily attach the lights when the time comes to attach the wings.
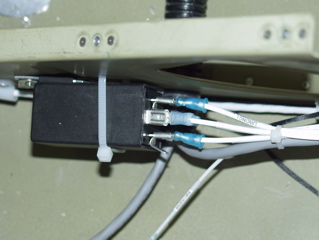
Here is the wig-wag relay for the landing lights. I put this under the seats as well and I am using it as a distribution block of sorts as well. The biggest issue is the honkin' huge 14awg wires that I needed to hook up the landing lights. 75 watts each, what are you going to do?!
I wired the landing light switch on the panel, then I spent a little while trying to organize the wires. The big 14awg wires don't like to bend much, so they protrude farther from the back of the switch than do the other wires.
4/2/05 - Brakes - 4 hours
I got my passenger brakes kit from Vans this week, so I decided to go ahead and install them to get a bit of a break from the electrical stuff. It's nice to be squeezing rivets for a change.
The brake pedals go together just like the pilot side ones. The only real difference I had was based on the fact that the rudder bars are already installed in the plane, so I couldn't do the same alignment that I did before. Just as well, since it didn't really work last time anyways.
4/3/05 - Flying
I didn't do any work on the plane today because I went flying for the first time in about six months. It was a pretty stiff southerly wind, but mostly it was right down the runway, so no worries. I flew one of the flying club's 172s.
4/7/05 - Brakes - 3 hours
Lots of "real work" this week, so I only touched the project a few times, but I did manage some solid time today.
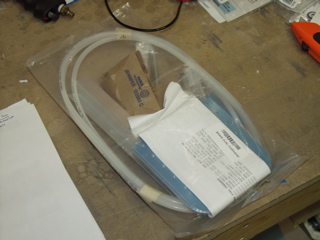
With both sets of brakes installed, it was time to run the tubing. I hope I figured out the right way to install the bushings and eyelets into this tubing. I guess I'll find out when I bleed them in a few weeks. I won't show you any pictures since what I did is most probably the wrong way to do it. I left enough extra tubing that I can replace the ends if it leaks.
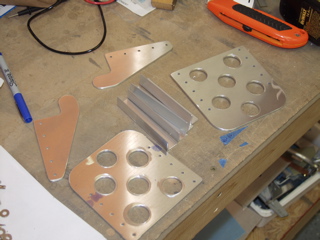
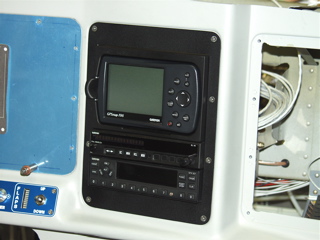
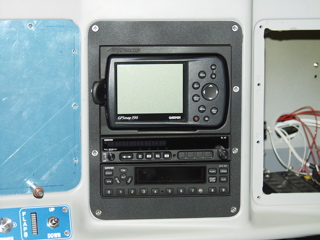
Another reason for the slow progress this week is that I'm finishing up work on a little side project. I have always intended to use a Garmin 196 or 296 handheld GPS in my panel, and I have been working on a mounting solution for some time. What I wanted was a mount that allowed easy removal whenever I wanted to take it out of the plane. I also wanted it to look as much like a panel mount as possible. So, I worked with a friend of mine who is a product designer. He modeled it in 3D and we made several "FDM" prototypes trying to get everything just right.
Finally this week we got a CNC machined version. It is extremely nice. Much better than I had hoped for. As you can see in the pictures, it matches the shape and style of the 196 exactly. I think this is going to work out great.
Of course, I didn't do all this work just for me. We went ahead and had the part manufactured, so you can have one too, if you like. I'm almost finished with a website where you can order it. In the mean time, let me know by email if you might be interested in buying one.
4/8/05 - Engine Update
Check out the engine page for some pictures I got from Aerosport of my engine!