| |
|
Previous: Cabin Stuff |
|
| |
|
2/12/05 - Rollers, Tracks - 2 hours
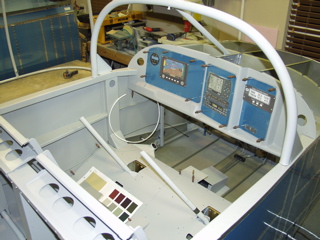
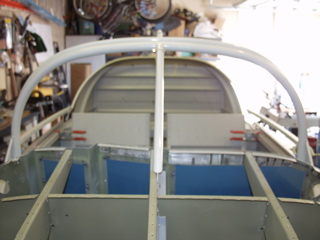
Here is the current status of the interior. The paint is dry and has cured for about a week, so I am comfortable getting the covers and seats back into place. I can now start to think seriously about wiring runs and other issues that I have been putting off.
This slider frame thing is supposed to be a pain, so I am planning to take it slow and get it right. |
 |
| |
|
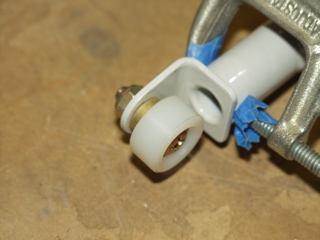
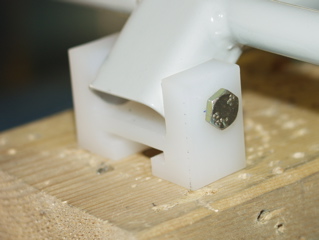
| I spent about a half hour looking for the hardware for the rollers. Once I finally had the parts it didn't take long to get the parts together. Mine look like this. The instructions say to clamp them to hold them in place, so I used some masking tape to cover the c-clamp. |
 |
| |
|
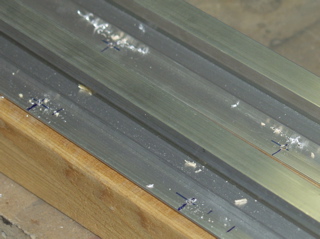
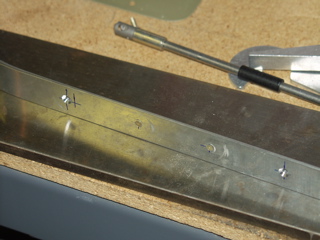
| I cut the side rails to length with a hacksaw, since the rail wouldn't fit into the bandsaw. I cut them about 1/16" extra long and I will trim them down once I know how much I need. |
 |
| |
|
2/13/05 - Rails - 3 hours
It was a beautiful day weather-wise, so since I don't have a plane to fly (yet) I got busy on this one. I started by measuring out and drilling the pilot holes in the side rails. The measurements are on the plans, so it was just a matter of carefully measuring, and then drilling the holes. Easy stuff. |
 |
| |
|
Clamping the side rails to the fuselage was a bit tricky because I needed to be able to slide the canopy into place. So I used some thin nosed clamps that I hardly ever use, but they turned out to be perfect for this.
The bushing block that slides along the top rail was next. I drilled the holes through the block. I then put it in place and drilled the bolt hole through the frame. |
 |
| |
|
 |
 |
| |
|
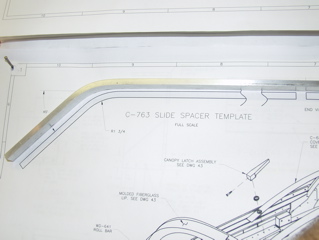
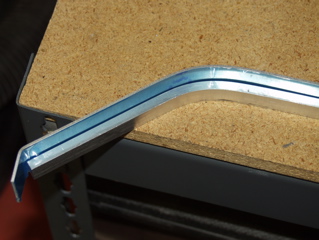
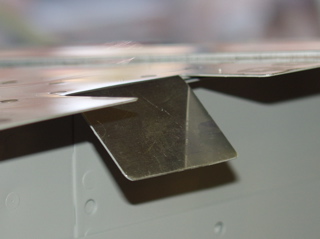
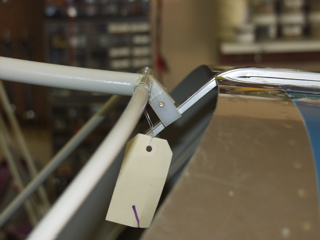
The top slider rail is made from a stiff piece of aluminum capped by a piece of thick Alclad. I had to make some slight adjustments to the prefabricated bend in the "spacer" bar. Then I had to bend the cap piece to match the angle of the spacer.
The spacer is riveted to the cap using double-flush rivets, so I had to drill and then countersink both the cap piece and the spacer. The whole assembly is eventually going to be screwed to the top of the fuselage using flush head screws and locknuts. |
 |
| |
|
 |
 |
| |
|
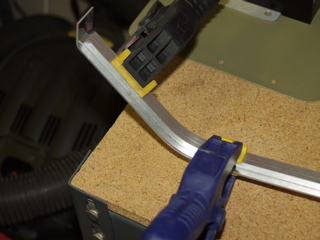
I drove the double-flush rivets using my back riveting plate.
For the screw holes, I don't have a #27 countersink, so I predrilled the holes to #30 and used my #30 countersink set just a little deeper than normal. Then I enlarged the holes for the screws to #27. Worked great.
It was nice to be able to do some metalworking after all this painting and fiberglassing that I've been doing the past few weeks. |
 |
| |
|
| Tiny detail: I had to bend the tab at the top of the fuselage. I did this with my fingers. |
 |
| |
|
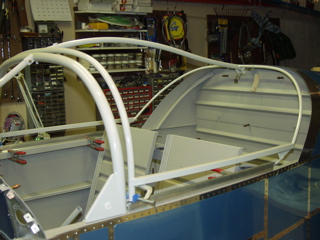
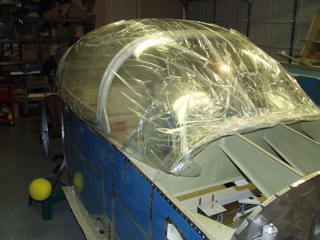
With the rails in place I carefully slid the canopy frame into place. At first glance it looks to be a great fit. I was somewhat surprise having heard all of the horrors of bending this thing. I was also a bit worried that I really didn't know enough to be able to tell if this was a good thing or not.
So instead of bending on the frame, I took some pictures. |
 |
|
|
 |
 |
| |
|
 |
 |
| |
|
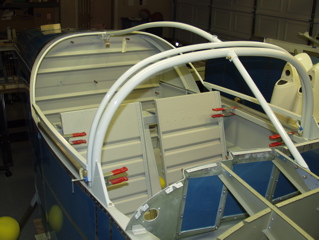
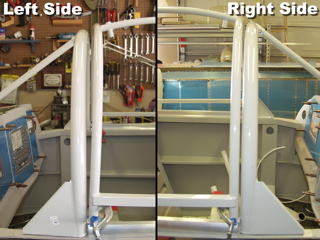
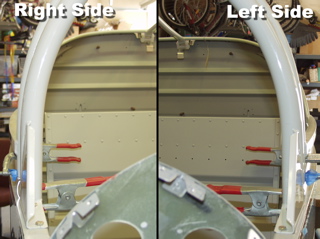
Here are some comparison pictures to show symmetrically what I am facing. Notice on the first picture that there is a wider gap between the rollbar and the slider frame on the left side than on the right side.
The sides really seem to be formed nicely. The only other area I am concerned about is the aft corners of the frame and whether they protrude outside the perimeter of the fuselage. I'll try to get rear-view pictures next time.
I'm not planning to bend anything until I know exactly what needs to change. |
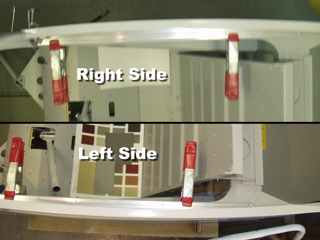
Side Views
 |
| |
|
Front Views
 |
Top Views
 |
| |
|
2/14/05 - Valentine's Day - 0 hours
I didn't work on the plane today, but I did do a little reading, and I did talk to Ken at Van's. There's an article in the RVAtor newsletter (2002, 5th issue) with some good information, some of which is reprinted in the instructions. I also read a bunch off the newsgroups. I think I have determined what needs to be done, but I am not quite ready to start bending.
The space that you see in the side views above, although probably correctable, is not a critical measurement. This space will be covered. More importantly is the vertical distance the slider frame is currently protruding above the rollbar. It's supposed to be about 3/8", but mine is currently about 3/4". I may need to adjust the tubes where the rollers are attached to get it to sit down nicely.
Also worth noting is the fact that the canopy will actually "spread" the canopy frame a bit because the plexiglass will try to open itself up after the windshield is cut away. For that reason the side rails need to be adjusted so they are 1/16" to 1/8" inside the perimeter of the side skins. Mine are close, but I'm sure once I start adjusting other things that these will need to be adjusted as well. Ken also recommended that I put the canopy out there and test fit it occasionally to see how it looks. He said it will probably take as much time as it took to get the fuselage "canoe" built. He encouraged me to take my time and not get frustrated.
So I will take it slow. Interestingly, there aren't many pictures on the web that I can find to show how this is done. Probably because it's hard to hold a camera while you're bending steel. :-) |
| |
|
2/15/05 - Bending - 2 hours
I spent two hours trying to get the forward bows to bend. I went ahead and cut about 3/16" from one of the tubes that connect to the rollers, because it was longer than the other one. Then I cut them both down another 1/8". This lowered the forward part of the frame, but not by enough. I will cut more after I have the bends done.
I tried bending the forward bow by placing the sides on two 2x4s and standing on the middle. No luck at all. I'm going to have to figure out some sort of mechanical advantage to get this thing to bend. |
| |
|
2/16/05 - More Bending - 2 hours
I can only do so much of this at one time. It makes me more than a bit nervous to be torquing on this frame so vigorously. I finally got the forward bows to be at least an acceptable distance from the rollbar. If you look at the before picture you can see that I have narrowed the gap on the left side pretty significantly. I did this by placing the frame on my workbench with the forward bows flat on the work surface. I then clamped one corner to the table and put wood blocks at the locations where I wanted to bend. Then I stood up on the bench and literally jumped up and down on the bow until it started to bend. I couldn't tell if it bent or not, so I had to stop and check occasionally by reinstalling the frame on the fuselage. I did this three or four times, becoming more and more animated with each recursion. |
 |
| |
|
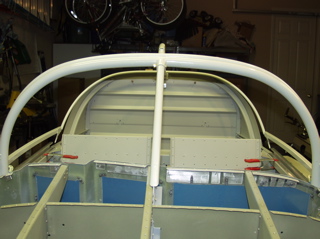
| You might also be able to tell from this front picture compared to the before picture that I have gotten the top of the frame to be lowered nicely relative to the rollbar. This was done mostly by trimming the bottom tubes that attach to the rollers. |
 |
| |
|
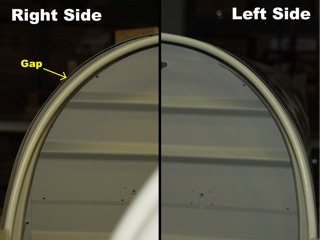
What's next? I have some problems with the aft bows. They don't match the curve along the bck of the fuselage, at least on the right side. So my next task will be to try to "flatten" the rear of the frame a bit to see if I can get the left bow to to "bulge" a bit and take up the gap that I have illustrated at the right.
Again, this is slow, tedius work that requires you to think geometrically. The good news is that I seem to be making progress. |
 |
| |
|
2/17/05 - Bending - 2 hours
I tried several ways to bend the side rails, and all I got were sore arms. I made a block of wood with a radius on it, but my c-clamps aren't big enough to get around both the wood and the frame, so tomorrow I will go to Home Depot to get some big c-clamps.
After wrestling with the frame for so long, I decided to see what the canopy looks like on the plane. I just set it on top temporarily. Looks good. |
 |
| |
|
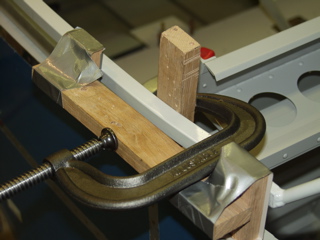
2/18/05 - Even More Bending - 3 hours
I still had some issues with the shape of the bottom frame, so I went to Home Depot and bought some big c-clamps. Using oak hardwood I made sort of a bridge, with two chunks of wood on either end of a longer piece. I would then apply clamp pressure to the center of the "bridge" to bend the frame in a particular area. This worked well, but you can't tell how much you've done unless you unclamp it and measure, so it takes time. |
 |
| |
|
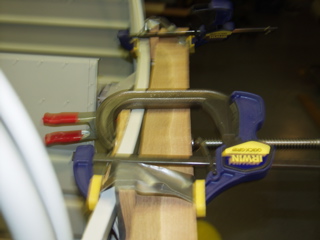
| Here's a fuzzy picture of a long piece of wood being used to affect a bigger area. The Quick Grip clamps are just there to hold the "bridge" in place. |
 |
| |
|
2/19/05 - Guide Rails - 3 hours
I finally went ahead and drilled the side rails. Everything is sliding well and appears to be within limits. The instructions say to drill these rails with #40 holes for now, so that's what I did. Of course with the clecoes holding the rails in place I am not able to slide the frame, but at least I have them in a fixed position. |
 |
| |
|
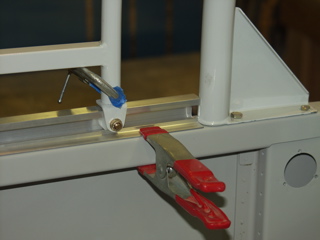
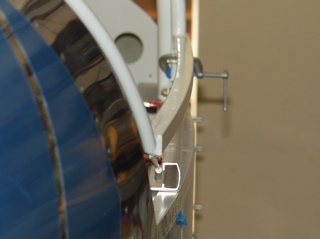
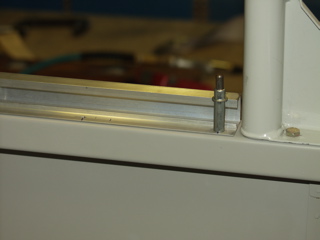
| Next I went ahead and drilled two of the holes to attach the track on the top of the fuselage. |
 |
| |
|
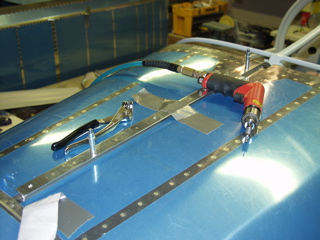
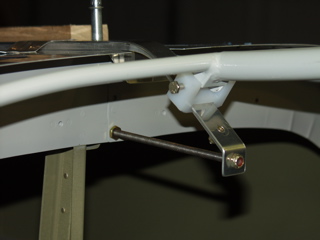
With the rails and guides clecoed in place I went ahead and drilled for the support rod. This is nothing more than a length of threaded rod that goes between the top of the bulkhead to the tip of the track that would otherwise be unsupported. The only trick is figuring out a way to hold the rod while you tighten the bolt.
My friend Todd stopped by mid-morning to check out the progress and to ask questions about RV building, so I didn't get any more work done on the plane. |
 |
| |
|
| Next: Electrical Part One |
|
| |
|
