| |
|
Previous: First 10 Hours |
|
| |
|
02/21/2006 - Gear Fairing Work
This past week I've been working on the gear fairings gucci outlet. I put this work off until after I flew the plane, but now I'm wishing that I had just done the fairings when the plane was sitting in my garage. Now I just want to fly and I'm having to spend my time underneath the plane messing with fiberglass.
The best thing is that this work should result in a speed boost of 15mph. |
 |
| |
|
I started with the main gear. The fairings are in the finishing kit and I have avoided them until now. The fiberglass fits around the gear leg and is joined at the back by piano hinge.
The plans have a template that you're supposed to use to cut the fairing for your aircraft. I didn't want to cut up the plans gucci outlet, so I traced the template onto some brown paper and used that as the template. I traced the template onto the fairing and then cut them to length using the die grinder. |
 |
| |
|
Once you've got them installed on your plane, you can make small adjustments to the length so they fit around the brake lines, etc. |
 |
| |
|
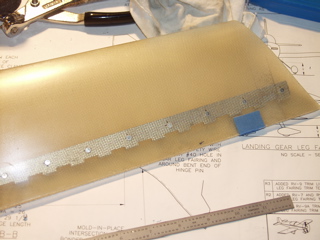
Here's the top of the fairing as I position one of the hinge halves for drilling. The instructions say to leave the hinges 2" gucci outlet; long so you can use the extra to aid in clamping. I used the extra inch at each end to attach a cleco edge clamp.
Be sure that you have the hinge far enough forward so that the fairing closes. Too far aft and it will leave a gap at the trailing edge. |
 |
| |
|
The instructions say to drill both sides with the fairing on the plane. I decided that I was tired of being hunched up under the plane gucci outlet, so once I had the first half of the hinge drilled I moved to the workbench and installed the other half with the hinge pin. I made sure the trailing edge was aligned and then I drilled the other half of the hinge. |
 |
| |
|
After drilling, deburring, and countersinking, I removed the extra 2" of hinge and installed the hinge with rivets.
|
 |
| |
|
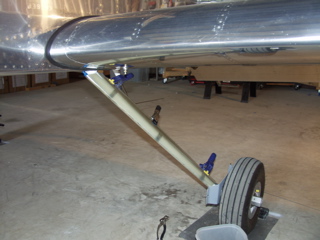
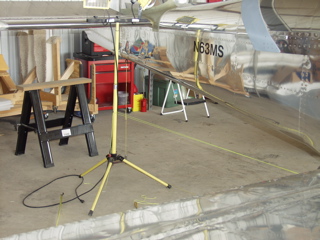
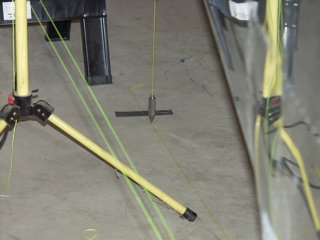
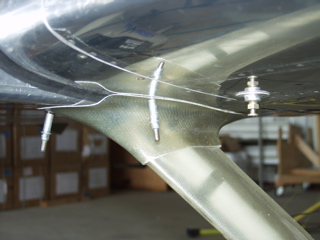
Next comes an interesting step. The fairing has to be aligned with the direction of flight so it doesn't negatively affect the flight characteristics of the plane. To do this I had to level the plane and drop plumb bobs from the front and rear along the aircraft centerline and then measure from the centerline to the gear leg. Then I set up a post at the back of the plane at the equal distance from the centerline. Then I pulled a piece of string around the fairing and attached it to the post at the same height. The fairing was then adjusted so the trailing edge was between the two strings. |
 |
| |
|
 |
 |
| |
|
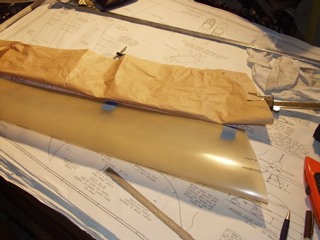
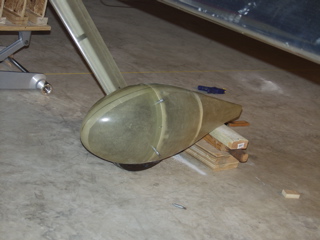
To speed up this process I had ordered some fairings from Bob at Fairings Etc. This turned out to be a good idea because this week it's about 30 degrees in the hangar. Epoxy doesn't like to cure in cold temperatures.
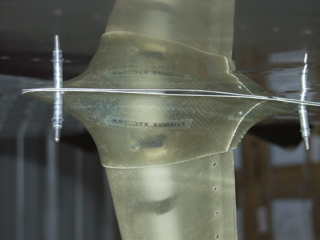
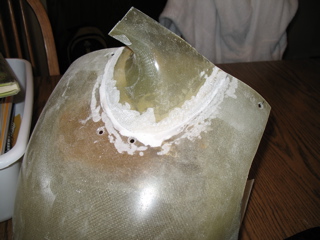
Here you can see the root fairing after the initial fit. I have some trimming to do, but this is a whole lot easier than doing a layup.
One thing I realized is that I'm going to need some platenuts installed inside of the plane to hold the fairing in place. |
 |
| |
|
You can see that there's a little bit of trimming and stuff that I need to do.
Now let me talk about lifting the airplane. The instructions say that the plane needs to be "off the gear" to properly install the wheel fairings. At first I thought about just installing them without lifting, but then the fairings may be out of alignment while in flight.
Well, how do you lift a 1000 pound airplane? The topic was discussed at some length on the Yahoo forum, and the consensus was that it's not a good idea to lift the plane from the engine loop. |
 |
| |
|
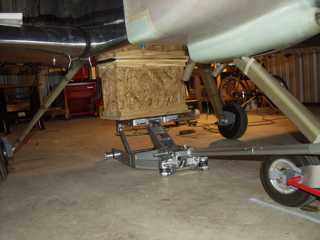
So I went to Harbor Freight and bought an aluminum motorcycle lift. It's rated for up to 1500 pounds, which should be good enough to lift the plane. I figured the best place to lift was directly under the wing spar at the center of the fuselage.
The lift only goes up 18", so I had to make up the difference between the lift and the bottom of the plane. I did this by building a "truss" using some scraps from a construction site. I found a 12" floor truss that I cut into three pieces and mounted to a couple pieces of plywood. |
 |
| |
|
After putting some rubber padding on the truss I moved the lift into place and in no time I had the airplane in "flying attitude" with the gear just touching the floor. This will also come in handy when I need to change the tires.
This, in my opinion, is the safest and easiest way to lift a plane. I don't have to remove the cowl and there's virtually no chance the plane could fall off of the jack. |
 |
| |
|
With the plane jacked up I retrieved the wheel fairings. The first thing I did was to clean up the joint between the front and rear halves of the fairings. This took some filing and sanding until the joint was relatively small all the way around the fairing.
After that, I drilled and clecoed at the locations where platenuts will eventually be installed. |
 |
| |
|
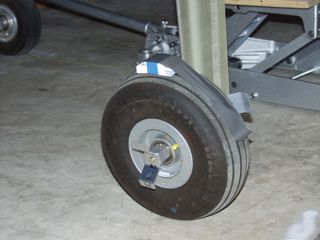
To set the height of the fairings, the instructions say to use a 1" spacer taped to the wheel. I made mine out of business cards taped together.
I test fit the fairing and located the position of the cutout that is required to clear the gear leg. I removed material a little at a time until the fairing would slide on without too much trouble. I also quickly realized that I needed to enlarge the opening for the tire, so I spent a while enlarging the hole just a little at a time. |
 |
| |
|
Here is the test-fit as I am able to cleco the halves together, but before I had drilled to the brackets. Notice the pile of lumber at the back side of the fairing. This helps to set the correct angle of the fairing relative to the plane.
|
 |
| |
|
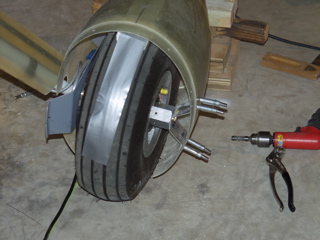
Here you can see that I have removed the forward part of the wheel pant and have match-drilled to the outboard bracket.
I pulled some parallel lines of string back behind the gear legs for reference, and after checking the position a dozen times I finally drilled the holes into the remaining brackets. |
 |
| |
|
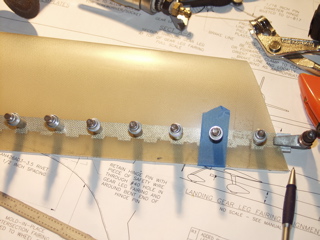
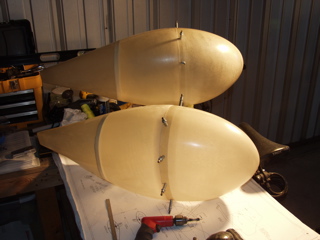
Afterwards I brought the wheel pants home for some fiberglass work. I added extra plies of fiberglass cloth to the locations where the brackets attach to the pants.
Because of the cold weather I am doing all of the fiberglass layups at the kitchen table.
The next day I returned and installed platenuts everywhere. Below you can see the installation with screws instead of clecoes. |
 |
| |
|
 |
 |
| |
|
Next came the lower intersection fairings. These were also from Fairings Etc. and they were pretty close to perfect. After a dozen or so adjustments I finally had the joint properly cut. and I was able to take the fairings home for more fiberglass work. |
| |
|
 |
 |
| |
|
2/25/06 - Finishing the Fairings
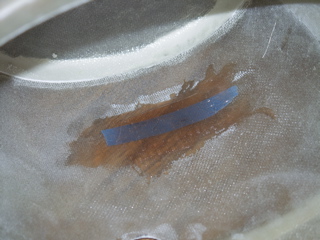
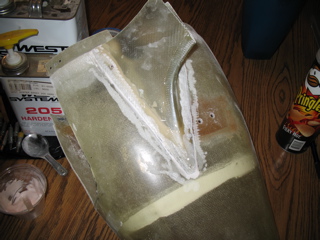
I brought these back to the heated kitchen so the epoxy would cure. Here are a series of pictures of the micro fillet around the edge of the fairing. |
 |
| |
|
 |
 |
| |
|
Returning to the hangar I installed the fairings for good. |
| |
|
 |
 |
| |
|
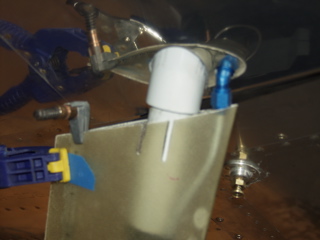
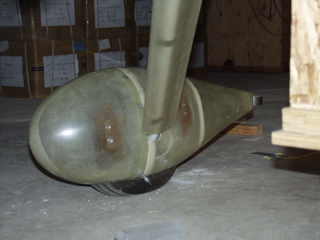
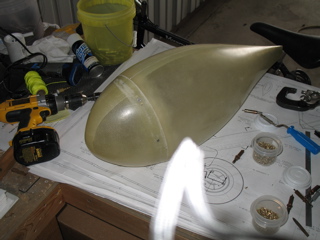
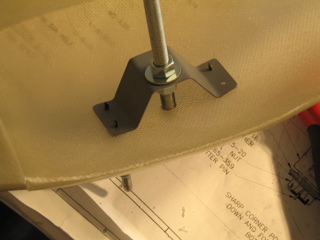
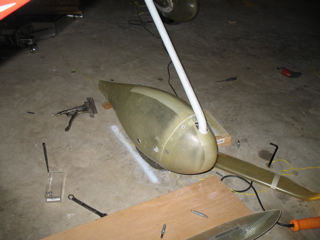
Next I moved on to the nosewheel fairing. This one is a bit easier as there isn't a root fairing to attach, but it still presented a few challenges. To start, I had to run to Home Depot and buy a piece of 3/8" threaded rod and some nuts and washers. The instructions have you use the rod as a temporary axle to help set the position of the brackets. |
 |
| |
|
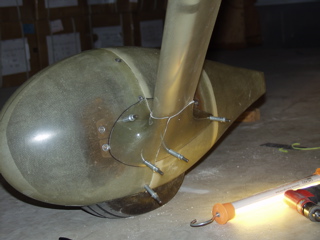
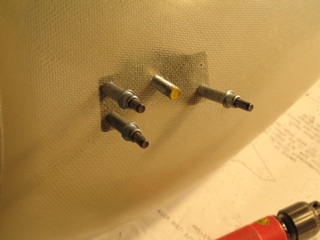
There are dimples on both sides of the fairing and they are drilled out to 3/8". The threaded rod is inserted into one of these holes and the bracket is mounted (temporarily) to the rod. This centers the bracket between the two holes. I installed the brackets this way, but later I had to come back and redo them because they didn't come close enough to the nosewheel fork. When assembled they would cause the fiberglass to distort. So check that the brackets are properly bent to provide the correct distance before you mount them. |
 |
| |
|
 |
 |
| |
|
 |
 |
| |
|
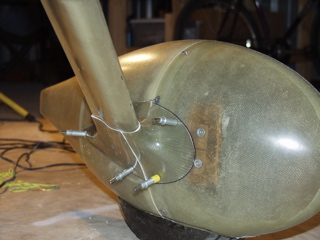
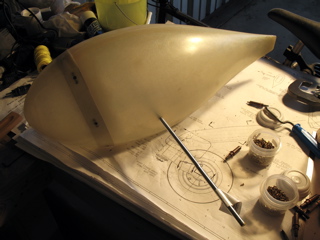
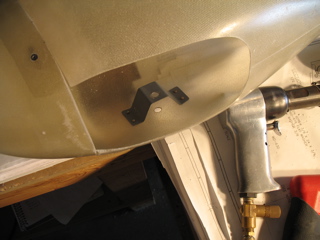
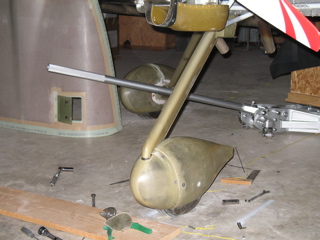
The second set of brackets are next. They get drilled in place when you have the fairing properly aligned. This required many test fits and cuts to make sure there was clearance for the tire and also for the rotation of the fork.
|
 |
| |
|
 |
 |
| |
|
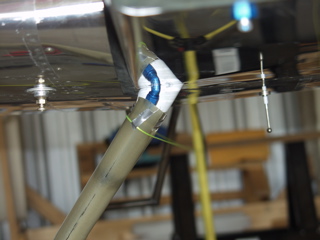
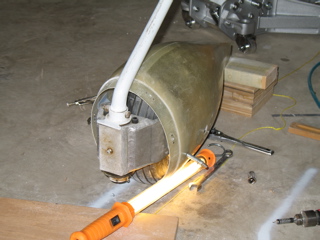
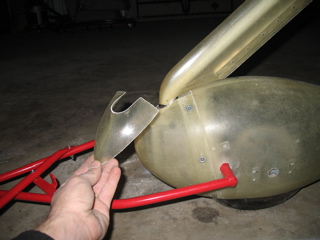
Finally I assembled the leg fairing. Again Vans says to drill the hinge material on the plane, but this time I decided to do it on the workbench where I had better control of the piece. This worked out fine. I just verified that it was "square" and wasn't warping, and everything went together nicely.
|
 |
| |
|
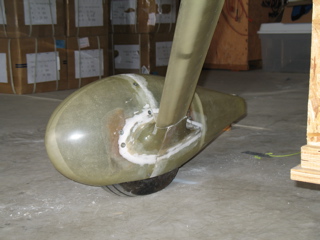
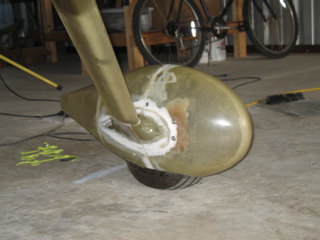
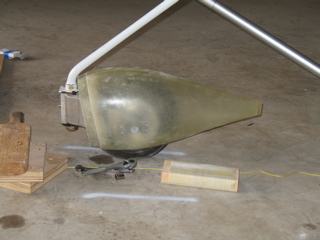
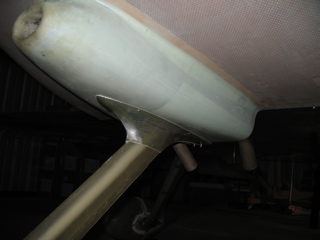
I highly recommend the fairings from Bob at Fairings, Etc. This one is the nosegear root fairing and it saved me a ton of time. The best part was that it covered the long slot that I had to make because of the three-blade prop. I was totally happy about this because I had been worrying about what I was going to use as a gap fill. Instead all I had to do was install a few platenuts and I was good to go. |
 |
| |
|
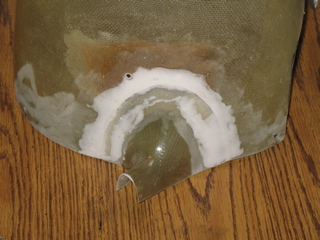
One piece I haven't installed is the little fairing that I got for the front of the nosegear. It looks like I would have to trim most of it away to allow proper clearance, so I don't think I'll install it.
|
 |
| |
|
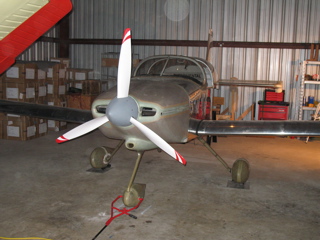
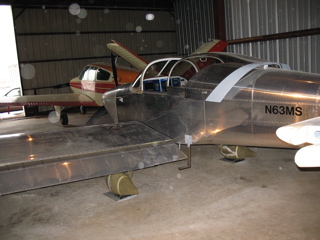
Wow, so now I've finally finished everything in the instructions from Vans. I closed the book, so to speak, and stuck it on the shelf along with the rolled up plans. I have several little things to work on, but I can now officially say that I've finished the plane.
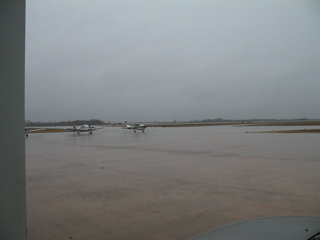
The only thing that killed my enthusiasm was the weather. It was raining all day long and there was no way to test the plane. So I did a few other tasks. I replaced the #2 EGT sensor that has been giving me trouble. We'll see if this solves the problem. |
 |
| |
|
 |
 |
| |
|
| |
|
